(by William Mead, Lecturer - University of California @Davis)


With the general introduction of JavaScript in the first course, this course will focus on JavaScript libraries, specifically jQuery. The scripts will be geared toward Document Object Model (DOM) manipulation. Learners will describe the top JavaScript libraries and differentiate which would work best to implement and accelerate development of web page animation.
Course objectives include being introduced to the end product of the course – a landing page style website using jQuery elements to manipulate HTML documents and enhance user experience. Diving deeper into the landing page that will be created and break it out into individual jQuery projects. jQuery events and effects will be covered while exploring more jQuery's relationship with HTML documents. Finally, a focus on plugins and continue to breakdown jQuery's ability to manipulate HTML and CSS.
In this first 1 week module (1), you will be introduced to jQuery and basic jQuery syntax and we will compare it to JavaScript syntax. You will be able to plug-in the jQuery library and discuss the history of jQuery and its relationship to JavaScript. You'll also use some of the selectors and filters available in jQuery to access DOM elements. You will be able to create an interactive element that could be used on a website and be able to identify and fix coding and logic problems while working on a project. You will be able to demonstrate proficiency with both JavaScript and jQuery for accessing and manipulating elements on a web page.
19 lessons, 4 pdfs, 3 zips
1.01 Introduction to jQuery
1.02 jQuery Libraries
1.03 Plugging Into jQuery Libraries
1.04 Basic jQuery Syntax
1.05 Using jQuery to Access Elements
1.06 jQuery Events
1.07 Introduction to Folding Sidebar Menus Using JS
1.08 Challenge 1 Solution
1.09 Challenge 2 Solution
1.10 Challenge 3 Solution
1.11 Challenge 4 Solution
1.12 Challenge 5 Solution
1.13 Challenge 6 Solution
1.14 Challenge 7 Solution
1.15 Challenge 8 Solution
1.16 Introduction to jQuery Sidebar Folding Navigation
1.17 Getting the Next UL
1.18 The Whole Script
1.19 JavaScript and jQuery Challenges Intro
In this module (2), you will be introduced to the jQuery effects library, helper functions, animations and callback functions. You will be able to use features in jQuery to animate elements on a web page. You will be able to use the callback functions to trigger a function when an animation is completed. You will be able to create a tabbed interface in both JavaScript and jQuery.
20 lessons, 7 readings
2.01 Introduction to the jQuery Effects Library
2.02 Example 1 Continued
2.03 Example 2
2.04 Example 2: Plugin Architecture
2.05 Example 3: Fading Buttons
2.06 Example 3: Fade To
2.07 Example 4: Custom Animations - Part 1
2.08 Example 4: Custom Animations - Part 2
2.09 Doing All Animations at Once
2.10 Introduction to Tabbed Interface Using jQuery
2.11 Styling the Anchor Tags
2.12 Tab Styling and Colors
2.13 Clicking and Fading Tabs
2.14 Whole Script
2.15 Getting the CSS Ready
2.16 Making the Tabs Work
2.17 New Tab and Old Tab
2.18 Handling the Switch
2.19 Fixing a Bug
2.20 Cleaning Up the Code
In this module (3), you will be able to use the jQuery syntax and the built-in effects library to create image sliders that could be integrated into web pages. You will also be able to compare the jQuery syntax to the JavaScript syntax by building a similar image slider using only plain JavaScript syntax and using CSS to perform the animation.
17 lessons, 5 readings
3.01 Basic Slider
3.02 Making the Script General
3.03 Window Load Function
3.04 Click Handler for Next Button
3.05 Next Click Handler with If Statement
3.06 Challenge Solution
3.07 Strategy for Version 2
3.08 Cloning the Unordered List
3.09 Setting the Left Position
3.10 Adding a Callback Function
3.11 Previous Button Click Handler - Part 1
3.12 Previous Button Click Handler - Part 2
3.13 Slider Using JavaScript
3.14 CSS for Slides and Adding Variables
3.15 Adding More Variables
3.16 Event Handler for the Next Button
3.17 Solution for the Previous Button Challenge
In this module (4), you will be introduced to the use of timers and recursion in JavaScript and use these techniques to make interface elements that run on a timer. You practice using jQuery syntax and recursion to build a simple content rotator that could be used as an interface element on any web page.
12 lessons, 6 readings
4.01 Example Script #1 - Part 1
4.02 Example Script #1 - Part 2
4.03 Example Script #2
4.04 Example Script #3: Recursion
4.05 Converting a Slider
4.06 Putting Slides on a Timer Solution - Part 1
4.07 Putting Slides on a Timer Solution - Part 2
4.08 Project Set-up
4.09 Starting the Script
4.10 The If/Else Statement - Part 1
4.11 The If/Else Statement - Part 2
4.12 Course Summary
Welcome to this course!
We are delighted to be a part of your continuing education. This course will provide you with a variety of tools and learning opportunities, to include video lectures, readings, assessments, peer reviews, and an opportunity to contribute to the Coursera learning community in the discussion forums.
In each of the lesson sections, you'll find learning objectives, lecture videos, readings, activities, and an opportunity to test your knowledge in quiz format. In some of the module sections you'll also work on assignments and grade the work of your peers. A peer-review assignment, is one where you and your fellow learners have an opportunity to review and grade each other's work. We'll dive more into peer reviews later on in this course.
When navigating the course, you can find available course resources under each of the lecture videos in a section labeled “Downloads” – here you can download the lecture video, view transcripts, PDFs of the lecture slides, and find additional readings or files.
If you run into any issues during this course, learner support is available to all Coursera students. The link for Coursera's Learner support is included below. The Help Center/Learner Support includes topics such as account setup, payments, enrollment questions, and troubleshooting common problems.
If you find any content issues, be sure to let the course staff know by flagging the lecture, assignment, reading, or quiz and this will inform us of where these issues occur. Here is the link for more information on how to Flag an Issue - it is also listed below.
One of the great things about Coursera courses is that they are self-paced. The course dates are based on the average time it takes to complete a course. However, if you need additional time to complete a course you can reset your deadlines with no penalties. More information on resetting deadlines can be found here: Assignment Deadlines
Need additional help during your course session? Be sure to utilize the discussion forums and interact with your fellow peers. In this area, you can ask questions or search for similar issues that have already been posted in the forums. Learner support is also a great place to find answers, but specific course content questions can typically be found and answered in the discussion forums. This is also a great place to post your assignment if additional peer reviews are needed. Here is a link with more information on the discussion forums: Discussion Forums
Because of the self-paced nature of Coursera courses, this is an excellent opportunity to show your commitment to your work and the work of your peers through academic integrity. Be sure to read the Coursera guidelines and the Coursera Honor Code here: Coursera Honor Code
We look forward to having you in this course. Happy learning!
UC Davis Coursera Team
In this module, you will be introduced to jQuery and basic jQuery syntax and we will compare it to JavaScript syntax. You will be able to plug-in the jQuery library and discuss the history of jQuery and its relationship to JavaScript. You'll also use some of the selectors and filters available in jQuery to access DOM elements. You will be able to create an interactive element that could be used on a website and be able to identify and fix coding and logic problems while working on a project. You will be able to demonstrate proficiency with both JavaScript and jQuery for accessing and manipulating elements on a web page.

Introduction to jQuery, a little bit of history.
JQuery was originally created by John Resig in 2006, and it became the most popular JavaScript library and it's still a popular JavaScript library. In a recent survey, it was found that over 80 percent of websites are still using jQuery. It's less popular today than it was back in the early 2010s where it was at its height. But it's still an important tool to learn and good to know.

There are some specific advantages that came with jQuery when it was invented and some of these advantages exist today, but they are somewhat diminished, but let's talk about them. First of all, it smoothed out the differences between browsers. Back in 2006, when jQuery was invented, JavaScript was not implemented evenly across browsers and jQuery was really great at smoothing out those differences from one browser to another. It also simplified common tasks such as traversing the DOM. It provided a lot of ways of getting elements on the pages that we didn't have with plain JavaScript back in the late 2000s, or early 2010s.
It also provided an easier to work with event model for capturing clicks and scrolls and other kinds of events that users might use in the process of working with the page. Events that users make trigger. So it provided this event model that was easier to access and easier to use, it was easier to create interactive scripts that could hook into that event model in jQuery.
jQuery also provides an effects library that's very easy to use and really exciting and it's really a cool effects library that provided a great way into programming, into creating interactive elements for a whole generation of developers.
Then on top of that, there's a plug-in system for additional functionality. You could create plugins that added functionality to jQuery and we'll take a look at this to some extent.
Then finally, last but not least, jQuery provides a simpler syntax and that allows us to write shorter and more concise scripts and these were all huge advantages to jQuery and contributed to making it the most popular JavaScript library.

Today, jQuery is less useful than it used to be back in the early days. Some of the things that have been smoothed over is that, remember, in 2009, jQuery came out in 2006. In 2009, the standardizing body decided to make JavaScript, the scripting language for the web and at that point, a lot of excitement poured into the JavaScript world and there was a concerted effort from the people who were making browsers. Web browsers like Chrome and Firefox and Safari and Internet Explorer at the time, It's now Edge. But for those companies that were making those, whether it's Apple or Microsoft or whomever, to standardize their implementations of JavaScript, that really helped with the development of JavaScript plus the release of ES6 or ES 2015 in 2015 really helped with a lot of the features of plain vanilla JavaScript so that we don't need as much from jQuery as we once did.
We don't need to smooth out the differences between different browsers as much anymore. The implementations in different browsers are pretty much the same now are very similar, we don't need a lot of that anymore. In terms of simplifying common tasks such as traversing the DOM, we've already explored querySelector and querySelectorAll, which are great tools for accessing elements in your DOM that are built into plain JavaScript now. Those have really helped minimize the need for jQuery to do that kind of thing.
Also in plain JavaScript, we now have the addEventListener method, which is great for adding event listeners for all different types of events that users might trigger or might be triggered by the system. Using that event listener model limits the need for the easier to work with event model that jQuery had to offer. The effects library is interesting. The jQuery effects library is great, and it's really great to work with and it's fun to work with, and it's still useful from time to time.
But these days we would much prefer to use CSS to create animation because CSS will take advantage of the devices GPU, the graphics processing unit, as opposed to the CPU, the central processing unit, and that will make your animation smoother and work better, especially for older, slower devices, and these kinds of things. Phones, older phones, this kind of stuff that the jQuery animations will feel a little bit clunky because jQuery is using JavaScript to create those animations. The effects library is not as useful today as it once was, although it can still be useful.
The two things that are still really useful about jQuery are the plugin system for additional functionality. There are thousands of plugins written for jQuery and we'll look at a few of them. But you can explore many on your own and the wonderful thing about plugins is that, other people have written a whole bunch of code and you can take advantage of that and build all kinds of cool things from the code that others have written. That also helps prepare you for other types of libraries of code, if you get into node and NPM and these kinds of things. Doing this stuff with jQuery will help prepare you for that world.
The simpler syntax for shorter, more concise scripts is also still true. It's perhaps less true than it once was, but it's still true. You'll see, we'll do some exercises and some examples where you'll see that the scripts are shorter and more concise and if you're just learning programming for the first time, that can be a way into programming. It was a way into programming for a lot of people who got into JavaScript and jQuery back in the day. It certainly was for me personally, where I wanted to do something that was fun and interactive and I could write fewer lines of code with jQuery than with JavaScript, so that was a real bonus for me as I was learning JavaScript back in the day.
There are a lot of modern considerations to take into account when deciding whether or not to use jQuery. Adding JQuery to your project, add some weight to the files, and they'll take longer to load. If you're just doing one simple small thing, it's probably just not worth it to load jQuery to do that. However, if you want to get a simple interaction working quickly and easily, or if you want to make use of a jQuery plugin, using jQuery could save you a lot of time and really be worthwhile. You have to really consider it on a project-by-project basis.

What is a library anyway?

In programming, a library is just a file with a bunch of functions in it. Or it could be multiple files that you link up to your project. In this case, you link them into your HTML file and then you can just use those functions. If you're not familiar with a lot of programming and you haven't done a lot of this kind of thing, it may seem like an unusual or a new concept for you, but just think of it as something as simple as that. It's just a file with functions in it that you can access and use in your project. And then once you've linked it to your project, it's just a matter of finding out what those functions are and how to use them. And that's really how jQuery works. It's a file that you can add to your project, and when you do you have access to all the jQuery functions and all the functions that come along with jQuery.
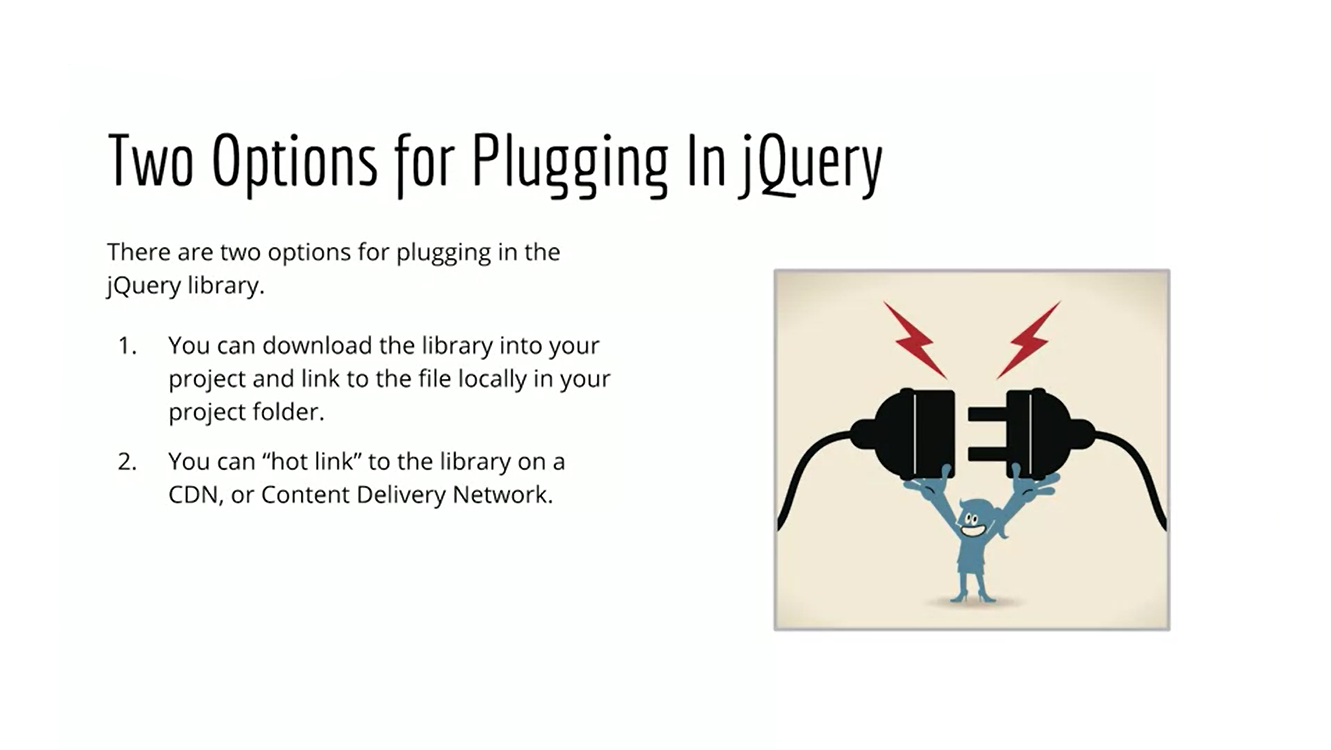
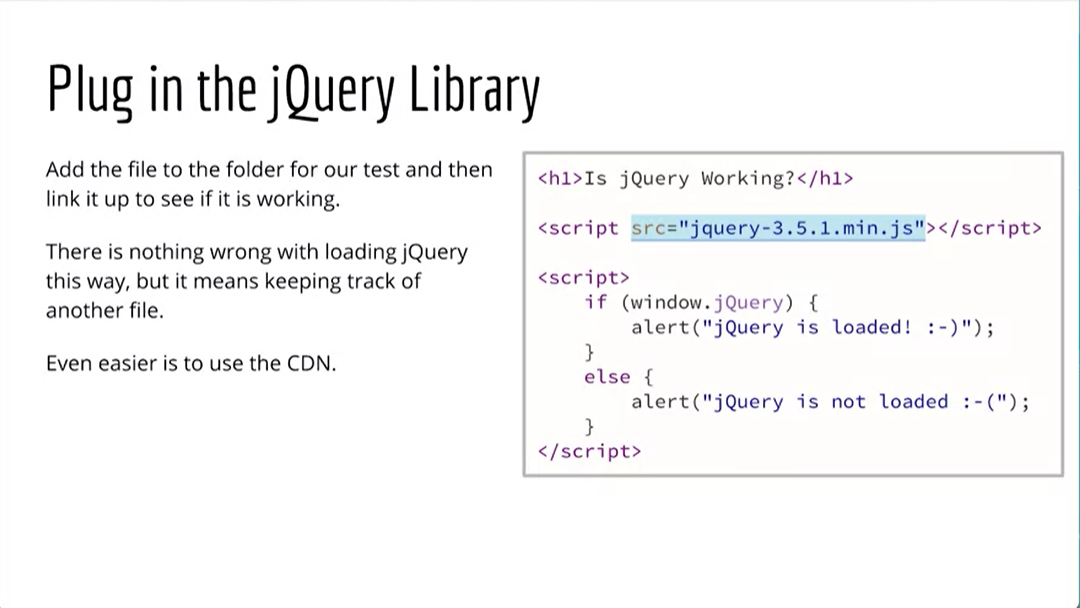
There are two options for plugging in jQuery. The first is you can download the file, the actual jQuery library file, and put it in your folder with your other Javascript files or other files for your project, and then link to that file locally in your project folder. And then when you load your web page it will load that file along with all your other files.
Or, second, you can hot link to the library on a CDN or Content Delivery Network. So what that means is instead of putting the file in your project folder, you're actually linking to the file already out on the Internet. And a CDN or Content Delivery Network means that when you do that, you'll actually be getting the file from the closest server to you. A CDN has servers all over the globe. And when you go to load a particular web page, it's looking at your IP address and figuring out where you are and then getting the file from the closest file server, so it will get it the fastest that it can.
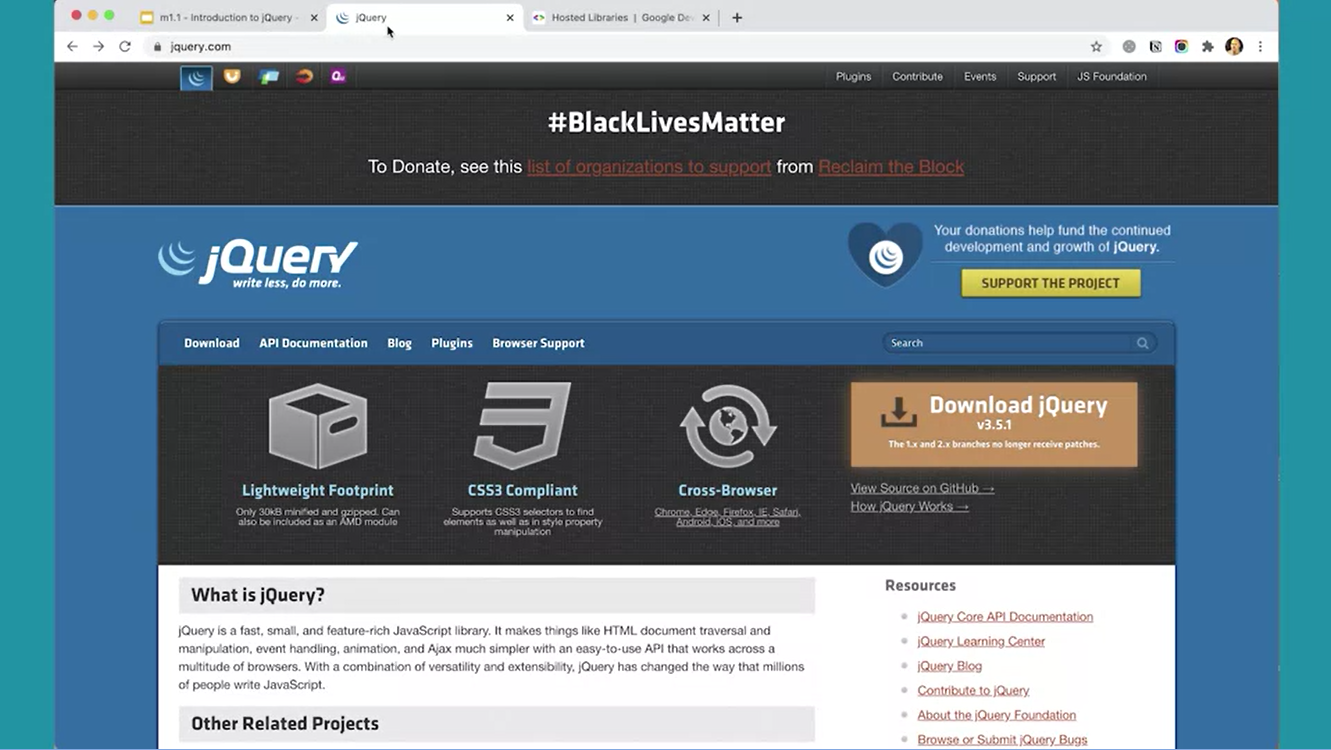
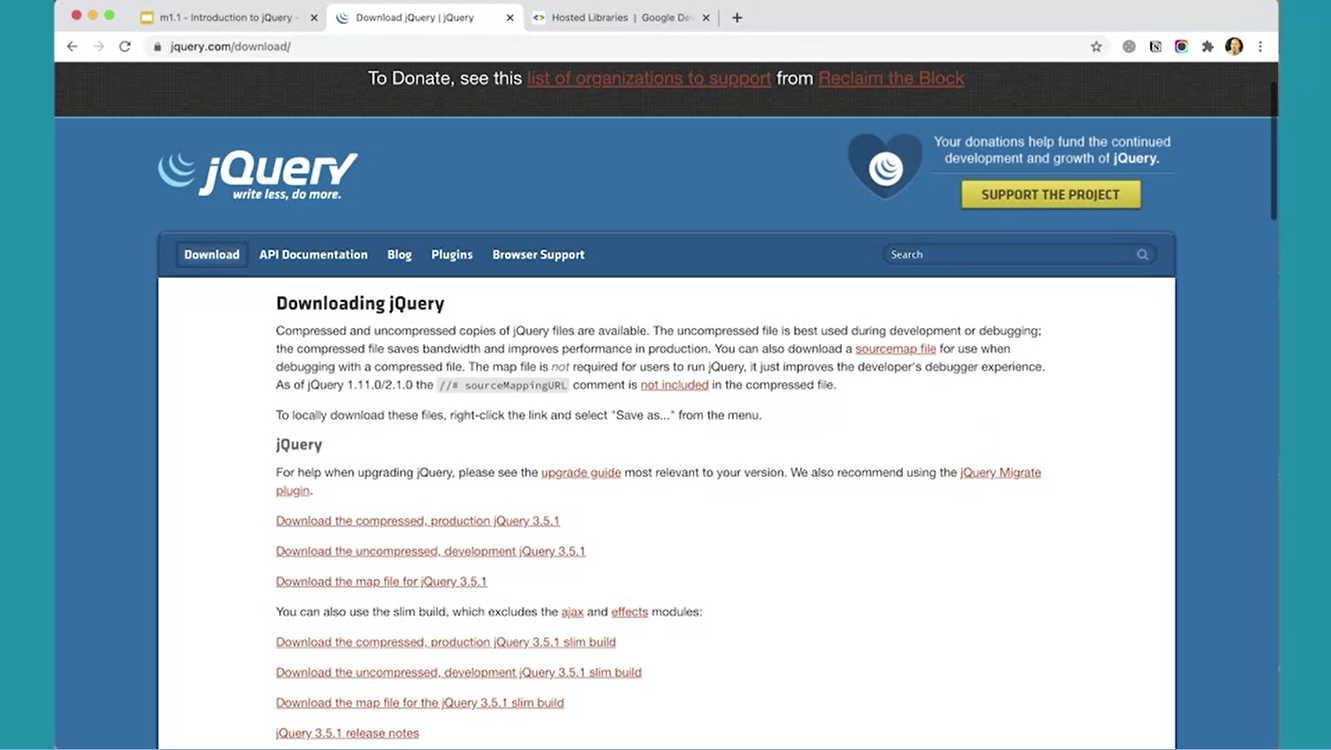
First, we'll look at downloading jQuery, and to do that, you can go to jquery.com, and I have that website pulled up here, and you can click the Download jQuery link. So let's go over here. And I can click on download jQuery here. And that will take me to a page that, if you're not used to doing this kind of stuff, will look a little confusing. because we've got a whole bunch of links here and it's not really clear exactly what it is you should actually be downloading. And then they've got this stuff with npm and Yarn and Bower, and this migrate plugin and all this other stuff on the page. So it can be a little bit confusing.
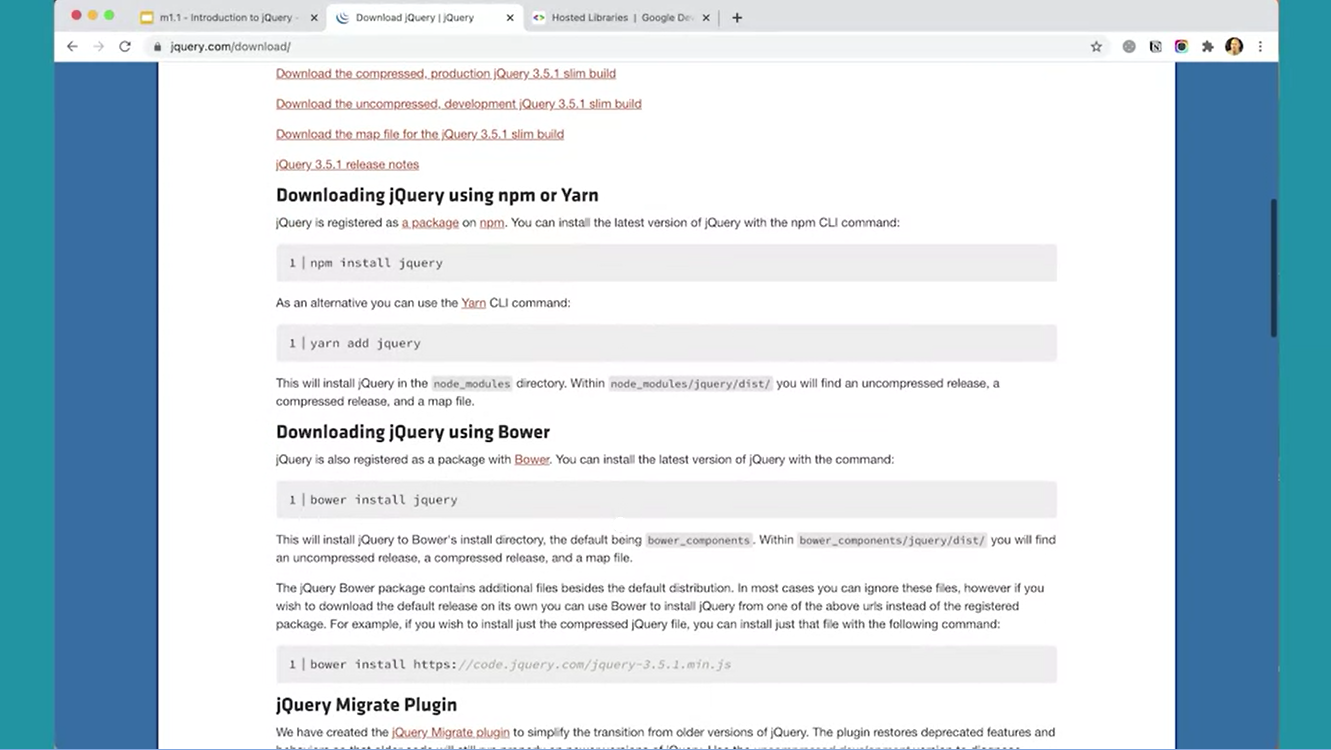
The npm, Yarn and Bower are all build tools that you might be using if you're in a particular environment that's using these build tools. But we're just going to download the actual library file itself. And what we want is the compressed version. There will be a compressed version and an uncompressed version.
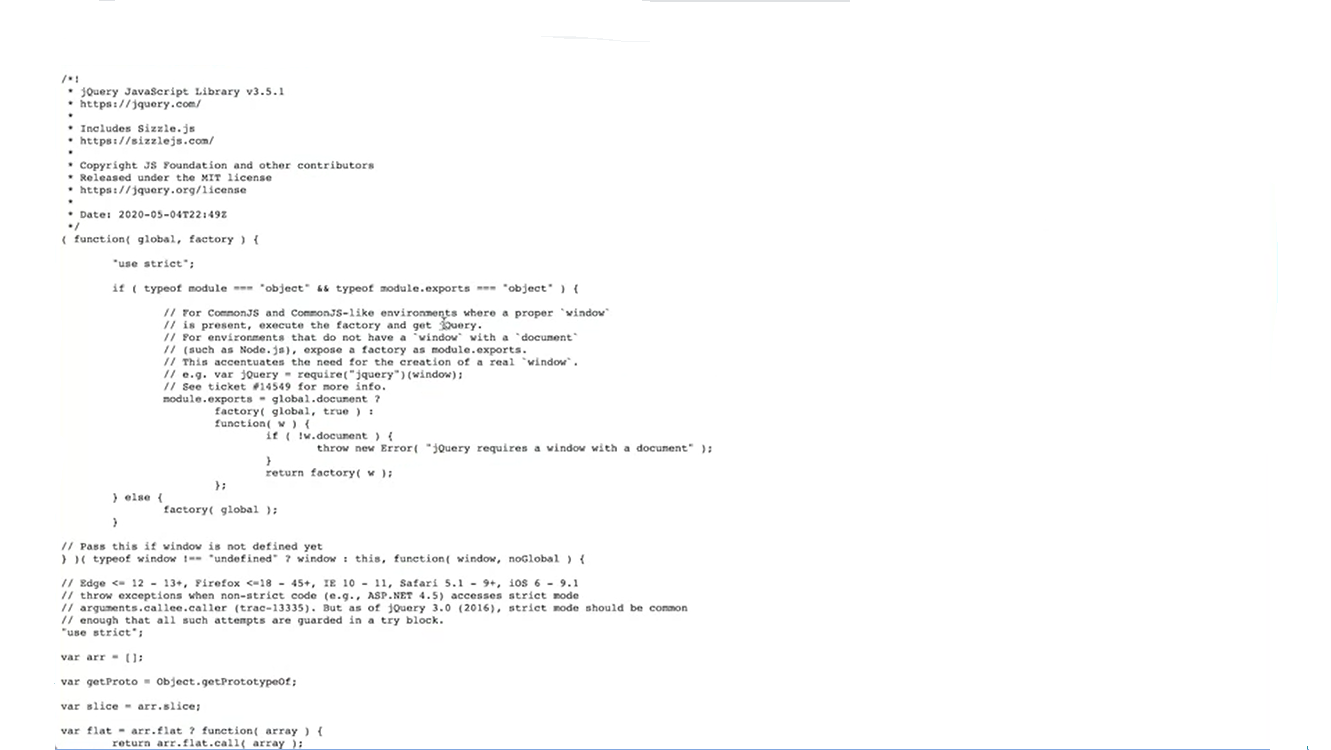
The uncompressed version will look like this, and it looks kind of like Javascript that you've seen before with var and all this kind of stuff. The compressed version is going to remove all of the white space and sort of compress it down. So it's not really made for human reading at all, it's made just to be loaded on your computer. But it will be smaller. It'll be a smaller file to download and so what you want is the compressed production version of jQuery.
So if you click the shortcut to the compressed version, you'll get a screen full of compressed code which appears as jQuery version 3.7.1. Okay, so to download this, if you just right click in the white area here and do Save As, and I'm going to save it in my Downloads into my jQuery Start folder, and that's where you should put it as well. So I'm going to just put it in here and save this so that now I have a copy of jQuery in my jQuery Start folder here.
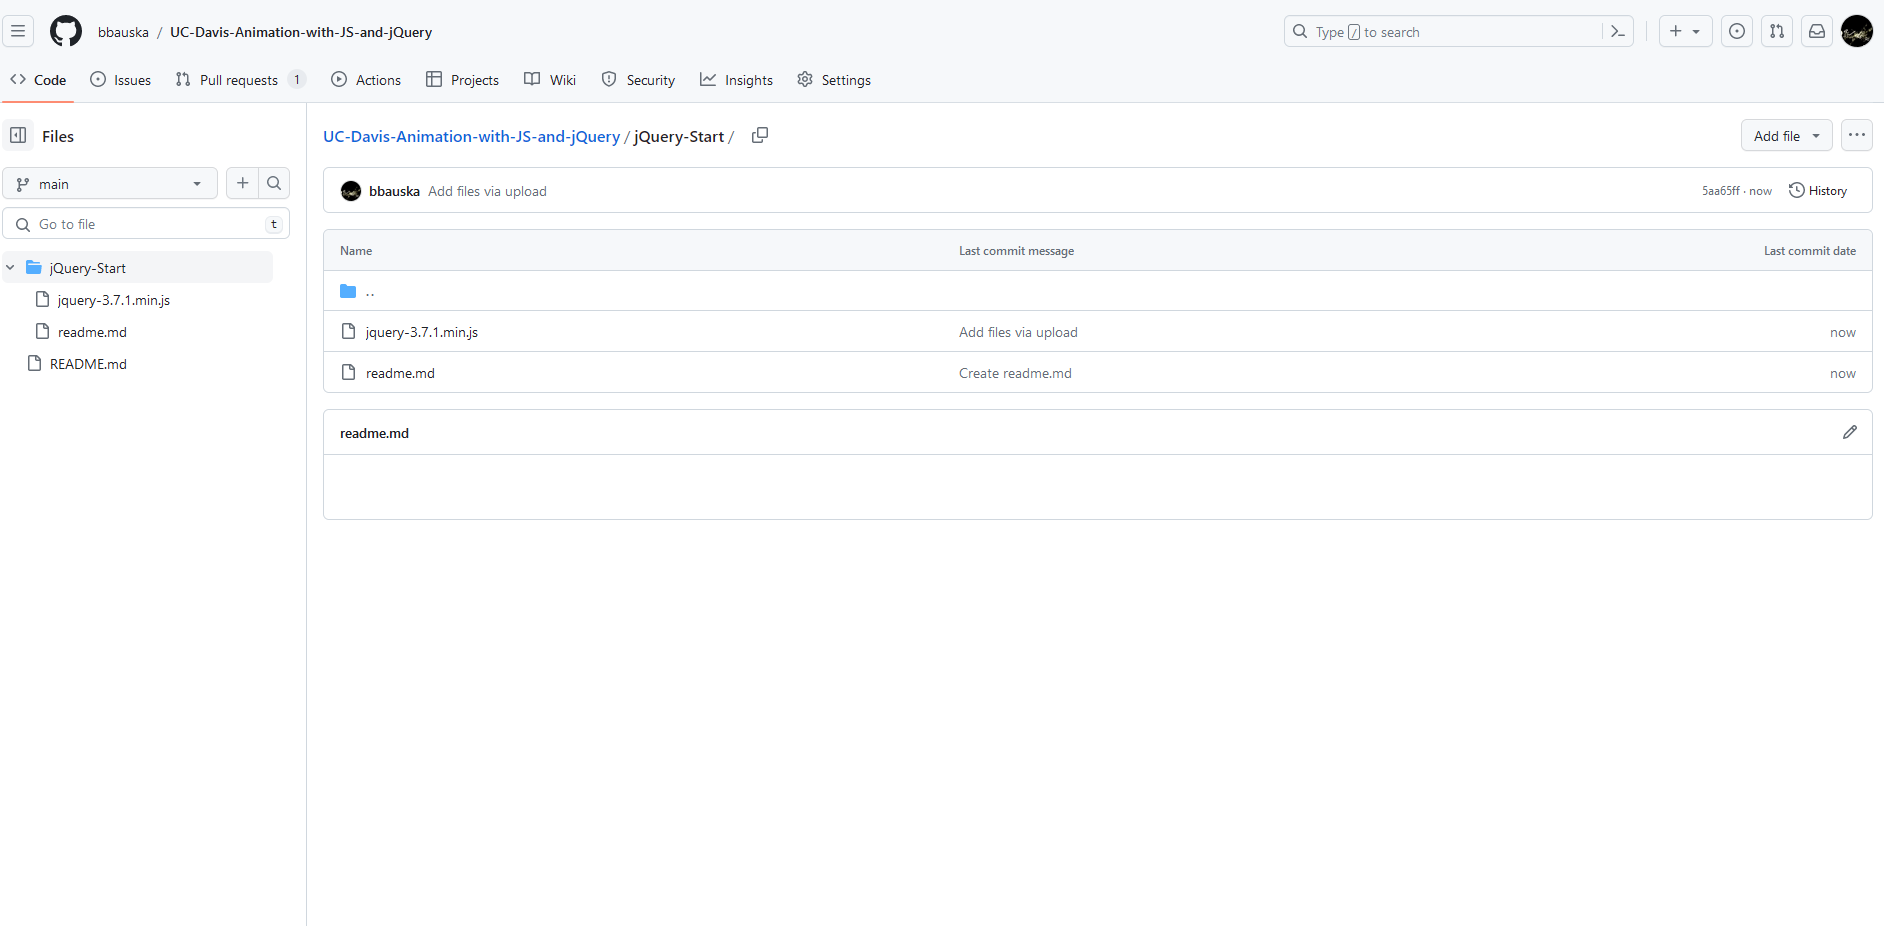
Here it is, jQuery 3.7.1 min because the minified version has been compressed down. And, you want to get the minified version. This version is the size of maybe a medium sized image on your web page (86 kilobytes). It's not that big. This is significantly larger (un-minified version of 279 kilobytes).
So now we've got jQuery, let's get it plugged into our HTML file. We'll plug it into our HTML file here.

Plugging in the jQuery library, now we've downloaded jQuery, all we need to do is add it to our file.
I want to add jQuery to my file here. I can come down here and I can add a script tag script, and what I'm going to put in here is src=“js/jquery-3.7.1.min.js” (last updated 8/28/2023). js is my subdirectory.
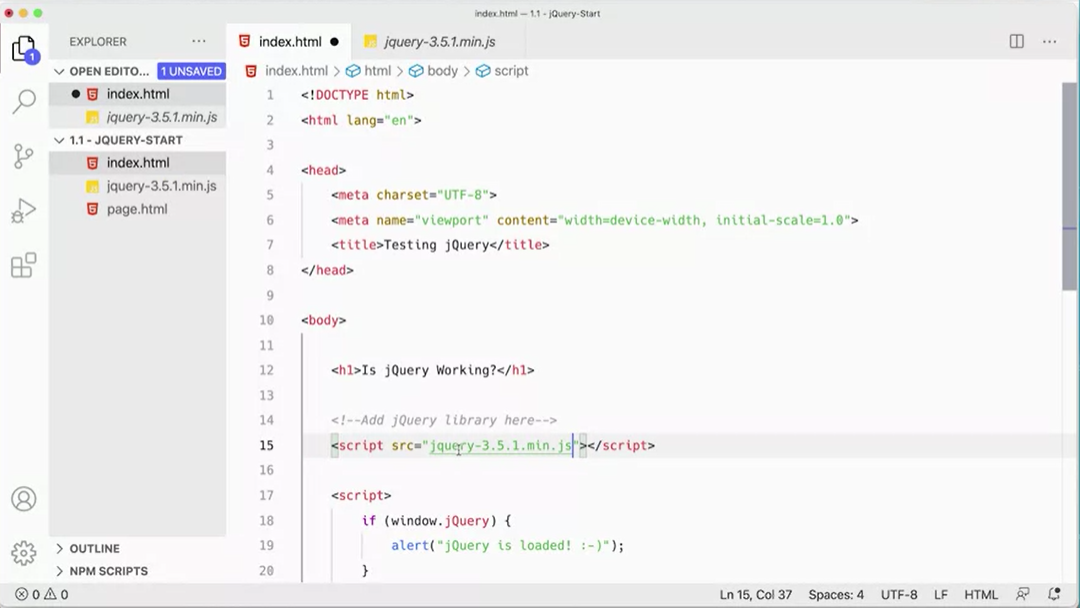
Now jQuery is plugged in.
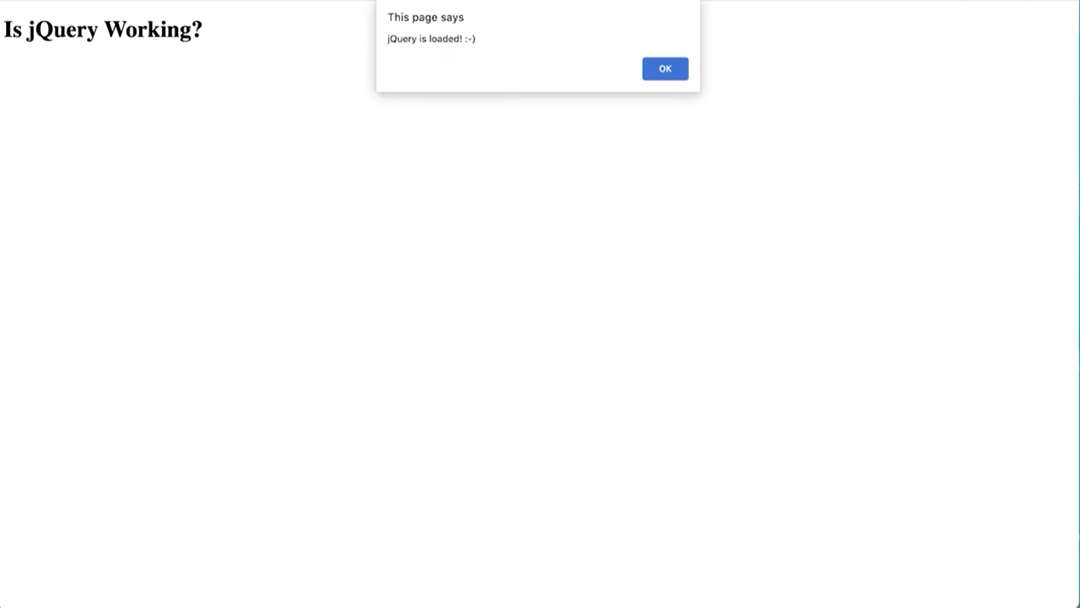
If I test this file over here, I come over here and open a new tab and do open and go into my jQuery Start folder and open this index file, it'll pop up and it'll say jQuery is loaded.
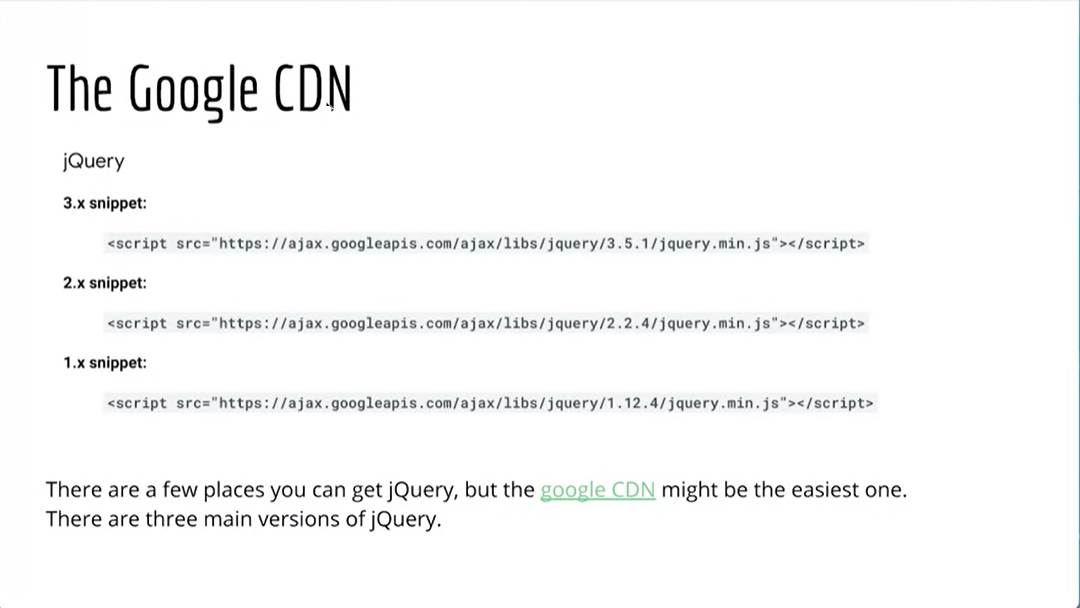
Even easier is to use a CDN to load jQuery, and the CDN I prefer to use is the Google CDN, and I have that pulled up over here, and if you want to get to the CDN, the easy way to get to it is just to Google. Google jQuery I type CDN there we go, and you'll see Hosted Libraries on Google. That's this link right here, and over here they've got a lot of libraries that you can access through Google that they host on their CDN, and one of them is jQuery.
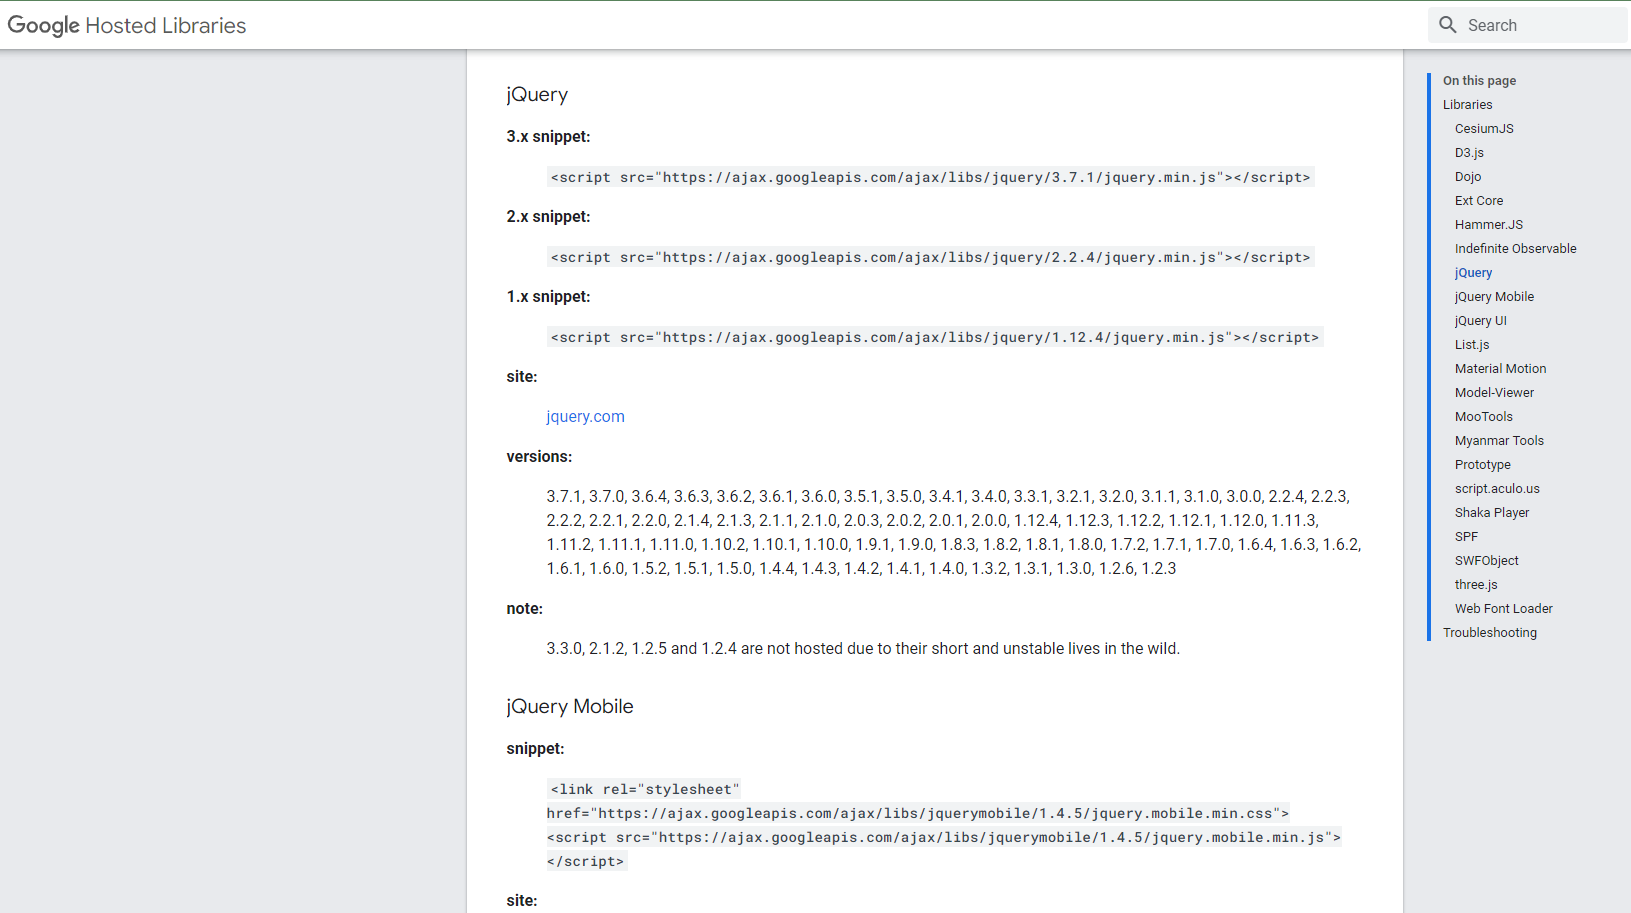
We can go to Google Hosted Libraries, to jQuery heading, and you can see that jQuery has three different versions, three flavors of jQuery that include different features. The version 1X snippet is the oldest version of jQuery and it's loading 1.12.4. This is really the 12th major version of version one, essentially, and then we've got version 2.2.4, which is the second major version, and that version they did a number of things to remove support for IE6, and finally, version 3.7.1 which is the current version of jQuery.
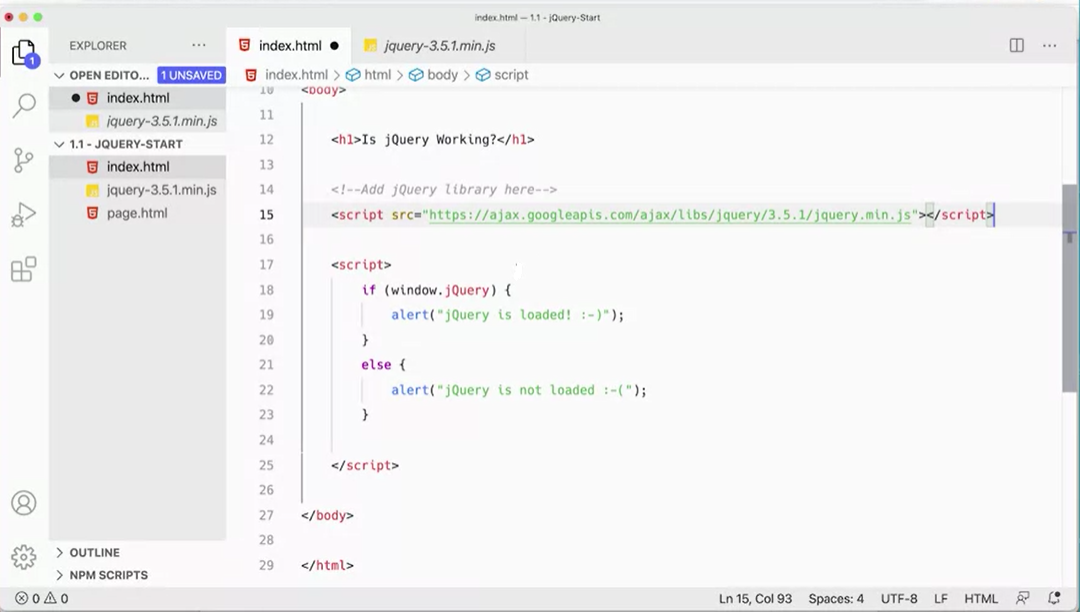
The most recent version, the version that we downloaded is version 3.7.1, so to get the same one that we had before, you can just copy the following command to the html index file.
<script src="
<script src=“https://ajax.googleapis.com/ajax/libs/jquery/3.7.1/jquery.min.js”></script>
Then go back to our file here, and paste that line in instead, and you'll see if we save this and come back and do testing jQuery, jQuery is loaded. Instead of loading from the file that I have locally here, I can now delete this file, and it will work just fine.

Now if I was gone, but this will work just fine because it's actually loading jQuery from the internet. Of course, if the internet's down, it's not going to load it, but if the internet's down, and you going to get to your webpage anyway.
It's a little bit easier to use the CDN to load jQuery because it's just one less file and I have to download, keep track of. Usually we will be using this method to load jQuery, and there are times when you might want the older versions generally will use the newest version, but you might want the older versions if you're using a function or method in jQuery that has been deprecated, or if you're using a plug-in that was built using an older version, and it needs some functionality from the older version in order to work. But generally we're going to use the newest version of jQuery, version 3.7.1 at the time of this recording.
Now that you have jQuery working, let's do something with it. Do something more than just to show that it's working.

We'll use the same file, we're just going to replace the script down there just so we can see that something is happening to our actual web page.

If we come back over here, we can get rid of this if-else statement. Just delete that for a moment and let's put in a jQuery statement. Try this instead. There we go, dollar sign, we're going to go get the h1 on the page, which is this element here, Is jQuery working? We're going to use the CSS method in jQuery, like that. What we're going to do is we're going to set the color of the h1 to red. If we just do this one line and then save it.

Then if you come over and run this test in jQuery again, you'll see that it turns the h1 red here. If I inspect this element here, you can see that what jQuery has done here is it's set the style color red on the h1. Now before we did the same thing with querySelector or querySelectorAll. We've done this kind of thing before in previous lessons, but now we're using jQuery to do it. In jQuery you can see we have just a simple syntax here that uses CSS-style selectors to access elements on the page. We've gotten methods that we have access to because the jQuery library is plugged in that we can just use. Now if you're wondering about the dollar sign here.
The dollar sign is just a shortcut for the word jQuery. I could put the word jQuery there, and over here this will run just exactly the same way. It will work fine with using the word jQuery instead of the dollar sign ($). But generally we use the dollar sign as a shortcut just because it keeps our script shorter, it's less typing, and why type all those extra characters if you can just type one? We can put the single dollar sign in there for that reason. This CSS method here is just one of the great many that jQuery has to offer that will help us factor web pages.

You can come back here, you can go and look at the jQuery API documentation here. You can see that there's just tons and tons of different methods that you have access to as we go through and look at all of these.

Here's the CSS one that we were just looking at, but there's tons of them in here. jQuery gives you access to all of these different methods. It's like having a kit that you can use to build things for your web pages just by plugging them in and plugging in jQuery and then using these methods, in accordance to the way they're described in the documentation. Let's try something else here. If we come back here and try, let's try adding a few paragraphs.

Let's just add a few paragraphs. One of the nice things about jQuery is it allows you to work with collections of things. If I come in here and just add a couple of paragraphs to the page. I'm just going to copy that and paste it and add a few more here. Now I've got three paragraphs on the page.

Down here, if I change this to p, if we were doing this with plain JavaScripts, we would need some loop because we would do querySelectorAll or getElementsByTagName or some method like that, which would give us an array of items that we would then have to loop through to turn them all red. We've done that before. You've done that in some of our previous lessons. Here with jQuery, one of the things that makes jQuery shorter and more concise is it'll work with groups of elements.

I can just grab the paragraphs and say CSS color red. You'll see over here when I run this page, it's loading these paragraphs and it's turning them all red without having to do a loop. That saves me a few extra lines of programming. This is the thing that makes jQuery easier to get into for people who are new to programming. This whole thing of having to, I take this array. Now I've got an array and I'm going to loop through it. It's a little bit of a pain. jQuery takes some of that pain away, and that's really a nice feature of jQuery.

jQuery selecting elements.

Download and open the page.html file and your code editor that goes along with this particular lesson and there you'll see some markup and we can use the jQuery language to select different elements on the page.


If we go look to this page here, you'll see that it just has some content in it with some different markup with the header in each one in each to summon ordered lists. It's got some ideas and some classes and some links and some other content that we can access.
And one of the beautiful things about jQuery is that you can access any element on the page, usually in many different ways. It's the very powerful part of jQuery and you can think of it as the query part of jQuery, you're finding elements on the page that you can do things to them or with them or for them. We will be using jQuery to go in and access elements on this page and we'll practice, what some of these different methods are and some of the different things we have available to us.

For example, if we were to try to do this, we could go back to our file, we're going to have to add the, at the library again so we need the script here.

If we come back over to our file, you'll notice the bottom, we don't have any script tags. So down here after this closing div we need to add the jQuery library, so we can use jQuery and then we need to use then we need a script tag, which we can open and close.

And now if we wanted to do something like put a border around this main element here, we can very easily just use jQuery object. And type it this way it'll get, there is still some syntax that you have to get used to with jQuery, so I recommend typing it this way, so you can kind of get used to it. If you do pound main and then CSS the CSS method that we've already talked about and we're just going to do a border here. Border 2px solid red.

If we do that and save this document here, and then come over to our example page, so here's my page and if I refresh you'll see I get a border around the main area of the page. So that's working, so we can access this element, we can access all kinds of elements with jQuery.

If I wanted to get the elements on the page that have the class special, if we go back to our code here, we should see that we've got a class special in these two list items. We've got a class special up here on this list item, so these items should be targeted if we change this to not special. And one of the things that's nice about jQuery is that if you just know CSS then how to get these selectors.


It's just using the same selectors you'd use in CSS, so I can come over here and try that again and you can see those elements are getting the border around them.

You can also use compound selector, so if I wanted to get specifically the age to inside of main we can do that as well so we can do main H two.


Now this may not seem so special now because we have query selector and playing javascript which allows us to use compound selectors like this using the CSS index. You can get to these elements, easily inside of our page and you notice I don't have to do any kind of looping. So even if I was using plain javascript, even now with query selector, all I would have to have some sort of loop or for each method or something like that, to go through and turn each one of these red. Whereas in jQuery I can very simply just grab the group and apply the CSS to it and applies it.

So this thing returns a jQuery object, with these elements inside it and then we can apply that CSS to it.

There are more that you can try, so for example you can try Multiple selectors, like I could say I want the H two and the paragraphs. I recommend trying these out I'm not going to make you watch me type them all. I could get the even list items, or the first paragraph or the list item that has an a northern list inside of it or a list item that contains the word three. So there's like all of these different ways of getting, content on your page. Now some things to pay attention to is that, jQuery does change over time and some of these that I have on this slide are deprecating now.
The best thing to do is, when you have a page and you have some elements, you need to get to be creative, use the documentation for jQuery to help you find the best way of getting to that element on the page.

Let's look at how we can capture some events in jQuery.

jQuery has its own special syntax for event handlers. So let's take a look at how to do that.

If we come back over to our test page here, you can just comment this, I already deleted just to get rid of it. But I'm going to target anchor tags on the page. So again, I'm going to type my jQuery object, and in there, I'm going to say a. That's going to go in and target all of these anchor tags on the page, all of those and all of these, and that's going to gather all those items and return them in this nice little jQuery object here. I'm going to add a click handler.click.
So this click handler is going to fire when you click on any one of those anchor tags, and what I'm going to pass in, make sure you type it this way, so you typing from the outside in. I'm going to add in here a function like so with parentheses and curly braces. So this is an anonymous function. This is a function that's just going to run when this click handler happens.
In here, I'm just going to put console.log, and in here, I'm going to put this.html. That should put in the console the HTML of the link that I clicked. Because it's going to put this in all of the links, I can only click one link at a time.

Let's see what this does. If I come back to my example page here and refresh it, and then turn on my inspector here, and turn on the console. If I click a link, this.html I'm getting link one, or if I click sub link one, I get sub link one, or if I click link two, I get link two, link four, I get link four.
The thing to keep in mind is that jQuery is just plain JavaScript. It isn't a separate thing from JavaScript, it isn't a separate language, it is just JavaScript and you can mix in regular JavaScript with jQuery.

In summary, you've learned a lot of new stuff. You can plug jQuery, like plugging the jQuery library either by downloading the library and putting it in with your files or you can use the CDN. You can use jQuery to capture events and to affect elements in the DOM, there's a lot more to learn, but this is a good introduction to what jQuery does. It's just more JavaScript, but it makes doing some things a little bit easier, and it's still important to learn actual native, regular, plain vanilla JavaScript, especially as the need for jQuery in new projects is reduced.
But if you get a job and you're working on a project, it's very likely that you'll be working with Legacy code and you'll encounter jQuery, or if you're looking around on the Internet, you're very likely to come up with solutions that are jQuery specific. Because it's been such a popular library, it's going to be around for a long time, and it's still important to learn how to work with it. Learning how to work with jQuery will help you learn how to work with JavaScript, so it's a two-way street.

Folding sidebar menus using JavaScript.

You've already learned a little bit of jQuery, but before we dive more into jQuery, we're going to do this project using plain JavaScript, and then we'll do the exact same project using jQuery. We're going to do this with a few different projects so you can see the difference between jQuery and JavaScript and how they work together, and some of the differences between the two.


In this project, we're going to have a simple page and on the side of the page, we have a menu, and when you click the menu item, it falls down and shows the sub-menu. When you click a sub-menu, well, one is already opened, it will close the other ones, that will limit the number of options your user has to see, and sometimes that can be really helpful for users in terms of cognitive load, you only want them to see a certain number of options at once.
We'll look at how to build this in plain JavaScript first, and then we'll do the exact same project using jQuery.

Just a few notes about the markup. If you look at the markup, you'll notice that the article comes first and the aside comes second. This is often important for search engine optimization, we want the important content further up the page. We'll use CSS flexbox with row-reverse to display these next to each other, but put the navigation on the left. Generally, we want the article higher up on the page. Also notice that the navigation is following a very common markup scheme inside of a menu. This embedded, unordered list goes entirely inside the list item for the parent item. This is important to get in HTML.

I have my page open and you can see the article comes first right after my main section opens there.

Then the navigation is an unordered list with list items, but notice this list item is entirely enclosed in the parent list item. This is important to get right, and a lot of web developers get it wrong. The only items you're allowed to have is children of the ordered or unordered lists of list items. This unordered list needs to be entirely enclosed in this parent list item.

These are the items that will show on the page, so over here currently without any JavaScript, these items will just show in here.

That gets us started, and we're using just a little bit of CSS here as demonstrated on the styles to display flex for this main element, but use flex-direction and row-reverse to get the navigation on the left and the main content on the right. Now, with all that in place, let's get started with making this project work.

The basic strategy of the script is that the sub-menu will be initially hidden, and then when you click on a parent menu, it will show the sub-menu. This will be accomplished by having JavaScript swap these two classes on the sub-menu when you click the parent menu.
Initially, the sub-menus, the unordered lists that are inside the list items that are inside the unordered lists, don't have the hide-menu class on them. Our first challenge is to write a loop that adds this class to all the sub-menus in the unordered list.


You'll see over here in the styles that these two styles are already here. Hide-menu, display: none, and show-menu display: block. Your first challenge is to write a little script, down here we've got script tags. See if you can write a script that goes in and applies that sub-menu to that hide-menu class. We want to apply that to all of these unordered lists so they have class hide-menu on them. See if you can do that, and when we come back in the next lesson, we'll see how I did that.

Were you successful? Were you able to do it? Let's do it together.


Down here, I'm just going to make a variable, var submenus. Then assign that to document.querySelectorAll, and what I want to get are the ul, il, ul. There we go. Because what I want are these unordered lists that are inside the list items that are inside the parent unordered list. I'm going to get these, all of these and put them in here, and then I just need a loop for var i equals 0, i is less than submenus, dot length, i plus, plus, curly brace. Now here what we need to do is to put that submenu on each of these. I'm going to say submenus dot square bracket i. Each one of these, it's going to go through each one of these and then do className equals hide menu. Over here it's hide menu. Hide menu, display name, and that should go through and put that class on all of those elements.

Let's see if I did that right. Over here I'll go check my document here, and this is exactly what I did, className, hide menu. Let's see if that actually works. We save that, come over here and refresh the page and look at that. All those menus are hidden, they're set to display none. I could do "Inspect," and you can come in here and see. Click on this menu here or this one of these, one of these menus you can see it's got hide menu on it. Let's get that class on there. That's working great.

Your next challenge is to add a click handler to the main links. These links here have a class on them of menulink. We want to gather those, and when you click on them, we want something to happen. We are going to need an event handler for that. For now, just pass the event object and prevent the default behavior from that would result from clicking the link. But see if you can do that on your own without looking at my solution. But we'll do it together in the next lesson.

Let's do this together.

First we need a variable, var submenus = document.querySelectorAll(‘ul li ul’); and what do we want to get? We want to get these links here, this class menu link for this one, this one, this one down all those. I'm going to come up share the document menu link.

So we'll get those document in there, and then we need to loop. Used your loop here, so we need a for var i equals 0, or i is less than menu links.length, i plus plus. Hopefully you're getting used to writing loops now. Then in here we're going to put an event listener on each one of these. So menulinks[i].addEventListener(’ click’, function(event){ event.prevenDefault(); alert(“clicked!”); }); When you click, we're going to run an event unit run a function. Not run an event, we're going to run a function. We've got this function here that runs. Then for right now all I want to do is pass in the event property, event object there, and do event.preventDefault.

But I have an event listener for each of these, and you can test it by adding console.log or an alert. Now if I go over here and test this, when I click on one of these, I get clicked! We've put an event listener on each of the menu links.

The next thing to get into is this keyword in JavaScript, and if you've looked up stuff on JavaScript online, you can find that you can find a lot about this keyword. It can be pretty confusing. But in the context in which we're going to use it in this course that this keyword is fairly simple. It basically means that the menu that we clicked on, we've add an event listener to all the menus.

Now when you click on one, we get an alert. But you can only click on one menu at a time, so I want to know which one I clicked on. I need to know that, and the this keyword can help us figure that out.


I'm going to make a variable here called thisMenu, and I'm going to assign the keyword this to it, which means thisMenu, the one that I clicked. Then I'll console.log(thisMenu.innerHTML). You'll see that we can actually get the HTML of the menu that we collect. Let's do that over here. Instead of an alert here, I'm going to say var thisMenu = this keyword. That means it refers to the thing that was clicked.
Then we could do either console log or we could do to learn. I'm just going to do an alert. Since we were working with alert, alert thisMenu.innerHTML. Instead quotes here because this was JavaScript not construe thisMenu.innerHTML. Alright, thisMenu.innerHTML, let see with architects. When I click this menu, I get an alert that says Menu 1. It's telling me what's the inner HTML of the menu that I clicked. Now we can get this menu using this keyword.

But really what we want to get to is the parent ordered list. Over here we've added a click handler onto when you click one of these links. But really what we want to get to is this list item. So that ultimately we can get down into the unordered list inside of here. The next challenge is now that we know, which menu we've clicked on, we want to get to the unordered list inside that menu item. In other words, what we want over here is we have something that tells us that we've clicked on this anchor tag.
But really what we want to get is this unordered list here, because this is the unordered list we added the class, hide menu to. Now we want to change the class to show menu. In other words we need to get from this link down here. The way we do that is through the parent. We can find out, who is the parent of this item. Then on that parent do query selector to find the unordered list that's inside the parent list-item. See if you can do that part on your own, going into to try to do that challenge on your own, and then on the next lesson, I'll show you my solution for that.

Were you able to figure that out? Hopefully you were.


This is what I did, because I want to get, I'm getting this, I've got the anchor tags as my event listeners for when I click on them, but I want to really get to this UR, so, down here what I did instead of just this, I can do this dot parent node, parent node dot query selector. You will. And that should get me, the actual on ordered list, that's in the parent of the anchor tag that I clicked on. The parent is the list item. So I'm going up to the parent list. I have been looking for the UR that's inside that will start them, and let's leave this. We'll leave this alert here. But you can make it console log if you prefer. It doesn't really matter.

And now when I click on menu one, I'm getting all of these list items, it looks kind of messy here, but it is actually working. Or if I click on menu two, I'm getting all these list items to B to C. So, I've got this whole an ordered list that I'm getting here. It might be easier to see it if you do it in a console log. So, we can change this to council a log and then let's see what it does.

I'm getting the inner HTML out there. Now that you have that your next challenge is, how do we change the class in that sub menu to show menu? Currently it's set to hide menu. We wanted to set it to show menu. How do we do that? Try to figure out how you can do that on your own, and then come and see the answer on the next lesson. I'll show you how I did it.

It shouldn't have been too difficult, but sometimes you have to work through these things.

What we could do instead, is we could use this menu and do ClassName equals 'show-menu'. So we're applying that show-menu class to that particular menu. That should work.

Let's go over and see what happens when we have refresher page here. If I click on this, it shows the menu. Now, you'll notice we're not quite done yet because if I click another one, it'll show that menu and it doesn't close the previous menus. We want to be able to open the menus and close them. The reason we want to make it so that when you click on a menu, if there's another one that's opened, it will close it before it opens this menu.

That's the next thing that we need to figure out how to do. But this little piece of the script is pretty simple here. We have a menu that's using this keyword that says, ''Go and get the parent node, go get the unordered list inside that parent''. The parent would be the list item. Go get the unordered list inside the list item, and then change the ClassName from "hide-menu" to "show-menu". That seems pretty straightforward. You got this answer here. We can open the pages and we can open the menus, but we can't close the menus.
The next challenge is if the menu has the class set "hide-menu", set it to "show-menu", otherwise, set it to "hide-menu". This is your challenge, is how to make it so that it actually functions properly. There are two methods that you can use to help you with this. There's a method called classList and there's contains that will help you figure out whether the menu has ''hide-menu'' or ''show-menu'' wanted. See if you can do it on your own. Then if you are successful or not, just come back to the next lesson and we'll see how I did it.

Were you able to get the answer to this challenge?
It's a little bit trickier because this one required you to look some stuff up. We haven't used class list or contains before. So hopefully you went to the MDN, the Mozilla Developer Network which is the authoritative resource on these types of technologies, and looked up something like element classless to sort of see how it works. And it gives you some examples on here. Also there's another page contains and so you can actually find contains contains. Does the dog token list and returns a boolean if true. So token list contained so we can combine these two things together to make this work. So let's try it together on our code over here and if you are able to get to work that's great. If not this will help you out.

So instead of this I'm just going to comment that out. Or you could just delete, but in there we're going to put an if statement if. And what we're going to check for is if this menu.classlist.contains. And we're going to look for hide menu like that. So if this is going to return true or false, does it contain hide menu? If it does contain hide menu then we're going to do this. But in there, else if it doesn't contain it then we're going to do this. But we're going to do hide menu. And that will allow us to open and close the menus. Let's save this and come back and check our page over here.

Now we should be able to open and close the menu. Unfortunately though, we can still open multiple menus and what we want is to be able to make sure all the other menus get closed. Any other menu that's open is closed. We can reduce cognitive load on our user and they can they can open only one menu at a time, and be sort of presented with only one set of options at a time.

So hopefully you got something like this on your own. And if you didn't, hopefully my explanation helps. But I recommend if you're not getting these challenges, I recommend going through this lesson a few times to the point where you really can't do them without looking at my answers. It will help you learn javascript and so much more. Okay, so your next challenge should not be a too difficult one. But basically what we need to do is close all the menus and then run this if statement. So before this, if statement happens this if else even happens. We want to loop that closes all the all the menus. So see if we can add a lip that closes all the menus before showing the sub menu with the parent menu being collect.

Hopefully, you were able to get this working this way.

So that when we click on these, they open and we can open them and we can close them. But now the challenge is we want to reduce cognitive load by making it so that our user isn't faced with too many menu options at once. So we want to only show one menu options at the time.

So let's go over into the code and see how we could do this. And what we want to do is we want to duplicate this loop. We want to copy this loop and stick it inside this if statement. So I will make sure that all of the menus get closed when you click on one that you're opening. And we're going to leave the if statements if you're clicking on one to close it, it will still work. And if it's set to class named show-menu, it'll cited to hide-menu. That's why we want to leave the if statement here.

And if we go over and take a look at it and test this, we should see that this is working now. So I come back here and refresh this. Now when I click on a menu it opens, but when I click another menu it will make sure that one is closed and then it will open this one. Plus I could click on menu to and close it. So all of the functionality is now working and it's looking pretty good.
The next challenges, since we're using this loop twice, we're using the loop here as well as up here. And we don't really want to repeat ourselves. So now you're challenge is, how could you make a function that contains this loop and run that function twice? We want to run it once when the page loads and run it once down here inside the if statement. And the function could be called something like hide sub menus or something like that. And, yeah, so see if you can make that function and make that work. And in the next lesson, we'll look at my solution for how I made it work.

Everything is working and we can leave the script the way it is. But it's always good to refactor your code and make it better if you can. Let's do that with this final step here, this next step here.

We're going to come over here and we're going to make a function, we're just going to put it here, function hideSubmenus, like that. I'm going to move this loop so it's inside that function. Hopefully, you were able to do this on your own. Tab that in. Now, I've got a function called hideSubmenus.

I need to run that function here and run it once here and then I'm going to run it again down here. It just makes the code a little bit more readable because in here, I can see if it contains hide all the submenus and then show this particular menu. Otherwise, if this one doesn't have class list hide menu on it, said it's a hide menu and that should actually work.

So let's just test that really quickly, make sure that that works the way we think it should work. Back over here and refresh the page and you can see that it's still working just the way I intended it to work.

Hopefully, you came up with the exact same solution that I came up with and we're able to get it to work the way I was able to get it to work.
The last challenge for this is just to apply our best practices steps that we've learned earlier in the course. Hopefully, you can do that on your own. But what we're looking to do is to put the script and do to a separate file, add the IIFE, the immediately invoked function expression closure, add the use strict directive, change all the variable declarations to const or let.
We're using let, if the variable changes like inside the loop over here, this needs to be let. Then link the script to the head of the page and be sure to add the differ property inside the script tags so that it loads after the actual content of the page is loaded. So see if you can do all of that and then come back to the next lesson and see if you are able to get the same answers.

Our last step is really to just use some best practice work and clean up our files and make everything work the way we want it to work here at the end.

You should be able to do this on your own, but I will show you how I did it here. First, I'm going to just make a new file, and you call it script.js, that makes sense. Then on this file I'm going to add my IIFE immediately invoked function expression, with the parentheses and in there at function. The function has its own parentheses in its curly braces. Then we add an extra pair of closing parentheses there. Then we're going to click inside of here, down in it & use strict directive here, like so. Then in here we're going to add all of our code.


We can take all of the stuff from here (lines 69-97), cut it, and paste it inside script.js. Now we just need to go through and clear up our function declarations and change this to const. Down here, because we're going to loop, this needs to be length, this var needs to be let. Then down here, this can be const. Sometimes it's nice to have your main variables all up at the top of the page.


We save that file back here and an index.html file. We'd get rid of these script tags from down here, bottom of a page. Instead we can put them up here in our head. Script SRC =“script.js” set it to defer to the close script tab. Then always of course, go back and test it to make sure that you didn't screw something up. You can open the menus, you can close the menus.

Only one menu can be opened at a time, which is exactly what I wanted for this particular project. That's all working great. We were able to get our final script working, get everything cleaned up in here.

This is how we could do a project like this in plain JavaScript. In the next part of this lesson, we will look at how to do the exact same script, exact same thing using jQuery. You'll see how much shorter and how much more compact that script is.

jQuery SideBar Folding Navigation.

For this project we'll use jQuery. We did this exact same project using plain JavaScript in the previous lesson. But now we're back to where we started with just these menus folded out and we want to do the whole same thing again, except using jQuery.

This will be a really great way for you to see the difference between jQuery and JavaScript, using plain vanilla JavaScript. jQuery is JavaScript, but the syntax is slightly different, and you'll see how much shorter this script is when we get done with it, and how easy it is to do this interaction using jQuery.

Yeah, we're going to do the exact same thing. The only thing that's different about the start file in this case, is that it includes a link to the jQuery library on the CDN.

Down here at the bottom of the file, this is the only thing that's different, is I'm including this extra script.

First thing we're going to do, is we're going to set all of those initial list items to not display. In the previous version of this project, we had some classes set up for Hide menu and Show menu. But here we're going to use the CSS property to set display to none. We'll see an even easier way in just a minute.

But let's do this first so you can see what it does. Down here, I'm going to use my jQuery object, and write it like this from the outside. I'm going to use my jQuery object like that. I'm going to use quotes to say go in and get ul, li, ul. This is the unordered list that's inside the list item that's inside the unordered list. That's these list items that are inside these unordered list items that are inside this unordered list. I'm going to do, ''display: none''.

You'll see when I do this over here, if I test the page, they all go away, and if I inspect this, you'll see they have displayed style, display none over here.

Now, as it turns out, there's actually an easier way of doing that, because jQuery has a bunch of helper functions built in. One of them is hide. Since frequently we want to hide things on our page, they created a helper function called hide, which hides those elements. That's even easier than using the CSS method here.

If I just put hide there, and then come back and test it, you'll see the menus are hidden. Not only that, but if I inspect and look in there, you'll see it's still says, display none there. This is actually doing the exact same thing but using the CSS method, but instead we're using the hide method. That's a convenience function that jQuery has built-in. jQuery is a bunch of these built-in for doing common tasks. We'll see another one of these convenient helper functions in just a minute. We've got that going, and we're ready to start building in our Click-Handler and doing all that fun stuff. We'll do that in the next lesson.

Just like we did in the plain Javascript version of this script, we need to know which menu was clicked.

Once again, we're going to use the this keyword in order to get the menu that was clicked. However, this time we're going to wrap it up inside of a jQuery object. So down here, you can see we've got this, but it's inside a jQuery object. Then we're going to use the handy next method that jQuery has built in. And in the plain Javascript version, remember what we had to do was we had to go get that parent object and then find the ul inside the parent. But here we can actually use the next method to get the next ul.

Because remember, what users are doing is they're clicking on this link here, this anchor tag. And I want to get the next ul that comes after that. And jQuery has this helper function that's very useful for that.

Let's come down here and add that into here. We're going to make a variable, var thisMenu is assigned. We're going to use the jQuery object to get this. And then we're going to use the .next method to go get the next ul. And that will get the ul that comes up after this particular anchor tag that we've clicked on.

And just to see that this works, I'm going to say, console.log( thisMenu. .html()). This html(), this is a jQuery method that will generate the html. So let's see what we get if we test this. If I come over to my page and refresh and then turn on my inspector to get the Console log here and click on this menu, you can see that I'm getting that html.

The next thing we need to do is check to see if the menu is showing or hidden or not. And we can do that with this sort of function here. We could say if this menu is visible, and there's a method called is in jQuery that will allow us to check for something. Here, visible is a filter that will allow us to see if a particular element is visible, in which case then we can hide it or we could show it. Now, we could do this and this works if you wanted to do it this way. And the is method is sometimes very helpful in jQuery.

However, in this case there is another helper function, a convenient helper function that will do the same thing in a nice, simple way. And that is toggle, thisMenu.toggle. That's all we need to do, so that if it's showing hide it, if it's hiding show it.

Let's add that into our script over here. I can just say thisMenu.toggle. Very helpful, convenient function in jQuery that you could use in many situations.
Now you'll notice that we're back to where we were after numerous lines of code before in plain Javascript where we can open the menus and we can close the menus. Unfortunately, we can still open all the menus and close all the menus, which is not exactly what we want. But we're close with just a couple lines of jQuery. And part of the reason why it's so short is that we don't need loops because jQuery works with groups of objects like this. And it's got these helper functions built in, so we don't have to write the if statement and do all of that.
The last part of the script we need to figure out is how to make it so that when I click on one menu, it closes all of the menus and then only opens the one that I clicked on. And we'll do that in the next lesson.

To get this final piece of functionality that we want, we need one more line in our script.

And it's just a short simple little line that we need to add and it will introduce us to yet another convenient function built into jQuery which is the not method here. And what that does is it excludes a particular item from a function, we can chain these functions together.

So here we're going to say go get all of the unordered lists that are inside the list item, that are inside the not word lists, those are sub menus. But not the one that we clicked on. And we're going to hide all of the other ones, but not the one that we clicked on, because that may be hidden already or we may want to show it, and then we can do the menu toggle and it will work. Just one last little line, let's go ahead and put this in over here.
Once again I'm going to use my jQuery object to go in and get the ul li ul. The unordered list that are inside the list items are inside the an ordered list is our sub menus. But not this menu, the one that I clicked on. That one I don't want to be affected by this line at all. And then I'm going to do hide, make sure all of those are hidden.

Let's come back and test it. I can open a menu, I can open the next menu, I can close the menu. And I'm getting exactly the functionality that I had before.

Okay, the last step that we need to do is just make our script file and move this stuff over into an external script file. So let's do that here. Up here I'm going to add script.js. And then I'm going to come back here. Then I'm going to add my IIFE function parentheses, curly braces, and then one more set of parentheses in a semi colon. And then I'm going to come in here and add my use strict directive. And then I'm going to grab this entire script. Cut that and stick it in here. Close that up. I've got a little short script here.


This can become constant. That's the only thing we need to take care of here, it's the only variable. And then over here we can get rid of this script tag entirely. And we can move the link to jQuery up to the top of the page inside the head here.
Don't forget to add the defer attribute there. And then down here I'm going to add a script tag with src set to quote, script.js defer. And that will work, this file has to come after that file, even if we're putting him on the head of the page using the defer attribute. Because once again, we need to make sure that we're using these functions from this library here in the script so it has to load first.
And it's working just fine. I can get to my menu items. It's not a fancy page, but this is a good example that shows you how to take a script and do the same thing that we did in plain JavaScript, but using jQuery. And using some of the nifty jQuery helper functions such as hide, the click handler, the next method, the not method, the toggle method, all make it possible for us to write shorter scripts, along with the fact that you don't have to do loops. So that makes it much shorter and hopefully you're pretty excited about this.

JavaScript and jQuery challenges.

One of the best ways of learning JavaScript is through these challenges, and in particular now that we're getting into jQuery it's important to get used to the jQuery syntax.

The way these challenges work is we'll pose a challenge, I'll put forward a challenge, and I'll have you do it in both JavaScript and jQuery. This will really help you with the syntax of both JavaScript and jQuery, and understanding the differences between the two.

I'll provide you with a challenge like this, and usually the challenges start off fairly simple and then they become more complex as we move through the challenges. I'll give you a challenge like this and then on the next slide, if you need to look the solution is on the next slide, but hopefully you don't really need to look at the solution. Really try to do the challenges without looking at the solution. If you have to look at the solution that's fine, you can look at the solution and hopefully you'll go ah-ha, I see what I was supposed to do and then you can go back and do the challenge without looking at the solution.
If you want to learn Javascript or jQuery you have to get used to the syntax and this is the best way to get there, is to really force yourself to do these challenges, and do them several times, do them over and over again. Do them today and then do them again tomorrow, and tomorrow when you do them hopefully you'll be able to do more of the challenges without looking at the answers. Each challenge builds on the next so that they become more complex as they go along, and that will really help you learn both JavaScript and jQuery, and help you understand the differences between the syntax of how each of them work.

Congratulations, you've made it to the 2nd module in our 2nd course on JavaScript. In this module, we'll be working with the jQuery effects library, which provides you with a lot of animation effects that you can use with all sorts of projects and in your interfaces. We'll compare that to using JavaScript and CSS to create your animations and see how the two are different and what are the strengths and pros and cons of each as you learn and work on projects. It's a lot of fun and you're really going to enjoy it. Buckle in and let's get started with learning about the effects library in jQuery.

jQuery effects library.

We'll be looking at how to use the effects library that's built into jQuery. But there's some important things to understand about animation in JavaScript versus animation in CSS. Generally, it's better to do animation in CSS if at all possible. When the animation is done in CSS, the computer's GPU can be used to help with the processing of the animation, that will make the animation smoother and more efficient. You'll particularly notice this on phones, especially older phones.
However, the effects library in jQuery is really easy to use, and for something minor or if you need something really quick, it can be a great option. In this particular lesson, we'll be looking at how to use the effects library in jQuery. I have some example files that you can download and when you open them up, they look nice.

Here's example 1. We'll look at how to apply some effects using these buttons here.

If we go over and look at the HTML involved here, I just have some links with these buttons, and then I've got this box here.
I've got a little bit of CSS as appear to make it look nice and that's fine. Down here, you'll notice that I have jQuery plugged in so that's all set and ready to go, and a place for us to put our script.

Now, the first one that we're going to look at is the hide function (furthest left of the 3 buttons) which we've already looked at before. We've seen this hide function when we did the sidebar menu exercise. But the hide function can also do animation. Let's take a look at how to do that.

Over here, what I could do is I could type in here, I could go get this first link here. I'm going to go get and use my jQuery object. Then I'm going to get hide box, that link. I'm going to add a quick add onto it, click. When I click it, I'm going to run a function, like so. In that function, what I'm going to do is I'm going to get this element again using my jQuery object. This element box, div id pound box. I tell it to, hide. Now if we do it like this, it will work, but it won't do any animation.

Let's try it out. If I come over here and refresh this page and click "Hide," you can see the box goes away.


But in jQuery, you can actually pass a value in here. There are a few keywords that it can use. You can use normal, slow, or fast. You'll see now when I do refresh and click "Hide," it does an animation as it hides that box.


You could do slow or fast, or you could put in a number. The number is the number of milliseconds. If I put 500, that will be half a second, it's how long the animation will take place. Or if you really want to see something to demonstrate how much that affects it, you could do 2,002 seconds. That's a long time for an animation like this.

Let's see what that does. There we go. You can see that you can affect the speed there.

In the last lesson, we saw that we could add a function here that will hide the box and animate that.


Let's add a couple more. We've got a few more buttons here. Let's do a few more of these. I'm going to do pound show box or hashtag if you prefer hash instead. I'm going to add the click handler and then put a function in here. Always type from the outside, so you get used to the syntax and understand which thing closes which thing. I'm going to do function parentheses, curly braces there and move that down. Then I'm going to do again, I'm going to go get my jQuery object and get pound showbox. No box, just box of the same box. Instead of hide I'm going to do show. Maybe we'll make this one go for 500 milliseconds. You'll see that will work.
Let's test that. We come over here and refresh this. We can hide the box and I can show the box and you can see the difference in time.

Now toggle will both hide and show. If it's hidden, it'll show it. If it's showing it'll hide it. Over here again, I'm going to just add toggle box. It's this link here. It's this link up here, toggle box. Then down here we're going to do box and instead of show, we're going to do toggle like that. Remember toggle is a helper function that allows us to do both hiding and showing and we've seen that before. But now we can use it with the effects library and do some animation with it.

Now one of the really great things about these animations and doing this in JavaScript and jQuery is that you have a thing called a callback function. What you can do after the toggle(500) is you can pass in a function that runs with its parentheses and curly braces like so. In here we could put alert ('done! ') something like that. This function will run after this animation has been completed. In fact, I'm going to make this a little bit longer so that you can really see that it waits and runs after the animation has been completed.
This is useful because sometimes you want to have a sequence of animations and when that animation is done, you want to do something else, something like that.

Let's see how this works. The page does the alert. That's really cool and I could do the other way around as well. With that, we are able to see that we can make these functions, these animations and the animations can have a callback function that runs when the animation is complete and this is useful. Let's take a look at the next example in the next lesson.

Let's take a look at Example 2.

Open up the Example 2, HTML file and you'll notice that it looks very similar to the first example. We have the same styling up at the top of the page, we have a box here, we have some navigation, and then we have this div id set to box down here, and it's just an empty div.

You can see that it looks very similar here. But jQuery has helper functions in for sliding up and sliding down and slide toggle. Because again, these are common tasks. These are common things that we need to do in interfaces, so they created a method that does specifically this.

Let's take a look at what we need in order to do this in our code. The syntax is very similar to what we saw before. What we're going to do is, like we did before, we're going to use our jQuery object to go in and get our link here.
It's pound, I've got a slideupbox as a link here, so let's do that. slideupbox and we'll put a click handler on that. We're looking for dot click. Then in here we're going to run a function with its own parentheses and curly braces. Then we're going to put our code inside the curly braces there, just the same way we did before. Again as before, we're going to go get our jQuery object and get box, because that's where we're going to be moving up and down. Then what we're going to use here for a jQuery function is slide up. Again, we can put in an amount of time or you could put inside quotes, you can put slow or something like that, and that will make that box slide up.

Let's go over and give that a try. Hopefully I did that right, I think I did. If I refresh this page and click "Slideup," it does that animation.

It's interesting to inspect this. Watch what happens here. Actually on the actual box itself. Watch what happens down here, when I click slideup. You can see it very quickly went through some settings in here, as it did that and ended up with displaying that.

The other ones look very similar as you can imagine. We've got slideupbox, we've got slidedownbox, and we've got slide toggle and they all work very similarly. I can actually copy that, paste it, and I recommend you type it actually, but for expedience sake, I'm going to just copy and paste it and change this to slidedownbox. This is going to be SlideDown and I can choose an amount of time. We're going to do two seconds, something like that. We have a longer time.
Now, when you're working with animation, one thing to be aware of is that, there is such a thing as easing. An animation can run and it will run for the period of time. This animation will run over two seconds, but it can run the exact same amount over those two seconds, which is linear easing, meaning that it's the same speed at the beginning as it is at the end or you can change the easing such that it goes faster at the beginning and slower at the end or slower at the beginning and then speeds up towards the end of the animation, or you can actually do easing in and outward. Starts slow, speeds up and then end slow or starts fast, slows down and ends fast. You can do all of these different types of easing.

jQuery has some basic easing built-in and you can put in here in quotes, "swing". That will do a little bit of easing on this item. It's pretty subtle. You might not really see it, but it will actually work. Take a look for yourself. Slide up, slide down. Does slide down, but it does a swing animation. It's not the same speed all the way through. It's hard to tell, but it is there, just subtle.
jQuery has built into it some basic easing. There's also a plug-in and one of the strengths of jQuery is the plug-in architecture. We're going to talk about that in the next lesson.

In the last lesson, we added some easing to our function, so that now it slides up using the linear easing, but slide down is using the swing easing.

Easing can give your animations a little bit of personality. They can make them seem a little bit less mechanical, when the speed of the animation is not always the same all the way through the animation. But the easings that are built into jQuery don't give you a lot of options. They are very basic.
There's this amazing plug-in (gsgd.co.uk/sandbox/jquery/easing/) that we can use, and it allows you to choose different types of easings so that you can do some different types of things with this, and you can go through and try some of these different settings here to see what they actually do. Ease-out will affect the animation at the end where ease-in will affect the animation at the beginning, ease-out-and-in will affect the animation at both ends. We've got ease-in-and-out. We've got a whole bunch of them in here for all these different: in ease-out, ease-in all these different animations in here. But in order to use this, we have to plugins plug-in.
jQuery has a plug-in architecture that allows you to add more functionality to jQuery. You can see over here on our file that I've already added the plug-in. The way this works is first we need the jQuery library, then you need the plug-in, and then we use it in our script.
Down here I'm going to do the third animation here for slide toggle, which we're going to use this ID. We'll grab that ID, and down here instead of slide down, we're going to do slide toggle, which will open it and close it. Here we can use some of the other easings that we find on this website here;
This is where I got the easing plug-in on the CDN that I put into here. That's where that came from, Cloudflare.
That comes from this website here; But we can use the easings that we see here. If I want an easeOutBounce, I can actually use that animation if I want to over here. Let's give that a try.

"easeOutBounce". Make sure you spell it right with the capital letters and everything easeOutBounce. Make sure you spell it all correct and that you get the correct capital letters. Make sure you put it inside the quotes, and so on and so forth.

If I save that and then come back and look at my example here, and click slide toggle, you can see that it does this bounce. Which is pretty interesting or you could do easeInBounce to get the bounce on the opposite end of the animation, which might look a little weird. It's doing the bounce first and then it's finishing the animation, which looks a little weird, but you get the idea and you can try some of these other easings and see what personality you can get.

I really like the easeOutCirc ones. Yeah, easeIn and easeOutCirc. You can give those a try. Let's see what we can do with that. Over here easeInCirc. Again, at two seconds, that's pretty slow. You can even slow down more if you wanted to see it. I'll set that to three seconds. You can see how it changes the animation by either slowing it down or speeding it up. I think this one's speeding it up as it gets to the end of the animation.

Let's come back and try easeOutCirc. That's starting fast and ending slow. It gives the animation a little bit of personality as it does its thing.

You could try easeInOutCirc. It's hard to see, but it is doing something there. Try these different animations. You'll notice if you spell them wrong, if I do, easeoutCirc like that, then it won't work quite right at all.

One last quick thing here before we're done with this lesson is you can also add the callback function after the easing. I could add a function here and say done, and you'll see that when that easing is finished, when that animation is finished, that callback function will fire.

Now that'll work, and it comes back and it says it's done. That gives us a lot of information about how to work with these built-in animations, and we're going to do more in the next lesson.

In Example 3, we'll look at something that's similar to the other two, but just slightly different.

It's got four buttons and we can use some built-in functions in jQuery to fade objects in and out, or to fade them to a particular percentage of opacity.

Here I have fade out, which will fade it out completely. Fadein, will fade it all the way to being visible. But then I had fade to 20 percent, which will fade it to 20 percent opacity, and then fade to 100 percent, which will fade it all the way in.

Let's take a look at how we can do that. Over here I have Example 3 open and you can see that I have much the same styling up at the top of the page, as well as my navigation year and my jQuery libraries plugged in. I don't have the easing plug-in here, but you could add it if you wanted to add some easing to these as well.
Here we're going to do what we did before with getting our link pound fade out box, which is this first link up here, and we're going to add our click handler to it. Click, and then we're going to pass in our anonymous function that runs when you click that thing. In here, we're going to go get our box.
Again, we use our jQuery object to get pound box. Then we're going to do, I believe the function is fadeout because we're fading out the first one. Yeah, fadeout. Again, we could put in normal or you could put fast, or you could put slow, or you could put a specific number of milliseconds; 3,003 seconds is a long time, but we can actually give that a try. You'll see that will actually work over here. Over three seconds, it will become invisible.

We could do fadein as well. I can copy that and paste it or just type it again. It's always a good idea to do that, but we're going to use this ID instead. Instead of fade out, we're going to fade in. I could do three seconds and you could do the easing swing. It's going to go in quotes, ''swing.''
Then you could also add a callback function, and that's parentheses. Inside the curly braces, we can add an ''alert'' that says "done." When the animation is complete, it runs the alert and says that it's done. That's great. We can do all of that. Okay, cool. Now we just need to add these last two here and we can look at that in the next lesson.

In this lesson, we'll make these last two buttons work.

And with that, there's a fade to method that we can use in jQuery.
So here, just as we've done before, we can add a new event handler for when you click the the button has fadeto20box on here. I'm going to paste that in just to make sure I spell it right and we'll add a click handler And then in here, we'll add a function that runs when you click it, it's just an anonymous function. And what we're going to do here is once again, we'll go get pound box. Don't forget the pound sign.
And we're going to use the fade to method. See it even comes up here, fade to. And we're going to fade to, the way this works is we're going to put in the amount of time. So we'll do, again I'll do 3000, just to kind of slow but gives us a sense of what that is. But then the second number it takes is a duration, an amount. Takes the duration, that's the first number. The second number is how much it's going to fade to. We want to do 0.2 like that. And now, that should actually work.

Let's go over and check it out. Press refresh this and click fade to, it fades down but it doesn't fade all the way down, it fades to 20%.

We can do that and then we can do the fade to again for the last one. We're going to use this link fadeTo. When you click the fadeTo, it's going to fade to one. The opacity is a number between 0 and 1, 0 is completely transparent, 1 is completely opaque.

The 2nd button has the callback function and the swing animation on it. And if you wanted to do some of the other easings, you would have to go get that easing plug in and stick it after jQuery loads.
But before we run our script, the order in which things loads matters because of the way that the functions build on each other. We need to have jQuery. In order to use jQuery, we would need to have the easing plug-in in in order to use the using plug in. Using plug in has to come after jQuery. All of this stuff has to go in order on your page for it to work properly. We can have the callback functions. And then in the next example, an example for, we'll look at some custom animations where you can do some different kinds of things. In examples 1, 2 and 3, we've used some of the built-in convenience functions that jQuery has built into it.
For fading in and out, for sliding up and down, for hiding and showing, and toggling, slide toggle and doing all these kinds of things that we commonly need to do. But sometimes you need to do a custom function, and we'll take a look at that in the next part of this lesson.

Next, for example 4, we're going to look at some of the custom animations you can use in jQuery and over here I have my example four file open, and you'll notice that the HTML and the CSS have changed just a little bit.
There are more links here and my box now has some content inside the div box here, and you'll see that my stylings is a little bit different up here, if you look at the actual page, it looks like this now. We're going to make each of these buttons work so we can see how some custom animations work in jQuery.

To do this, we'll use the animate method in jQuery, and you'll see that it allows us to animate some, not all, but some of the CSS properties that we have come to know and love over the years in working with CSS. That gives us a lot of power, because we can actually use these CSS properties to animate all different things not just sliding up and down or showing and hiding and doing this kind of stuff.

Let's give it a try and see what it does over here. Down here I'm going to add in my script. I'm going to go get my jQuery objects and I'm going to get this first link up here, growbox, pound, growbox, and I'm going to add a click event handler on there, and then I'm going to pass in a function that runs when you click it, and everything's going to go inside these curly brackets here. At this point I want to affect box, pound box, don't forget the pound sign. We're going to do the animate function in jQuery. This will animate the box.

The way we're going to do this here is we're going to pass in an object. We have not yet worked with objects in JavaScript, they're coming, we're going to get to them later in our instruction about JavaScript, but will see them pop up a few times and this is one of those times. I'll explain it a little bit now, but we'll get into objects in more detail a bit later, and an object is an alternative way of storing data in JavaScript, and it comes with a key value pair.

We define an object with the curly braces, and then we have a key value pair. In this case, the key is width, that's the CSS property we're animating, and then the value is 710px, and you'll notice that the value goes inside quotes, but the key does not. That's a distinguishing aspect of objects in JavaScript in general and also in jQuery.

We're going to animate in here. We're going to pass in an object open and closing curly brace and we're going to put in width, colon, and then in "710px". That will move the box. It'll change the width of the box to 710 pixels. If I come over here and test this, refresh grow box, and you can see it sets it so that it 710 pixels. I knew it was 710 pixels to end right here. Let's take a look at growing the text and affecting the actual text inside the box in the next lesson.

For this next example, we will start with our jQuery object again as always, and then go and get the element that we want to get, which in this case is pound growBox.

Because we're getting on and we grow text. It's always good to copy and paste just to make sure you're getting exactly the right thing, and then we'll do click parentheses and a semicolon. That click handler will run when we click on grow text. Then we're going to come in your add a function that runs when we click on that, on secret square braces. I want curly braces.
Move that down and then once again, I'm going to go get my box, pound box inside quotes there. I'm going to run the animate. The custom animate function here and again, we're going to pass in with curly braces, not square brackets, curly braces and object. What are we going to do here? We're going to do font in quotes. No, this one looks like this.

We come over here. Font size. We're using the JavaScript version of font size rather than the CSS version, which is font dash size. We can't have the dash in there because JavaScript will think that looks like a minus sign, and so it's trying to subtract size from font and it's not going to work. Instead what we want is fontSize, colon and then I can set it to say 24 px or something like that and that should change the font size.
Grow the box grow the text. That's working just fine and you can try a different size text if you wanted to do 36 pixels or 40 or whatever you want to do that'll be a little bit more dramatic. Grow the box, grow the text and that's working great.

We could also move the box. Let's give that one a try. With move box, what we're going to do, we're actually going to change the position of the box, and in order to do that, we need to set some positioning for box.


In our CSS over here for box, we need to add position absolute, and then we want to set the left position, left 50 px. Why is it 50 pixels? Because everything else is, is indented 50 pixels in here. I think I have that, yes, he said padding 50 pixels. If I don't set left 50 pixels, let's take a look at this really quickly. If I reset that, that puts that in the right place. But if I didn't put the 50 pixels in there, left 50 pixels, maybe it won't actually do anything, okay, well actually maybe be fine.

But still I want to set the left 50 pixels so that I'm moving from this position, left 50 pixels. Because we're going to change the left property when we move the box. Down here again, I'm just going to copy this for the sake of making it a little bit quicker and down here instead of grow text, I'm going to move box. Move box, animate and then here I'm going to change the left property, left, and I'm going to do plus equals 300 px, so that we'll add 300 pixels to the 50 pixels that's already there. Plus equals, we'll add 300 pixels to the 50 pixels.

It's already there and it'll move it left 50 pixels, I mean to 350 pixels from the left-hand side.

You can set how long you want that animation take. You can make it go longer if you wanted to and after the animate, after the object here, I could add in a comma and say, I want this to run over five seconds, something like that, and that will animate over five seconds. Let's see what that does. Five seconds is really slow, but it is animating . We're able to adjust the amount of time and the amount that it moves in, what it does with the actual animation, all with custom animation.

For next button on Example 4, we want to make all of these animations happen at the same time.

They're all going to move forward at the same time. We will change both the width, the font, and the left positioning of three of these. We're going to change all of them at once. We can do that by just passing in these different properties into our object all at once, separating them with commas.

Let's do that. Down here, once again, I'm going to use my jQuery object to go get this pound, but what I want is do all. I'm going to get pound do all. Then I'm going to add a click handler. Click for when you click the doall button, and then we're going to run a function, when that button is clicked, and here we have it. Here now, we want to effect a parentheses pound box, like so. Again, we're going to do the animate method. We're going to pass in our object, so we do the curly braces. First we want width, 710 pixels, so I put that in here. Width, 710 pixels and then a comma. Then we want font size, 36 pixels, I put that in there. Then a comma. Then we want left plus equals 300. We'll put that in there.
You'll see now there's some extra spaces at the end. It doesn't really matter, it's fine, but you'll see with all of those in there, that now when I come over and test this thing, I also want to put in an amount of time, that will be really helpful. After the curly brace, put a comma, and then I'm going to put 1500. It's going to take a second-and-a-half to do all of these.

Let's come back over here and refresh this. When I click Do All, it should do all of those things.

Now, the last button is to do them in a sequence. First we want to grow the box, then we want to grow the text, then we want to move the box. We want to do each one of these in a sequence. We can do that with callback functions.
Each one of these animations can have its own callback functions that when it finishes it calls the next one and when that one finishes it calls the next one. It can be confusing for the syntax in order to get this to work, but once you understand it and know how to do it and mess with it a little bit, it's not too hard.
Let's do this again. I'm going to start with this one. I'm going to copy that and stick it down here. Instead of getting that button, I'm going to get this one sequence. When you click the button Sequence, it's going to take box and it's going to animate the width to 710 px. I'm going to put a comma. Another comma, yeah, I'm going to put a comma, and then I'm going to put say 1500 for how long that animation should take place. I'm going to put another comma, and I'm going to add a function. It's really easy to get confused here because we're going to put everything into this function here. I'm going to make sure I click between those curly braces, move that down.
Then I'm gonna go get this one, font-size 36. I'm going to put a comma here and I'm going to put 1500 seconds in there. The 1500 milliseconds, that's 1.5 seconds. 1500 milliseconds in there, and then a comma and another function, parentheses, curly braces. It's really easy to lose track of this stuff. You have to be really careful with it, but then I'm going to put the next one inside these curly braces. I move that down, and I'm going to do this one here. Now change that to 1500. There we go. That's the last one. It doesn't get a callback function.

Let's see if that works. If I come over here and test this, refresh, if I did it right, sequence, it should do that one and that finishes. It does that, and then it moves it, and everything is working all in a sequence.
With the JavaScript effects library, we can do all kinds of really interesting things. You can animate all kinds of different CSS properties. However, it is better to do the animations in CSS with transitions or keyframe animations in CSS, and then apply those classes, but sometimes using the effects library in JavaScript is still useful. Especially if you're doing something fairly quick, there's not a lot of reason not to use it. We'll see an example of when is a good place to use this effects library coming up when we create a tabbed interface.
Here are resources related to these lessons:
Here is a PDF of the presentation slides used in the lessons for this section: Intro to jQuery Effects Library.

Tabbed interface, using jQuery.

We're going to create this tabbed interface, and this is a really good project to see the jQuery effects library in practice.

We've looked at how to use the jQuery effects library, and now we're going to use it a little bit in this project.
This is a good project for seeing how that effects library can be effective without adding a lot of extra weight to a project. We're not going to do anything too intensive with it, but it's a nice use of effects library.
Then we'll remake the same project using plain JavaScript, so you can see the difference between the two, and compare the code between the two versions.

Let's get started and see what this is going to look like.


If we go and look at the markup file over here, you'll see that the way it's setup is we have a div called tabs with an idea of tabs, and in here we have an unordered list. These things are going to be the actual tabs that you click on.
Then the href for these links to the id's for these pieces of content down here, and this is the content that will be on each tab. This is typical for the setup for this type of interface, is that you would have an unordered list that makes the tabs, and the tabs themselves would have id's that match the href's for them up here. That's the basic markup that we're going to be using, and it should really work well for us.

From there we need to add some basic styling because currently in the page, if you open up the start files in the browser, they look like this, so there's very little styling here.

I've done just a little bit on my style sheet, so you can come over here and see styles.css. I've got this reset rule, which is not great to use for production websites. But for this, it's just taking margin and padding off of everything.
Then we're just adding some padding to the body and setting the background color and the font and the color. Let's add a few rules here to make sure that we get this thing all in place. The first rule I'm going to add is for the tabs themselves, so this is the entire interface really. I'm just going to give it a width of 400 pixels and set margin to auto so that it centers on the screen.
With those two pieces in place. Then for the actual tabs, for the unordered list, I'm going to get rid of the bullets and set them to display flex, so they go next to each other.
You might wonder about the single bracket, and what this does is it makes sure that the unordered list, that's inside the tabs directly, the direct descended is targeted.

Example 1, something like this, li. Example 2, something like that. But I didn't want this unordered list to get targeted by my rules, I only want this one because this is actual content in my tab. That's why I'm using the angle bracket here, is that it will only target the specific selector for my element tabs that are there. We've got that in place, and now my tabs are lining up next to each other, still doesn't look very good, but we're getting there.We'll continue with the styling in the next lesson.
Attached is a zip file of the the things you need to begin this exercise. A zip file is defined as: a computer file whose contents include one or more files that are compressed for storage or transmission, often carrying the extension .ZIP.

The next rule styles the actual anchor tags that are inside the list items that are inside the unordered list that are inside the tabs.

And again I've got the angle brackets to very specifically get the elements I specifically want. And this is a longer rule so I'm going to paste it in but you're going to have to type it so, I'm going to come over here and I'll add it here and again you're going to have to type it.
But first thing I want the anchor tags to display block elements not in line elements. Remember anchor tags by default in line elements and I want them to displace block and what that does is it makes the entire area of the tab clickable not just the text. Plus it makes padding and margin a little bit easier to work with unblock elements because they don't all affect in line elements quite the same way.

I'm setting the height 30 pixels and the line nine to 30 pixels and that puts the text in the vertical center. As long as it doesn't wrap around margin on the right to pixels to create a little bit of a gap and then I'm just setting a background color, the color of the actual font color and then the text decoration. I'm getting rid of the underlining putting some padding on the left and right.
So zero 15 pixels that would be zero on the top and bottom and 15 pixels and left and right. And then I'm doing some border radius where I'm putting the border giving a little three pixel radius on the top left and top right of each tab.

With that in place you'll see over here if you save that, you'll see that the tabs are starting to display the way we want them to display and they're looking like tabs. We have a few more rules that we need to adhere to make our make our interface look that we wanted to look.

So I'm going to add these two rules here.

But this is again going to target the divs that are specifically these divs that are labeled tabs-1 because again I could add a div in here as part of my content and I don't want that to be affected.
But I want just these divs here the ones that are tab one tattoo and tab three to be affected by this rule. And basically what I'm doing here is I'm setting them so they don't display initially at all. So that hides them all entirely and then I'm just giving them a little bit of padding and setting the background color. But then the first one I want the first one to display is block and set its background color.

What that will do, you'll see when we come over here is currently all of these tabs are showing and really I just want the first one to show. So when I refresh this you'll see that the first tab is showing but the other tabs are not and I'm not going to have styling for these list items in here.

So I'm going to go in and take them out just because I don't need that stuff in there. That was just to demonstrate that those won't get targeted by the other rule. I take that stuff out for now, that's great.

And then I've got a couple other really minor rules for styling that will fix up the way we want our taps to look and everything to look for this project, switch back to the styles and add two more rules you have to add in here.
The 1st one (first-of-type) is styling the anchor tags again, this is getting our first tab up at the top of the page and I'm just changing its color and changing it's background so it matches our interface. And then I'm giving some styling to the paragraphs to make them look a bit better.

Now we have the actual interface. It doesn't function but this is the interface that we want for our tabs. And the reason why I showed you the styling is again because javascript is very much tied to the browser and tied to adjusting the styling.
It's important to understand how the styling works and that when you're making an interface like this, you want to get the styling for the widget or the element or the interface element to work properly before you start working on the javascript.
So here we have three tabs but two of them are set to display none and one of them is set to display block. We have unordered list and they're all styled here but the first one has a background color that matches this thing so it really starts to look like a tab and we want to get that styling in place. The next step will be to add the jQuery to make the thing work and we'll start working on that in the next lesson.

Now we're ready to start with writing our script to make our tabbed interface function.

You can see down here at the bottom of the index.html file, I've added the link to the jQuery library.

The first thing we want to do here is add some jQuery to gather all of our anchor tags in here and add it to when you click on these something happens. Again, we're going to use our jQuery object as always, and in here again, I want to very specifically target the # tab angle bracket, ul angle bracket, li angled bracket a.. I want to target those and then I want to add a click handler, so that when a click happens. Then add an anonymous function that runs when you click these links. This anonymous function will run and is always on typing from the outside ends so that you don't lose any curly braces or semi-colons.


Then I can click inside the curly braces and in here I want to get all of these anchor tags here, and make it so that the color and the background color of these are all set to the default background here, this default color. Then I'm going to take the one that I've clicked and change its background color and the color of the font.

Then we can pass in key value pairs that will work with this object. We set the background and color. We're going to set background and that doesn't go in quotes because it's the property. We're going to set it to, this one does go in quotes, pound a2a2a2. We're going to set color, and its properties can be pound cecece. That's going to set these colors. They immediately all of them gets set to the color of the background.

If I come over here and test this. As soon as I click on one of these, you'll see they all turn to that dark color. Then I want to take the one that I clicked on, this one, and set it to this color here. We'll do that in the next lesson.

All of the backgrounds to default color.

Now we need to turn the background in the color of the font for the one that we've clicked on. Again, you can only click on one tab at a time so which one did you click on? You clicked on this one. We're going to use this keyword, dollar sign this and then we're basically going to do a CSS command like this here so I'm going to copy that and paste it here but the colors are going to be different. The background is going to be, eaeaea I think, and the color is going to be 333, like that and that should work. Let's save that.

Now when I click on "Brownies", you can see they're all turning to dark gray and then this one, the one I clicked on is turning white gray, so it makes it look like this tab is active. Now we've activated the tab, but we haven't actually changed the tab content. That's what we're going to do next, is change the tab content so that when we click on this to correct tab content shows up here.
How are we going to do that? Well, when we click on one of these, there's an href attribute associated with this link, with each one of these links. We know that the href attribute that's associated with these links is also associated with the content below, because that's how we had our markup setup over here. Remember up here, we set these href's here to link to these id's down here. Really what I need to do is find out what href I clicked on when I clicked on one of these.

We can do that very easily down here, again, using this keyword. I'm going to make a variable var, this tab. I'm going to assign it a value it can be var it can be constant I'll just use const for now. I'm going to use the, this keyword I'm going to use in our jQuery object and I'm going to use.attr, which is the attribute method in jQuery that allows me to get a particular attribute on an element and what attribute do you want, I want the href.

Just to see what's gong on with this, if I do alert this tab and see what I get. When I do this, you come back here and refresh the page. If I click on "Brownies" I'm getting pound tabs 2, if I click on "Cotton Candy", I'm getting pant tabs 3. If I click on "cupcakes", I'm getting pan tabs 1, that's getting me the correct tab, which is exactly what I want.
Now that we have that working and we're able to click on these and swap out the correct information there. What do we want to do? How do we want to actually handle this content here? What I want to do is fade out the content that's showing for the tab that's selected, then fade in the new content and that animation is going to be handled by the jQuery effects library. It's going to happen in 200 milliseconds. But that fade is important to the interface because it gives the user a clue that the information is actually changing. That's what we'll do in the next lesson.

Now we need to fade out the current tab that is showing.

What I need to do is get the tab that's currently showing, and we can do that using jQuery. The most effective way is to use tabs, angle bracket, div:visible. We've talked about this filter before briefly, and it will give us whichever one is currently set to display block. That's the current one that we need to set, and we're just going to set it to.fadeOut over 200 milliseconds. That will fade out the current one that's showing. The other ones are all set to display none. Once this animation is finished, we need to take the one that we've clicked on and feed it back in.
What we need here is a callback function. Once this is done fading out, we want to add a callback function, with its parentheses, and its current devices in here. I want this tab to get faded in. The way we're going to do is we're going to make use of our variable that we've already created here. We can use our jQuery object to get this tab. We know that this thing is going to hold in either pound tab dash 1 or pound tab dash 2 because that's what we found when we did this alert. You get this one and then we can do.fadeIn over 200 milliseconds. We'll fade that one in.

Now we have a nice simple script that allows us to capture these elements and use the jQuery effects library to feed them in and out. This isn't particularly heavy duty effects libraries stuff. It's not going to look terrible on mobile or anything like that.

Let's see if this actually works. Come over here, refresh the page. When I click on Brownies, it feeds the first one out and feeds the next one in, and that's working perfectly. Because of the animation, it's giving us a sense that the content is actually changing. That's a really good use of animation there and the effects library. That's working great. Let's just review the whole script. Here we're loading the jQuery library.
Then in our script, we're getting those anchor tags and adding clickHandler to notice that a function runs when they're clicked. In the tabs we are changing all of them to be the default background color, the unselected color for both the background and the color of the text, then the one we clicked on we're changing so that it shows the correct color in text for that one. We figure out, well which link did we click on, and then we're going to take the corresponding div that goes with that, fade out the one that's currently showing, and take the corresponding div and feed it back in.
That's the entire script. It's a nice simple script and does a nice job of making use of our effects library in jQuery to build something simple and effective that you could use in lots of websites.

Again, in summary, this is a great use of jQuery, and maybe if this is the only thing you're putting in your webpage, you'd use jQuery. It's not really worth it because you're downloading the entire library just to make these little tabs. We'll see how to do the same tabs in plain JavaScript, but it's working really great, and if you are using jQuery for other things on your website, then this would be really good use for it as well. The last thing to do here is just, put the script in a separate link file, add the IIFE immediately invoked function expression closure, and use strict directive, and link it in the head of the page with the deferred property and do all that stuff.

Here, I can just make a new file called script.js. On that file I can add my function parentheses, curly braces, and an extra set of parenthesis at the end to make it run. Then inside the curly braces, I'm going to use strict directive semicolon, and then I'm going to come back here and just copy this script from here. Already use const for the one variable that I have, so I don't really have to do anything with that. That's all fine, and that should be all good there.

Then back here I can just get rid of the stuff. Instead, I'm going to move these things up to the top of the page, cut them from here, and stick them in the head, but again, you have to add the defer attribute here, like that. Then for this script here, I'm just going to link to my script tags. I mean just SRC equals quote, script.js, and then don't forget, defer, and then this thing down here can go up. There we go. That should all work. Let's just test it really quickly and make sure it works. Refresh, and it's working great. We've got a nice, clean, simple script that we can use using jQuery.
Here is a PDF of the presentation slides used in the lessons for this section: Creating a Tabbed Interface with jQuery.

Now that you've created the tabbed interface using jQuery, we're going to create that exact same tabbed interface using plain JavaScript.

And that way you can compare the syntax between the two and understand the difference between playing vanilla javascript and J query and making use of the J query library. When we're done, the interface is going to look exactly the same and function exactly the same as it did before using jQuery except now we're going to be using plain JavaScript.

To get started I have my files open in visual studio code and you can notice that it's a little bit different in the setup and then I've added these classes; visible, hidden, & visuallyhidden. And we're going to making use of classes because we don't have the J Query effects library at our disposal. We're going to have to make use of CSS and classes to do the animation and do the hiding and showing of things. And we'll use javascript to trigger the changing of these classes.


First over here, I should open up this file here. So I'm just going to make a new tab and open this file. You can see that it looks the same as the previous one. I found it a little bit of the styling in here already.
But the first thing we need to do is get these things styled and the styling forgetting these things. Style is exactly the same that we did for the J query tabs. So you could actually go to that project and get that same styling from there. But over here, I'm just going to come in and just add, I'm just going to paste it in here. But this is the exact same rules from the previous version. We're setting for the ordered list inside the tabs and again we're using the ankle bracket because we want to target those elements specifically and we're setting them to display flex so they go next to each other.
And then down here for the anchor tags were setting to display block height, 30 pixels, line height, 30 pixels which puts the text in the vertical center margin on the right to pixels and setting the background color and all that stuff is exactly the same along with the border radius and all that. So that should all work to get our basic tabs to look the way we want them to look on our design. And that's really critical to kind of get started with their.
The rest of the styling that we need is a little bit different. And basically what we're doing here is I'm making these divs down here. They're going to be set with padding 15 pixels and a background color that's that lighter gray. And then the transition is what's going to actually handle the fading in and fading out of the opacity and we'll see how that works in the script. But this is where the actual animation is going to take place is here in CSS. So that's a little bit different. Then I have a class of active on the current tab up here that's selected and that's going to get the background color that matches that background color and the color of the text.
And you can see over on the html if you go look that the current tab cupcakes is active, it has the class active on here. So in our JavaScript will be moving that class active to each of these will be removing it from here and adding in each of these as you click on them to change them.


And then we've got a few helper classes down here that will be using hidden to set elements to display, not visible to display block and visually hidden. Which is going to be the opacity and that's what gets animated down. You'll see how this all works in the JavaScript. But for right now we need to add this over onto our CSS and you're going to have to type it in. I'm going to paste it so you don't have to watch me type it because it's not that interesting to watch me type this, but I'm going to paste it in here. But you can stop the lesson and go in and add this yourself.
Stop the lesson here and add these rules on your CSS tabs, angle bracket div set the pattern to 15 pixels, the background color and transition. We're going to be transitioning the opacity over 200 milliseconds using linear easing. So it's going to be the same speed all the way through. And then the active class on the tabs gets its background color in the color and then we need these three little helper rules down at the bottom here. So I'm going to save that. And of course, visual studio code likes to have them formatted this way. I kind of prefer these all in one line myself because there's just one declaration in each. Little easier to read. But that's okay. Well that visual studio code have its way with it.

So now we should have the look that we need for our tabs. If I come over here and refresh, it looks just like it did before. None of this is actually functioning yet. But the look is the same as what we had in the original in the original version of the Jacob version, and we'll start working on the JavaScript in the next lesson.
Attached is a zip file of the the things you need to begin this exercise. A zip file is defined as: a computer file whose contents include one or more files that are compressed for storage or transmission, often carrying the extension '.zip'.

Hopefully, you got all this CSS in place and now you're ready to start working on the JavaScript.

I have a linked script file here, and it's linked at the bottom of this file, you can see down here. I've got my script file linked.

I'm going to go to that script file and just work directly in here. I'm going to use var for right now, and later go in and clean up, and add Latin concentrate. But you could use Latin concentrate from the beginning here, but the first thing I want to do, is get all of my tabs and put them in a variable. I'm going to make a variable var tabs, and set that equal to document.query selectorAll. What do I want to get in here? I want to get very specifically the pound tabs, angle bracket, ul, angle bracket, LI, angle bracket a. Those elements. Using the elements that I want to get and assign to my tabs variable.
Then I want to add a click handler to all of them, so I'm going to use a loop for, var i equals zero, or i is less that tabs.length, i plus plus, curly braces and then down here I'm going to say, okay, tabs square bracket i, so each tab as we go through this loop, I'm going to add an event listener and the event listener is going to listen for a click.
And then when the click happens, we could run a function. We could do an anonymous function like this, and put everything inside of here. But in this case, it'll be a little bit cleaner to make a separate function, so I'm going to have a function down here. Function, select tab. I'll leave it select tab and parentheses, curly braces. Instead of an anonymous function, I'm going to run select tab, so I can just copy that and still be here. When you do this, you don't put in the parentheses up here, if you put in the parentheses, it'll run right away, and I don't want it to run right away. [inaudible]. I just put the name of this function here and that will run this function down here. That's going to get us started with getting our tabs, the next thing we need to do is figure out what we need to do in here.

What do we need to do in here? The first thing I'm going to do is, I'm going to pass in the event object here, so I can do event.preventDefault.

What that will do is make it, so that when you click on the tabs over here, you don't get the little hash showing up at the end of the URL. I don't really want that to happen. Prevent default will keep the hash from showing up.

Then I need a little bit of a loop, I mean I just do a four loop. Basically what I want to do is I want to go through and remove an index, I want to remove, any class that's on any of these links. This one has the class of active on it. I want to remove the class of active from all of these and then add it to the one that I clicked, so it gets the correct class on there. I'm going to use a loop to do that.
In jQuery, we didn't really need to use loops because we could apply things to groups of elements using your jQuery object, but in plain JavaScript, we need to loop through and do this. Here I'm going to add var i equals zero where i is less than tabs dot length, We're using the same variable that we created up here to the global scope there and then i plus, plus. Then I'm going to go through and say, okay, tabs, square bracket, i dot removeAttribute, class. That'll remove the class attribute from each tab, that'll get rid of all the class attributes.
Then after I'm done with that loop, I want to add it to the one that I clicked on and I could use this keyword here, but it's easier and better to use the event object that have already passed in and used with the prevent default. Can use it again, your event dot target. That will get this item event.target.className equals active,and that will put the active class on the one that I clicked, so I'm removing from all of them and then putting it on the one that I clicked. What we did in one line of jQuery, writing a little function here to do in plain JavaScript, but that should work, let's go over and test it.

If I refresh this and click “Cotton Candy”, you can see it's getting the correct class on there. If I inspect, and look at my elements here, you can see that one has the class of active on it. But then when I click on these, that class goes away on that one, but now it's been added here, so that one has class of active. We can see it moving around that class actives to each one of these. So we've done half our project. We've made it so that you can click on these tabs and have the correct classes. It looks like it's doing that, now we have to actually make the content work. We'll do that in the next lesson.

Now that we have the actual tabs working properly, we want to do something with our actual tab content to get it display, we have to do something with the new tab that we've clicked on and the old tab that is going to go away.

The first thing we're going to do is make a variable here, for this tab and we're going to make that equal to event that target. Again, the one that we clicked on, event.target.getAttribute. We want to get the href attribute so that will get the href of the length that we collect and put it into this step.
And then we want to get that element. So I'm going to have another variable thisContent and that's going to equal document.querySelector(thisTab).
And then we want to go get that div for whichever one was clicked and again only one of these can be clicked. So if you click on brownies it's going to get the class active.
So we've got those two things and we're going to hold off on those for a minute and let them do their own thing in a minute. But now we need to do something with the old tab and get its content, so we know what we're, what we're going to do with that one.
We will add another variable var oldContent and I'm going to have that equal document.querySelector('.visible');. Now, in jQuery we had the colon visible filter that would get visible tabs. But here since we're not using jQuery, instead each of these tabs has a class of either 'hidden' or 'visible' on it. This one is 'visible'.
What we're going to do is swap these classes around, so that when we click on one of the tabs one is visible and the other hidden. But we have to do an intermediary step to get the animation and fade out. What we're going to do is we're going to set its class name to 'visuallyhidden' and its opacity to zero.

And that will trigger this animation which fades that opacity down to zero over 200 milliseconds. Old content.class name equals 'visually hidden', make sure it matches how you spelled visually hidden over here. That is set to visuallyhidden. It's still on the screen, but it's just been transitioned down to the opacity of zero, so you can't see it anymore.
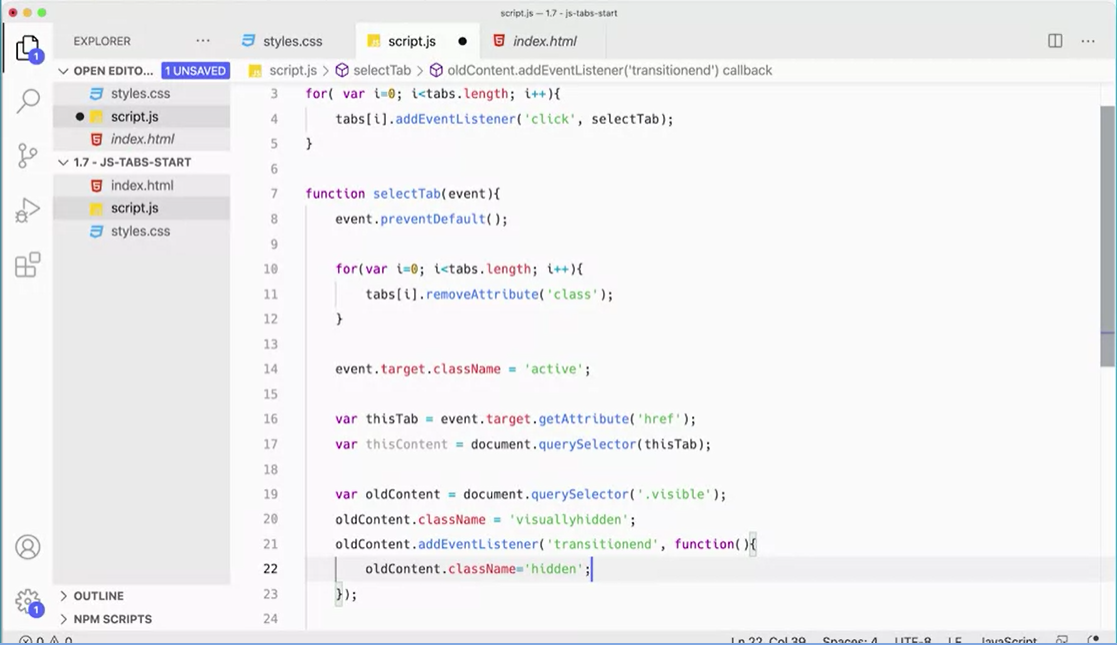
Then what we need to do is we actually need to add an event listener to this old content. And when that animation that transition has finished, we need to do something with it, we're going to take it off, we're going to set it back to its basically display none at that point.
And in jQuery, we have these great callback functions after the effects library does its effects that we can use. But here we don't have that instead what we're going to use as an event listener. So I'm going to put an event listener on old content to out event listener and the event that we're going to listen for is transition. And this be sure you get this right transition and it's not transitioned. Its transition and the end of the transition and make sure you get that right. Because when I've done this assignment with students in the past that's frequently where things go wrong, people put transitioned, which kind of makes sense. But it's actually transition yet.
Okay, so once this content the transition has ended, so transition and we're listening for that end of that CSS transition, it's pretty cool that we can do this in javascript is listen for the end of the transition, a CSS transition. We're going to run a function that's curly braces and a semi colon. And in this function we're just going to set the class name on this too after it's transitioned so that it's invisible. We're just going to set the class name old content that class name equals hidden, because now we can just say display blocking on and we've transitioned it down to opacity zero. Now we can just set it so displaying nine instead of display block at that point.

We've taken care of the old content, so we have said it.

We've taken the old content. What was the element that had visible on it? And we've set its class to 'visuallyhidden' and that fades it out. That sets it down so its opacity is at zero over 200 milliseconds (2 tenths of a second). When that transition has ended, we're going to run a function to set it, so that it's completely hidden. And that just sets it to display none.
Now, we want to set the new content to be visible, but with the current opacity at zero. So, after a very short time out, we'll set its opacity to one, so that it fades in.

Let's do that here. We're going to come down here and we already have a variable this content so we can use that. This content. This is our new content. We're going to set its class name. We're going to give it to classes. Were going to give it the class of visible. I think I spell that right. And visually hidden.
So visible will set it to display block, so that it's on the page. But visually hidden will set it so that it's opacity is at zero. And then we need to wait just a split second. And then get rid of the visually hidden class, so that the opacity comes up to 100%.
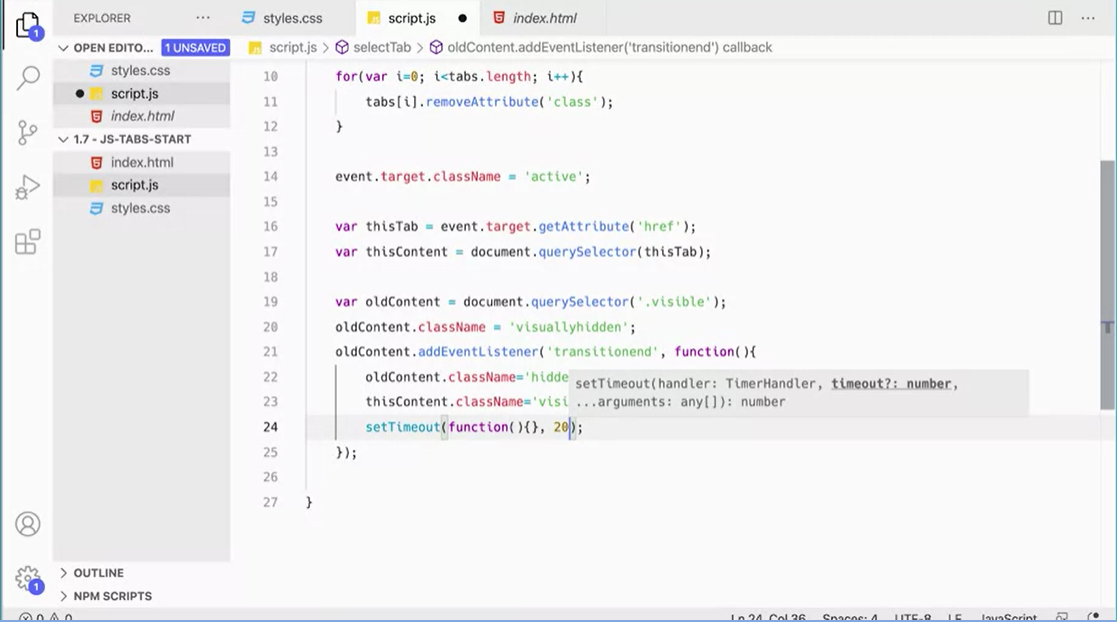
And to make it wait, we're going to use a method in Javascript that we haven't talked about yet. And we'll get more into this in a future lesson, but this is a good place to introduce it. We're going to use set time out. And set time out well, wait a certain amount of time to do something. And basically what we can do is we can pass it to function. That's going to run, over a certain amount of time. I was just going to wait a split second like 20 milliseconds. Very short amount of time just to let that thing come on the page, get the class set and then remove the class. So this function will run. This callback function will run after 20 milliseconds.
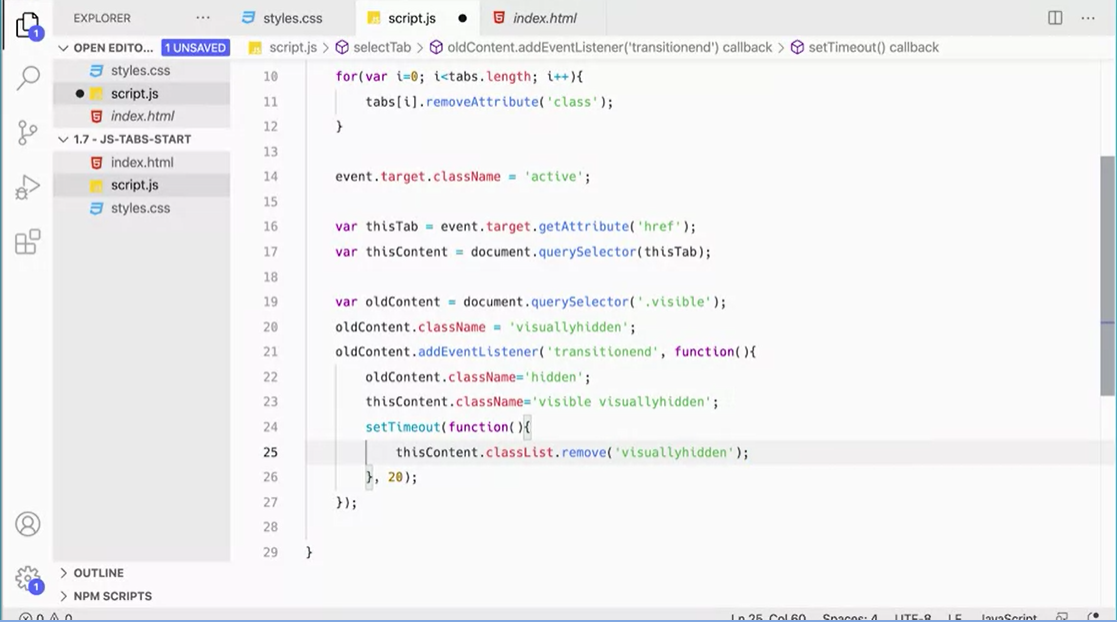
So I'm just going to click in the curly braces there. What am I going to do here? I'm going to do this content. Got class list. Done. I move, I think that works. I think I did that right. Visually hidden. You can spell that, right? So that should wait 20 milliseconds and remove the visually hidden class on their. Alright, we're ready to give this a try. You'll notice that there's a terrible bug that we need to fix. But it should be mostly working and then we'll fix the bug.
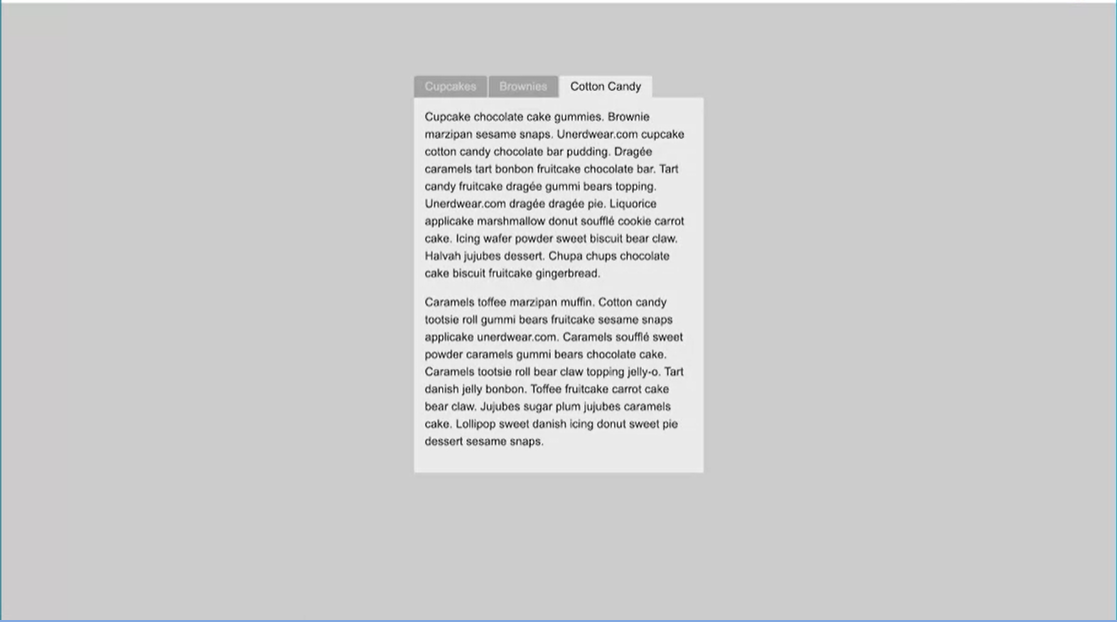
So let's give this a try real quick here. Refresh the page and if I spelled everything right. It's fading that one in and switching my tab, click on that one and it works, it's great. But then if I click another one again. I start getting this kind of weird blinking screen going on. What the heck is up with that? That is not what I was expecting at all. Alright, cool. I'm going to refresh this, so I don't have that going on. Okay, we're going to fix this and look at sort of the solution for fixing that in the next lesson.

We got our tabbed interface working, but you probably noticed that we had a pretty severe bug.
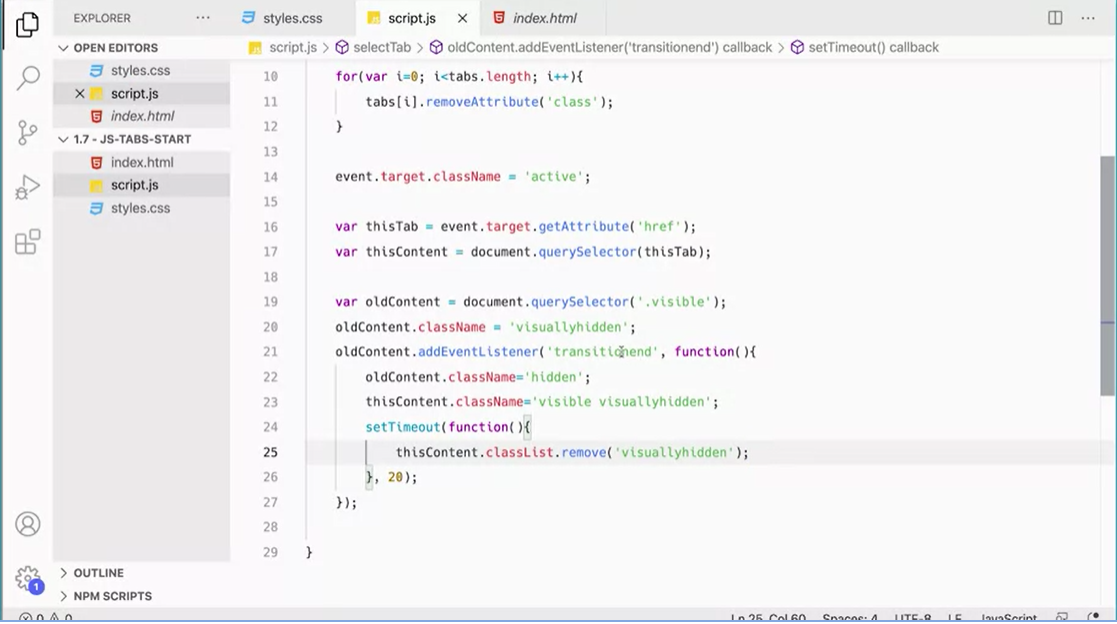
Where it works once clicking on the tabs, but once we click on them a second time, we get this weird flashing thing going on. So what's going on with that? Well, the real problem has to do with this transition and EventListener, because we've added the transition and EventListener. And it works when you click on the links the first time, it's looking for that transition end.
But that EventListener's getting added onto old content each time you click on it. So all of a sudden when you're clicking on it a second time, it's firing a second time and running again and it ends up in this weird loop where it's doing this kind of thing. So what do we do about that? What we can do is at the end of this EventListener down here after the function.
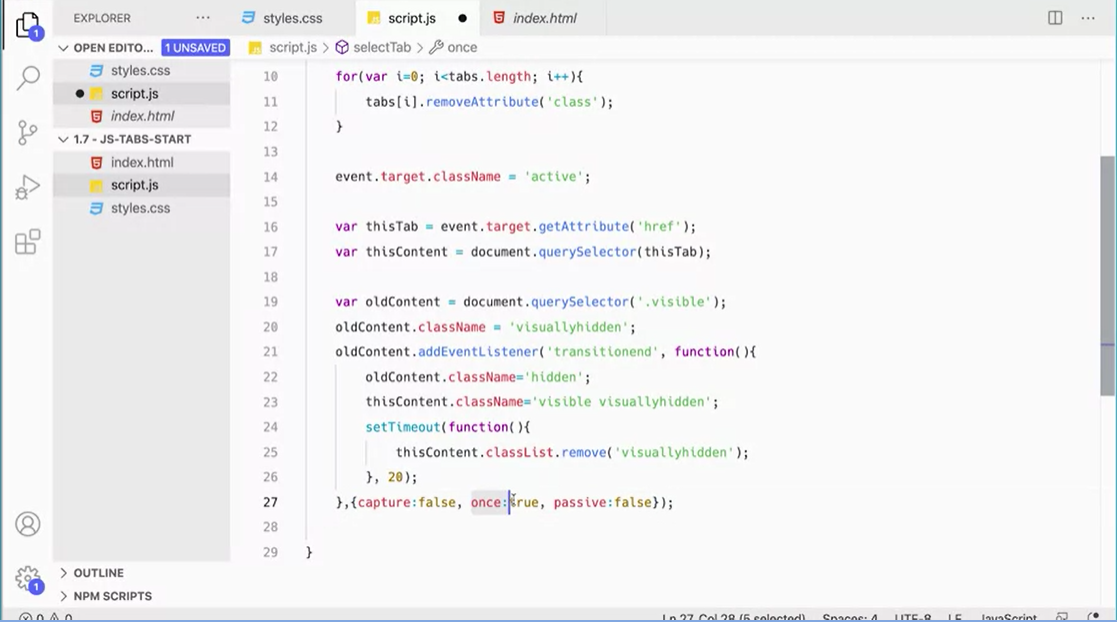
So this function opens here and closes at this curly brace here after this function for it that runs when the transition it. We can put a comma and another object, so another set of curly braces in there. And there's actually three settings that we can add to the AddEventListener that will help us work with these different pieces here. And what they are are capture, False, once:true, and passive:false.
The only one we really care about here is this once:true. What once:true does is it says add this EventListener once, and then when you're done with it, remove it, so that will get rid of that. Get rid of that problem, capture and passive, they're all false by default. If you don't put this thing in here at all, then they're all here but they're all false by default.
So we're leaving these two as false but we're making this one true, we have to put these two in if we're going to just change this one. So we pass in this little object here that has capture:false, once:true, passive:false. And if we save that and come back and refresh the page over here. Now you'll notice that I can click on it and it will run, but it's dispensing of that EventListener after the first time. So now when I click on it again, it's just doing it properly. It's getting rid of the old EventListener and adding the new one and only gets added once.
So now at this point we have a working functional script over here. We can look at the script and it's a lot more complicated than the jQuery version. I think we can all agree that this script is a lot more complicated in the jQuery version. And part of your decision as to which one you would want to use if you wanted to include such an interface on a project of one sort or another is, is it worth including the entire jQuery library in order to have a shorter script here? Or is it better to have the longer script and make use of CSS and do this kind of stuff?
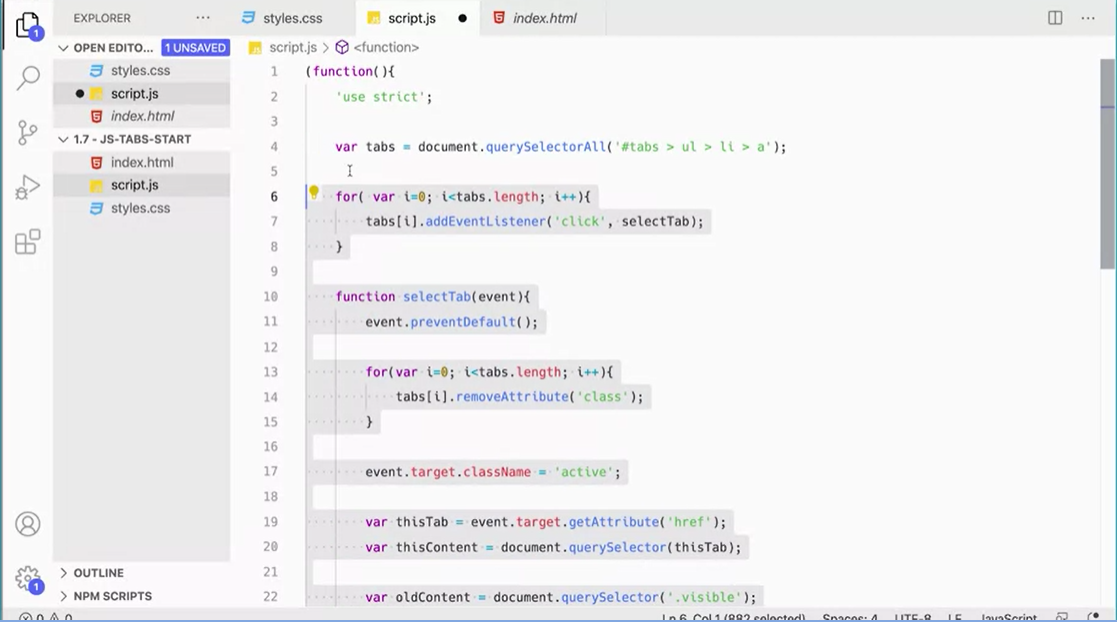
Now we can do a few more things to make this a little bit better, and to make it a little bit more efficient and perhaps a little bit shorter and easier to read and all that stuff. So we're going to add those things in next. The first thing of course, is to just do our best practices and add in here our IIFE, our immediately invoked function expression, (function( ){}();. And then in here we can put our use strict directive, like so. And then we can just make some room here and we can move this whole script into there.
And of course we can go through and we can change var to const if you didn't do that right from the beginning, that could be const. This one has to be let because it's inside of a loop. Down here this one needs to be let. And then these can be const here.
But there are a few more things that I want to show you that we can do with this script to make it a little bit better and a little bit more modern. And there are things that we're going to talk about in more detail in a later lesson. But I think it's good to introduce them in these small projects that you can get used to them before we talk about the theories behind them and really delve into them in more depth. I think it's nice to come into that kind of conversation with a little bit of experience with them. So we'll look at those features of Javascript next.

As mentioned in the previous lesson, this script is definitely longer and more complex than what we would see in it with the jQuery script.


There's some things about it that are always going to be a little bit confusing inherited this transition and thing with that capture in once and for, all that stuff down there, as well as using set-time-out to have to wait a split-second before swapping the classes to get the transition to work properly. But there are few things that we can do to clean up the code a little bit and make it a little bit better.
Again, you don't have to do any of this, you could leave the script the way it is, it works fine, the way it is. These are just some things that are worth looking at and thinking about in terms of syntax for JavaScript. We'll get into these features in more depth later. This is just a good opportunity to introduce them. One of them is the for each method which can work on arrays.

Tabs is an array because it's going in and getting all of these tabs, and there's just three of them, but it's an array. The for loop is fine. It works fine, but it's a little bit hard to read and a little bit cumbersome. The forEach method is a little bit nicer. Let's just try that and see how that looks instead. What we would do is we would say tabs.forEach like this. This is the forEach method. The forEach method, again, it's an array method, so it works on arrays. We do tabs.forEach, and we pass in a callback function that runs.
This function takes a variable that's going to work on each element and tabs and you can call it Eachtab, where you can call it tab. I'm just going to call and tab. It's going to do something with tab. It's going to go through each of the tabs and do something with tab. What are we going to do here? We're going to say, okay tab.addEventListener, and we're going to do click.
Then we're going to run this selectTab down here. This piece of code is doing exactly the same thing as this for loop here. You could either comment this out or deleted altogether and just use the forEach method here that will allow us to add an EventListener to each tab. I just think it's a little bit easier to read. Again, we'll get into this more later, but this is a good place to introduce it.
We can do the same thing down here in place of this for loop down here as well. We get even just paste this in, but instead of adding an event listener, we can just do this instead. But instead of tabs dash, the square bracket i, it's just tab, tab.removesAttribute class. Again, we're just replacing this for loop with that. That should work just as well as before. Let's go over just test this really carefully here. If I refresh this and test it, you can see that it's working exactly the same as it did before. You can get rid of these things here.

Now, even further in JavaScript, there is now a, something called an era of function. And if you've looked up I JavaScript online, you've probably come across arrow functions before. Again, we're going to get more into arrow functions and talk about them in more in depth in a future lesson. But this is a good place to introduce them because we could even further clarify these little functions here with arrow functions.
The way they work is like this, you get rid of the word function, and instead over here you put what they call an arrow, which is really just an equals sign integrator that sign in here. If you're passing in only one variable, you can get rid of the parentheses. Now we have tabs.forEach tab, and then this becomes the function that runs. Now, we could do the same thing down here.


Again, we're going to do this in more depth later to talk about arrow functions and when do you use them and when not to use them and what they're good for. It just gives us a clear tabs.forEach tab. You could even move this up, so it's all on one line. That helps with the clarity of the script.
Again, you don't have to do any of this stuff if you don't want to. The script worked perfectly fine before. There's nothing wrong with using the for loop and now using the forEach or using the arrow functions. But it just seemed like this would be a good place to introduce those ideas.
Just to summarize the lesson, we've created a typical tabbed interface, and we've done it with plain JavaScript. It's a little bit different than the version that we did in jQuery, and ultimately, you have to decide whether including the jQuery library and doing the shorter script is worth it. It's not that long, it's not that bad, it's certainly a lot less code to download than the entire jQuery library.
On the other hand, if you're using jQuery for other things in your project already, then using it for the tabs doesn't actually add any extra weight, and it works. It is short and quick and right to the point. This is a great example of the difference between JavaScript and jQuery.
If this helps you get used to working with JavaScript and more excited about learning it, then by all means, use the jQuery. If you prefer to learn the plain vanilla JavaScript because jQuery is starting to get phased out, then this is a good example of the work you need for it with plain JavaScript.
Here is a PDF of the presentation slides used in the lesson for this section: Creating a Tabbed Interface with JavaScript.

Welcome to the third module in our second course in JavaScript. In this module, you'll create some scripts that are useful and that you can put on actual webpages. Plus they'll build your skills and you'll get better at working with JavaScript and jQuery, they provide a lot of practice. Let's dive in and start working on these scripts. I think you're going to get a lot out of them and I look forward to going through them with you.

jQuery Image Slider, version 1, the basic slider.

Learning JavaScript and jQuery is the most fun when you're working on projects that you could actually use. In this lesson, we're going to make a basic image slider that you could put on any website. Plus, along the way, you'll learn some new things about jQuery and JavaScript and get a lot of practice.

Let's move forward and see how this project works here. The final project you'll have just a simple little slideshow where the images will slide from left to right or they'll come in from the right-hand side and slide over to the left-hand side as you go to the next image and then the other way round as you go to the previous image. We'll see how that actually works and how it comes out as we move along here.

In the start folders, you download the files that go with the assignment. In the Start Folder, you'll find there's an index HTML file, we've got a script file, and we've got a folder with some slides with some images that I took up at Bodie National Park which is an old abandoned ghost town. It's a pretty interesting place. Great place to take a lot of great photos. I took some photos up there, so we'll use some of those for this project.

If we come over and look at the index file, you'll notice that we have a div with an ID of slider, and then an unordered list with list items for each of the images for the slides in the slideshow. This is actually a fairly common setup that you will find for image slider scripts that you might find around the web. Then I've just got some links for the previous and next buttons.


If we come over here and look at that HTML, you'll see that that's what it looks like here. I'm loading my normalized script. I've got my CSS. I've got jQuery loaded here. I'm loading an easing plugin that we'll talk about in a bit. Then we've got our script file here, and then we've got our slides. That's all there. I've got a script file here which is empty. It's where we're going to write our JavaScript, and then we've got some styles that we'll talk about in just a minute here.

The important way to think about this or the important strategy here is that the images are all going to be lined up in a row.
What we have as the actual window, the slider div, is going to have overflow hidden on it so that you can't see the other images, and it's going to be set to position relative so that we can absolutely position the string of images, the strip of images inside that window. The current image will be displaying and when you click "Next", the next image will slide in or if you click "Previous", the previous image will slide in. That strip will basically slide back and forth left and right as we move through the slides.

Now, one thing to check out is the way that the styling works, and it's really important to understand the way HTML and CSS works because it's these tools that will provide the basic content and structure for our pages, and even though we're learning JavaScript, and that has to do with the behavior, the behavior very much is affected by the layout and the content of the pages.

If we come over here and look at this, the overflow hidden on this slider element here, which is, again, if we go back to the index here, it's this div here.
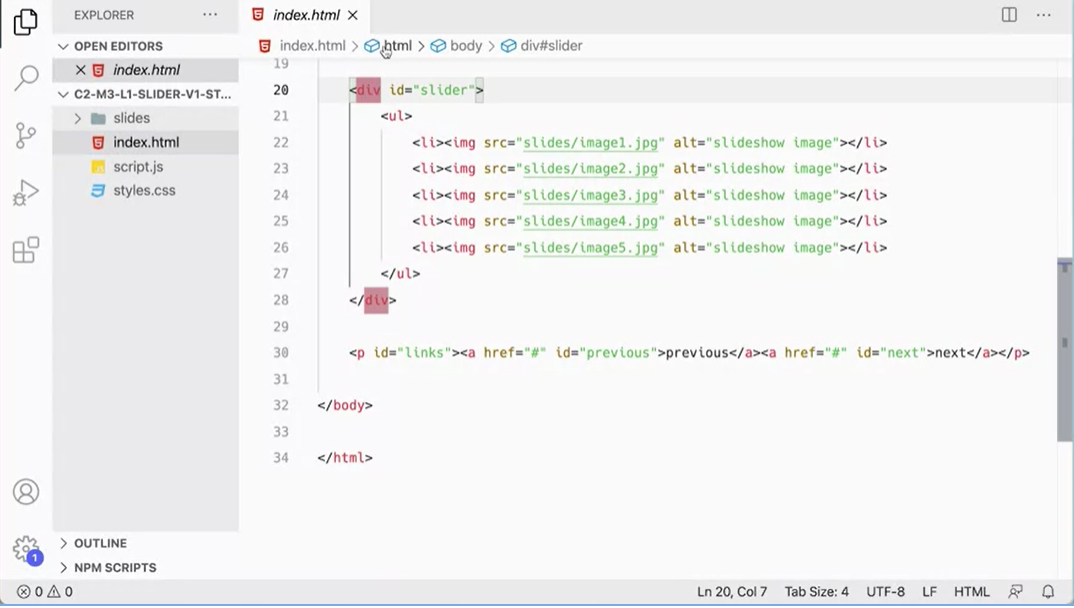
If I come and look at the page, it's this div here that has the picture in it. That div has overflow hidden on it and it is showing only the slide that is in the window and the width of it is set to the same width as the actual images. The height is set to the same height and then it's set to position relative so we can use absolute positioning.
If you know some CSS and you know about positioning, you know that when you set a parent to relative positioning, then the child set to absolute positioning is going to be set in relation to that parent element. Position 0, top zero, left zero puts that thing inside this container here. Then display flex is what makes all the images go into a row. Top zero, left zero puts that in the top left corner.
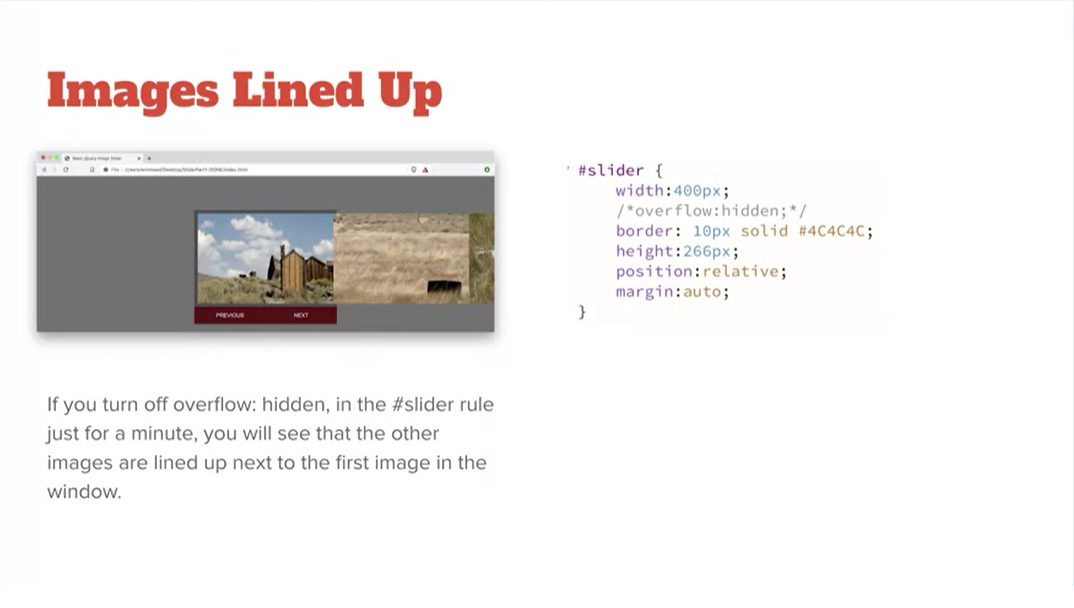
Now, if I were to go in and mess with this just a little bit, you can see what it will do. For example, if I take overflow hidden out of my slider declaration here. Let's do this just to see what happens.
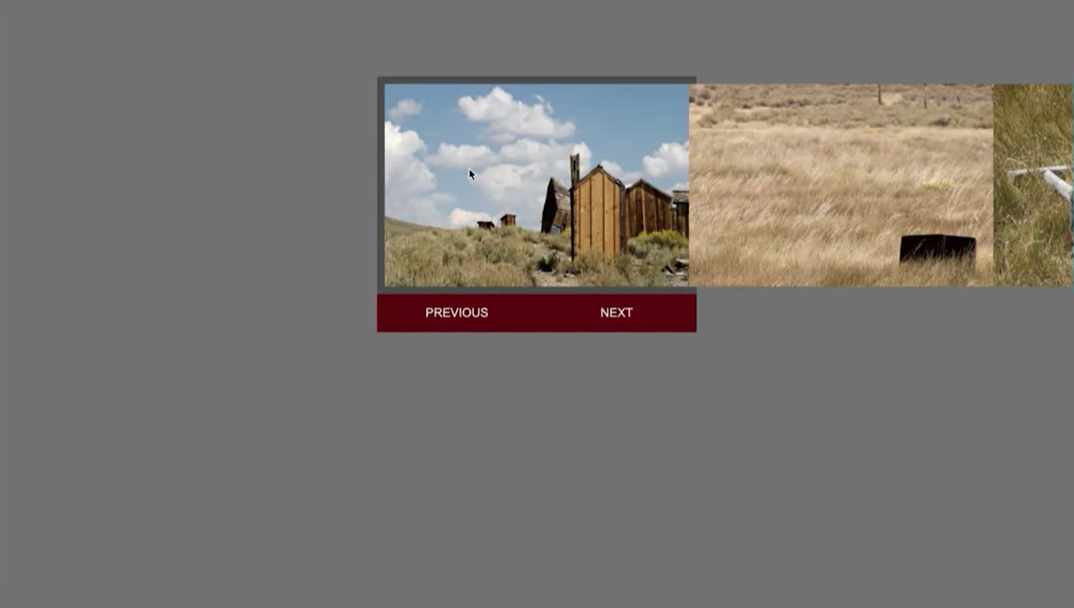
If I come over here to my styles and remove overflow hidden just temporarily, you'll see that the other slides are all lined up. Each one is on there next to each other and they're all lined up here. Just because of overflow hidden, we're not seeing them. We're only seeing what's actually in the window. We want to go back and put overflow hidden back so we're not seeing those additional slides. We're only seeing the one that's actually in the window. It's important to understand that that's how this project is set up because it has an effect on how we write our JavaScript.
Attached is a zip file of the things you need to begin this exercise. A zip file is defined as: a computer file whose contents include one or more files that are compressed for storage or transmission, often carrying the extension .ZIP.

One thing we want to do as we're working on our scripts is we want to make them as general as possible, so that if we were to add more images into our slider then our script to be able to handle them.
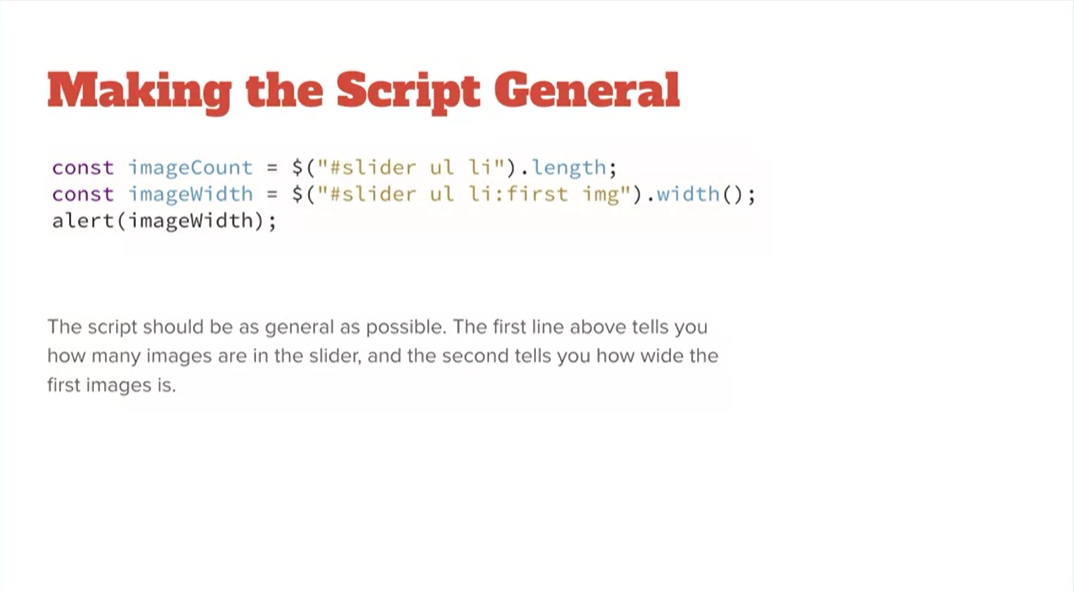
I'm going to use some variables to keep track of some things like, well, how many images do I actually have in my slider? I know right now that it's five, and I could just leave it at that, for image count, but I could just set image count to five. It really rather have it actually find out what is the length of my element here.
Then I also want to find out how wide is my image, and I'm going to assume that all my images are the same width because the slider won't look right if they're not anyway. I'm going to assume that all these images are the same width, but I need to find out how wide is one of them.
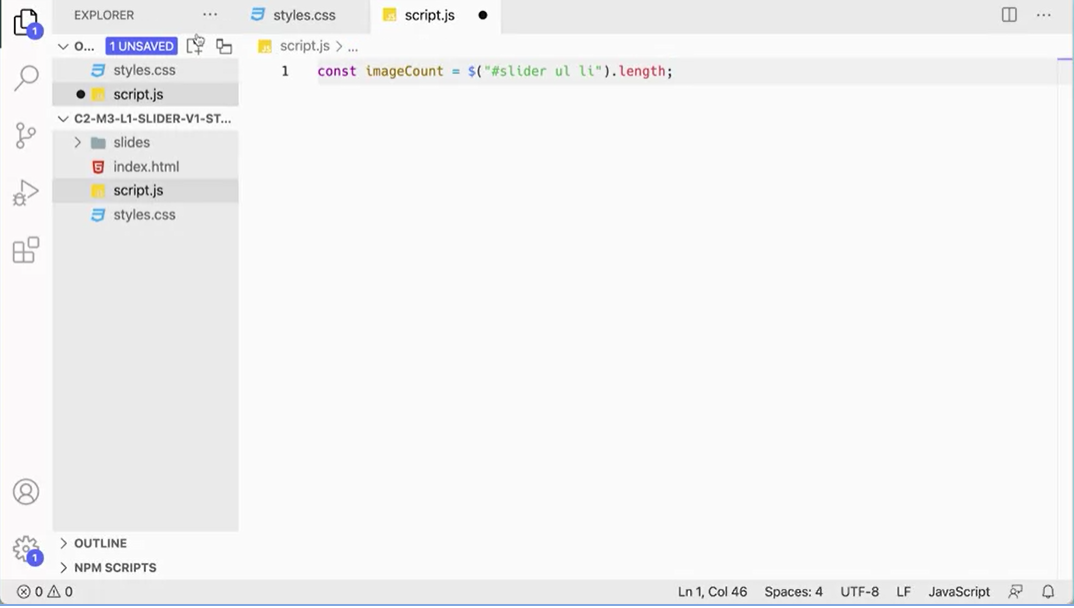
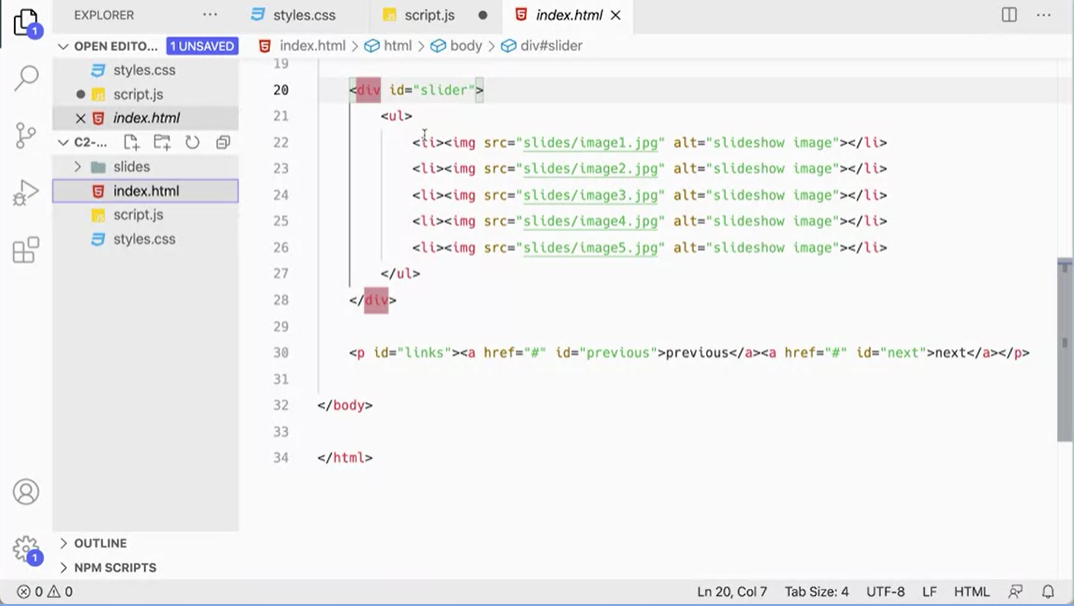
Let's add these two variables to our script over here. I'm going to come back to Visual Studio code and go to my script file, and here I can just add in const. What did I set this for? I set this variable to image count. How many images do I have? I'm going to set variable image count, I'm going to make it equal to slider, length.
It's "#slider ul li" dot length, and that will actually go in to my document over here (right image) and look for this slider element, and then find the list items, and we'll find out how many are there. That should return to me, a five in this case.
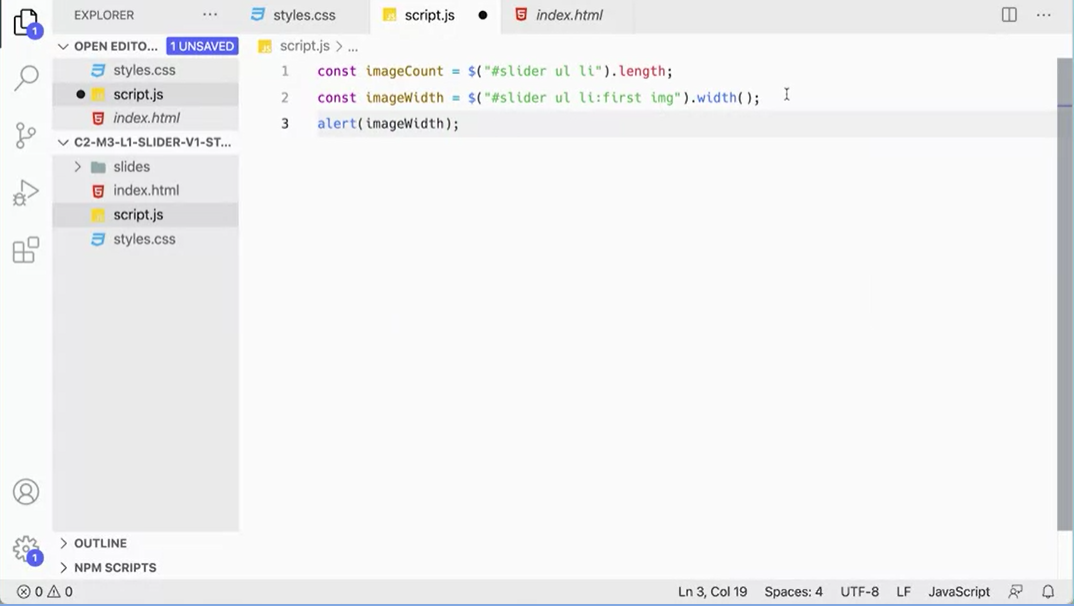
Then I'm going to have a variable const imageWidth, and I'm going to use my jQuery object for that, and I'm going to put in here "#slider, ul li :first img" dot width, and that should give me a number that tells me how wide might first image is. Let's see what that does, alert imageWidth. I'm getting 400. It's telling me that it's 400 pixels wide.
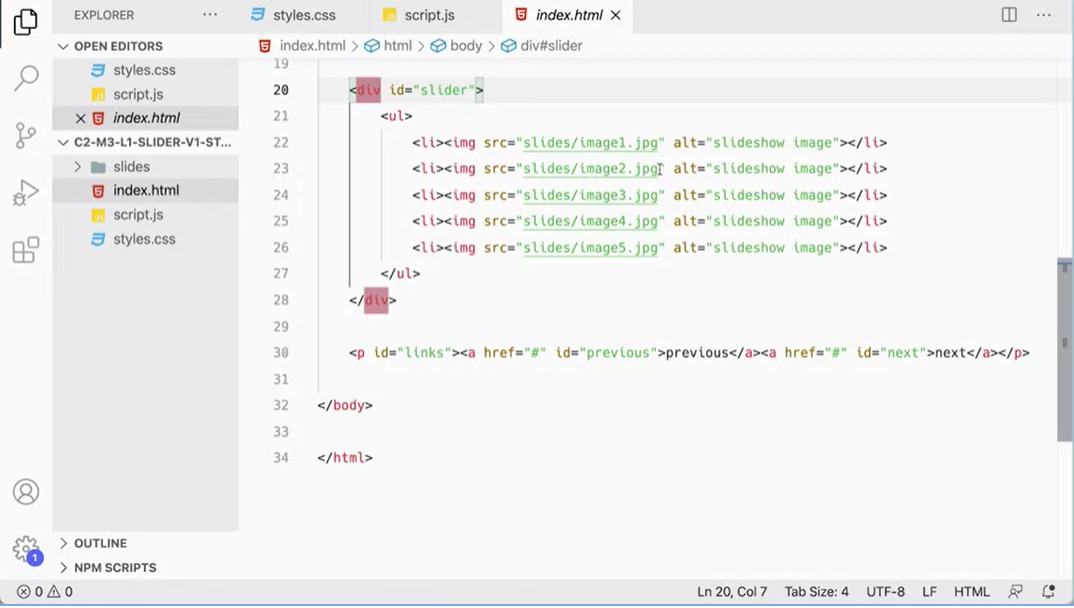
Before I move on, I'm looking at my slide here and realize I'm using this first pseudo-class here to get the first list item. What that does is it goes into the DOM here, and it looks at the first one of these list items and then gets the image. Now, as it turns out, jQuery has deprecated this first pseudo-class.
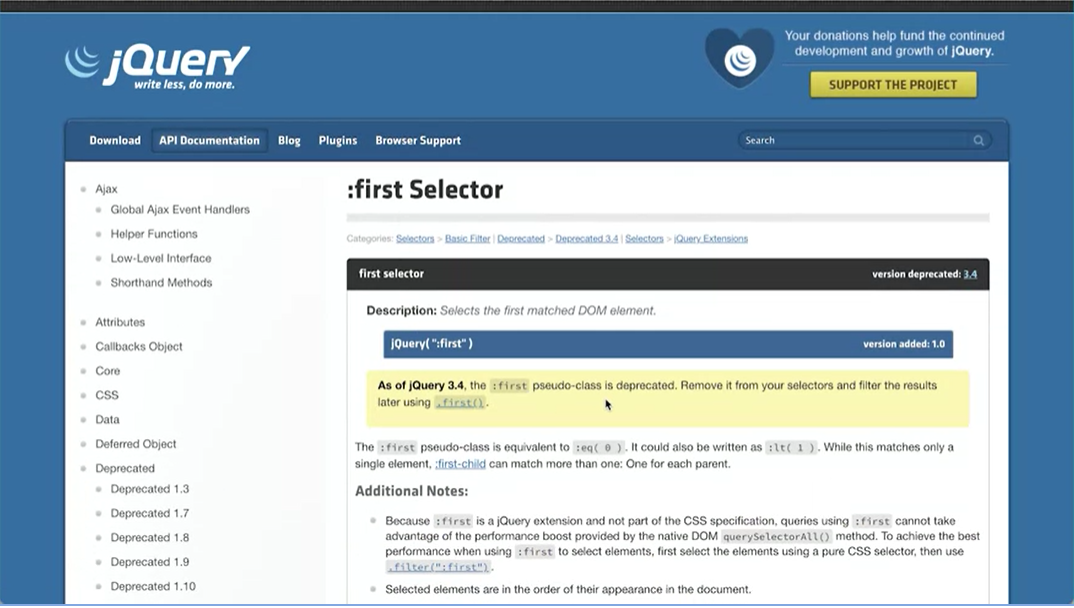
If you look this up on the jQuery website, it'll say deprecated. They don't want to use this, instead, they want to use the first method. Let's do that. I'll just do jQuery: first, in Google Search. You will see as of jQuery 3.4, the first pseudo-class is deprecated. Remove it from your selectors in filter results using dot first instead.
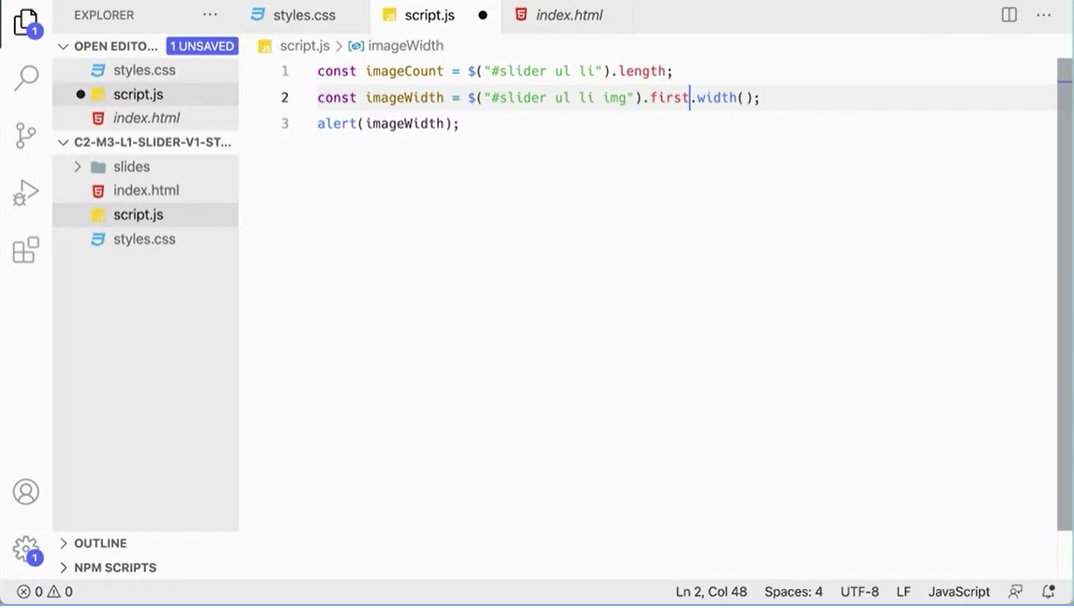
It's important when you're using a library like jQuery to stay up on sort of the latest trends with language as best you can, it's not always easy to, this one slipped by me when I made this slide, but I'm aware of it now. I'm going to fix it here in the lesson. I'm going to come over here and get rid of first here, and instead use first like that. That should give me the same result.
Let's check it. If I come over, I'm still getting 400. It is important to pay attention to these things as you can. I should add, while this still works currently in the current version of jQuery, it might not work in future versions of jQuery. Since I'm loading this version of jQuery up at this project, unless I update my link to jQuery to a newer version, it will continue to work. This is actually fine to use for now with the current version of jQuery that we have, but going forward, we should use the dot first method instead. I just wanted to show you that.

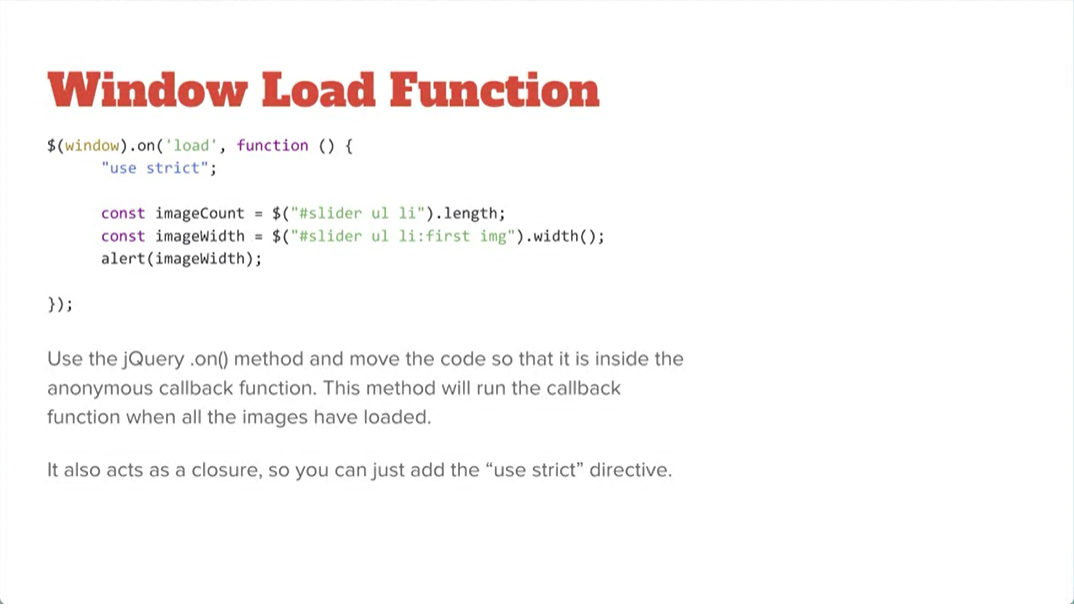
The next thing to consider is when resources are going to load, and in this case, this seems to be working just fine.

If I click refresh, it's giving me a 400 here but it's loading these images. Now, I have this file local on my computer, and that's all well and good and fine. It's going to load it really quickly since it's local on my hard drive. However, if I were actually putting this on the internet, it's possible that, that request to find out how wide the images are, we'd run before the images are downloaded and I could get a zero there, and I don't want that.
I want to make sure I'm getting the actual images. What I want to do to prevent that problem from happening is I want to add an EventListener that checks to see when all of the assets for the page have downloaded and it's not going to run the script until they are. We can use the on method in jQuery and the on method in jQuery is similar to the addEventListener method that we have in plain JavaScript and then you pass in a particular event that you're looking for. Then it'll run a function when that event happens.
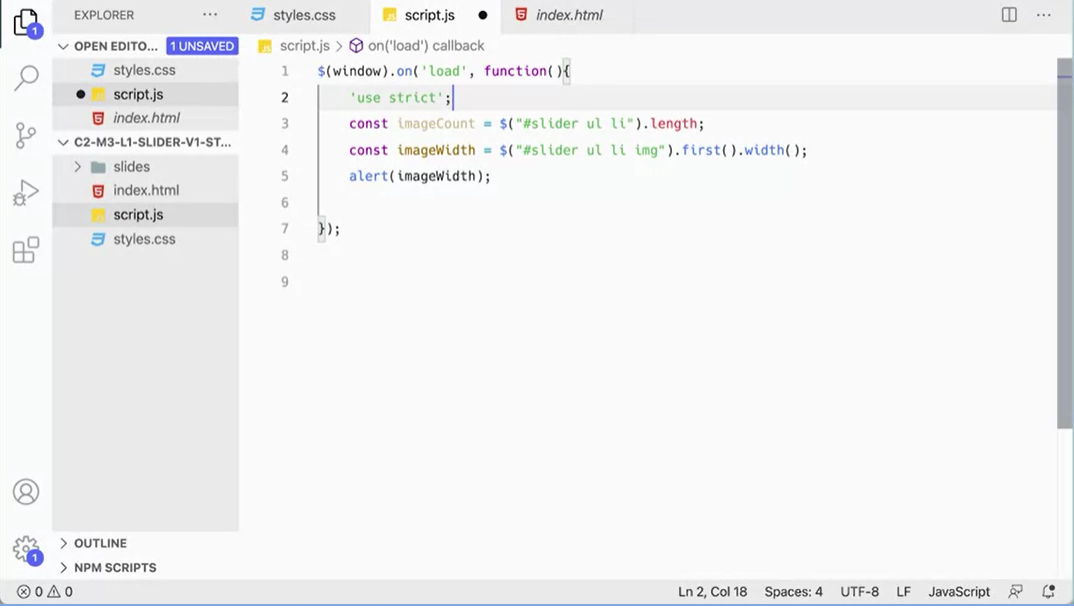
Here we're going to put the on method on the window object and the window itself. We're looking for a load event and this callback function will run when load is completed, meaning all of the images for the page have downloaded. That will keep the script from running until the images are actually there.
Let's add this onto our script and we're going to put everything inside this window load function for our page. I'm going to add my jQuery object and I'm going to pass in the window object. I'm going to use on and I'm going to look for the load event, and then I'm going to run a callback function. Then everything's going to go inside of these curly braces here.
While I'm here, this function here, will work as a closure for the page for this function. This thing is all in its own closure, we can add our use strict directive, right here. We don't need to make a separate IIFE, the Immediately Invoked Function Expression. We don't need that because we want this function to run when the page has loaded all its files. When it has, then we can say, okay, now you can run, and we're going to set up these variables in alert.
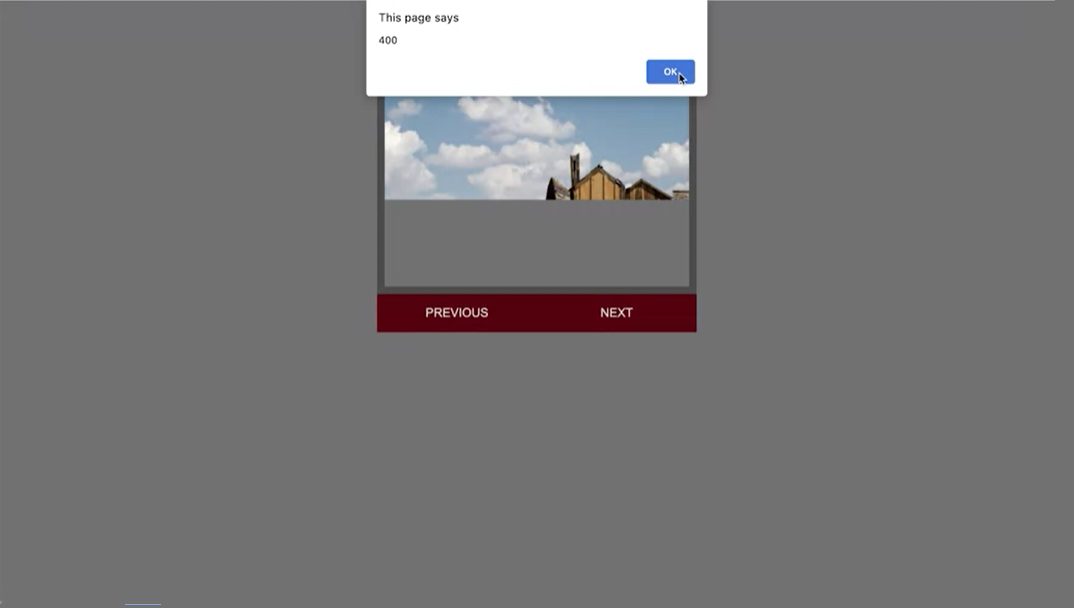
We should still be getting 400 but you can see that the image started actually coming in because before that alert ran.That's one thing that's slightly different is that it's actually loading the images first. Because we are loading from our hard drive, it's not that big of a deal.
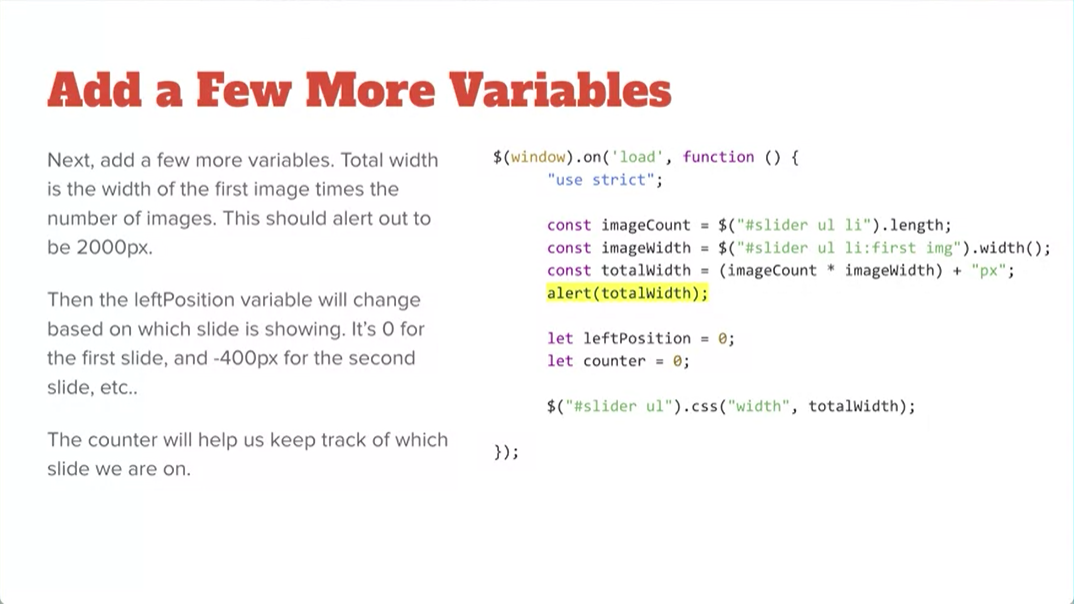
Next, we're going to add a few more variables to our project. We need to know the total width of our whole slider. For that we're going to take the image count and multiply it by the width of each image. That will give us our total width plus we'll add a px to the end of that.
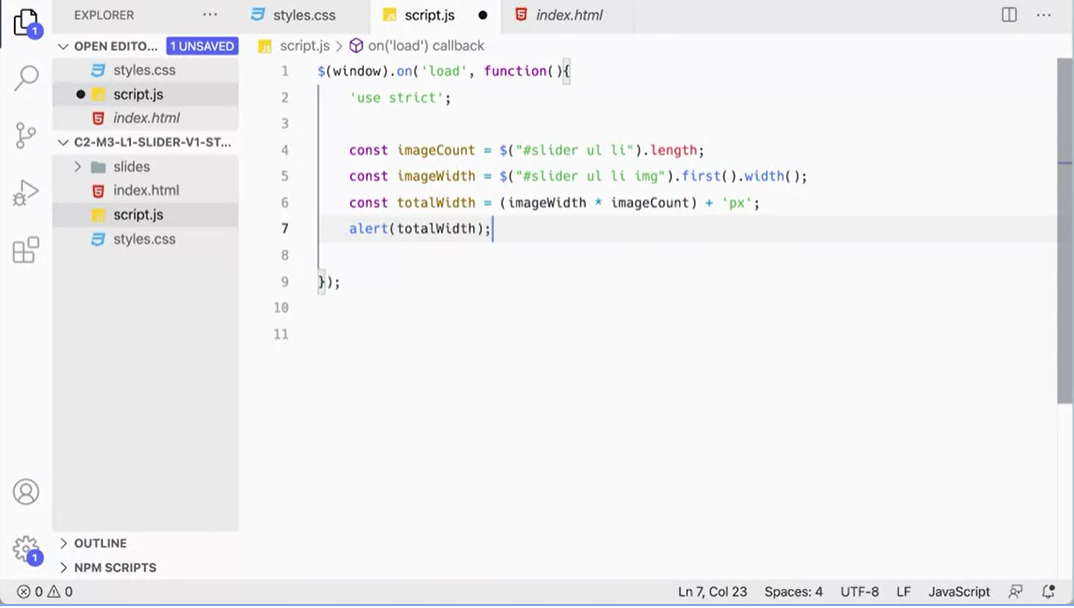
Let's go ahead and add that to our script now. I'm going to get rid of this alert and just to const totalWidth, and this is going to be equal to imageWidth times imageCount. Doesn't matter which way around it goes right, it's going to come up and same thing. Then we're going to add onto that a px at the end of there, that's going to put that in there. Then let's just alert out total width which is to see what we're getting here.
I'm going to come back here and now when I refresh, I'm getting 2,000 pixels because I've got five images, each of them is 400 pixels wide, that's 2,000 pixels. That's adding up and doing that properly, which is great.
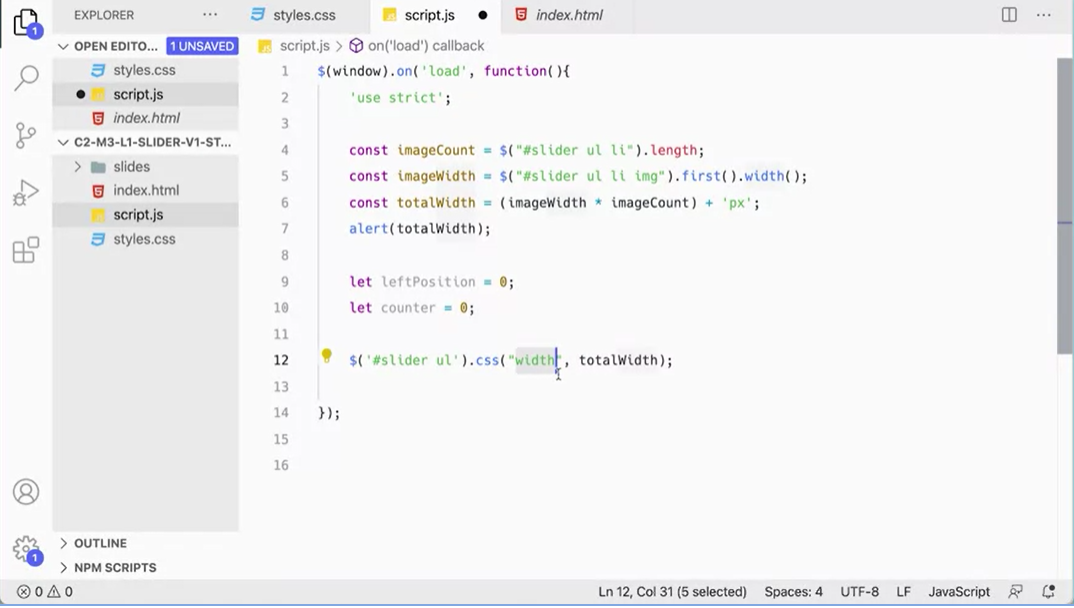
Next, I'm going to need a variable for left position. This variable can be changed in the process of running the script. I'm going to set it with the keyword let and I'm going to have a counter that's also going to change. Then I'm going to set the width of my slider UL to be that total width. We'll talk about that in just a minute here, let's go ahead and add these in. Let position equals zero, let counter equals zero, then I'm going to use my jQuery object to go in and say, Okay pound slider ul.css. Your width is going to be total width. Let's stop the lesson here and then we'll talk about this more in the next lesson.

In our previous lesson we had set this setting here which sets the width of our unordered list to the totalWidth and I just want to talk about this now.

If we go over to the styles, you'll see on here that the slider UL isn't given a specific width, but I want to add a width to it because that will make sure that when I set it to display flex that everything fits properly inside this UL.
Adding that to the script ensures that the slider is going to be the exact width that I need it to be, 2000 pixels.
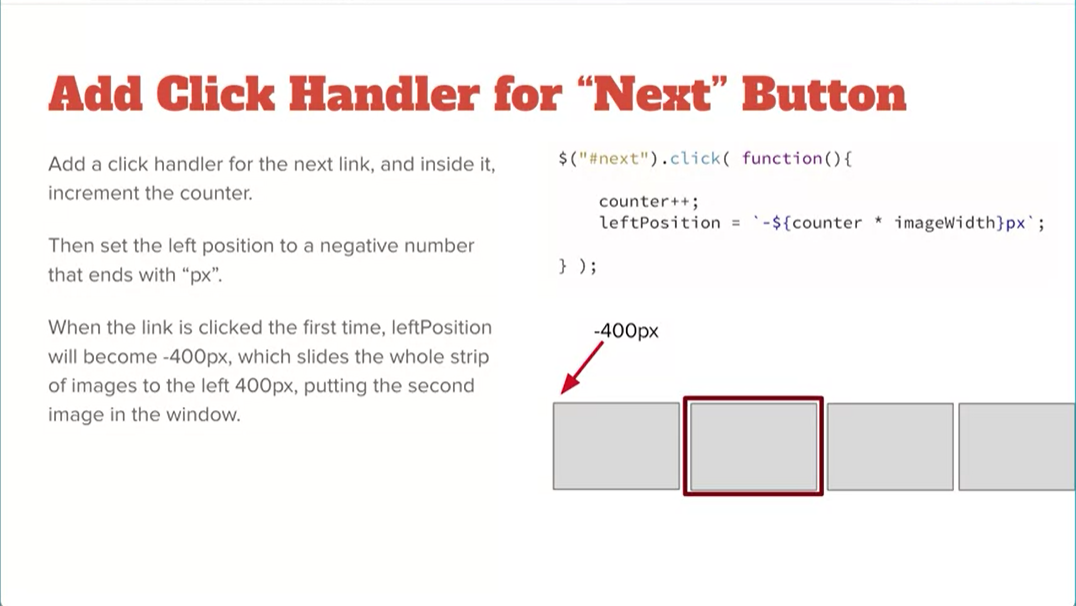
Now we're ready to add our click handlers and make the script work. We need a click handler for that next button. And when you click the next button, we're going to increase the counter. The counter is going to go from zero to 1 and then we're going to set the left position to a -400 pixels. We take that counter and we multiply it by the image width; 1 * 400 is 400 and we're going to put a - in front of it because we're going to move it a - 400 pixels.
Let's add this into our script over here again. The best way to do this is to type from the outside in. I'm going to add an event listener like this.
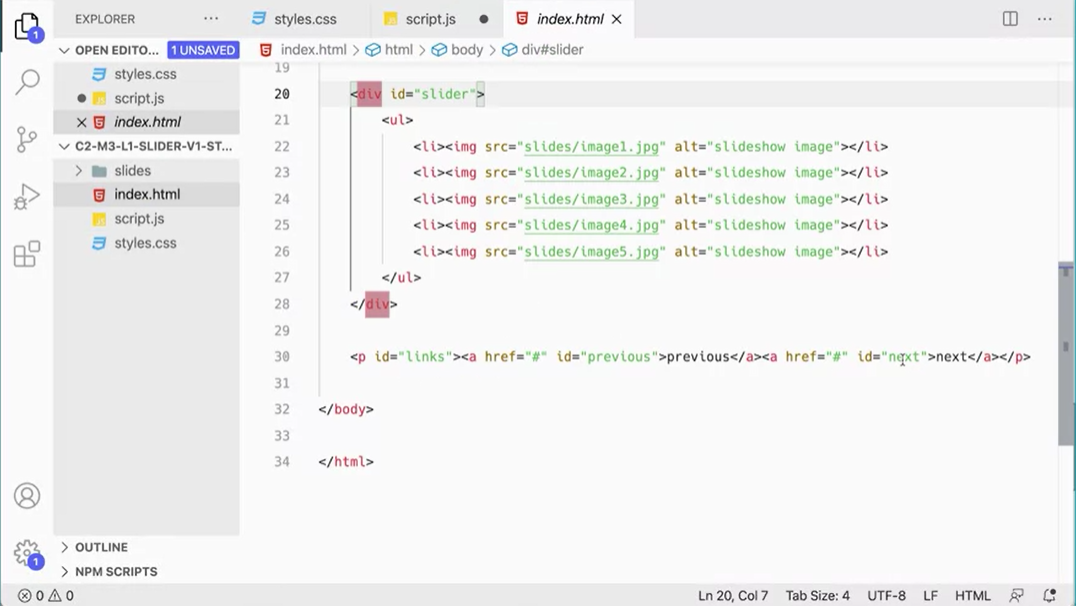
I'm going to start with my jQuery object and then I want to get the element that I want to work on my pound next element which if we go back to the index file here is this link.
Right here id equals next for this link when you click on this button that says next. When we click on that, we want to have a click event handler. And then we're going to pass in an anonymous function that runs when you click function, parentheses, curly braces, click between the curly braces and move that down.
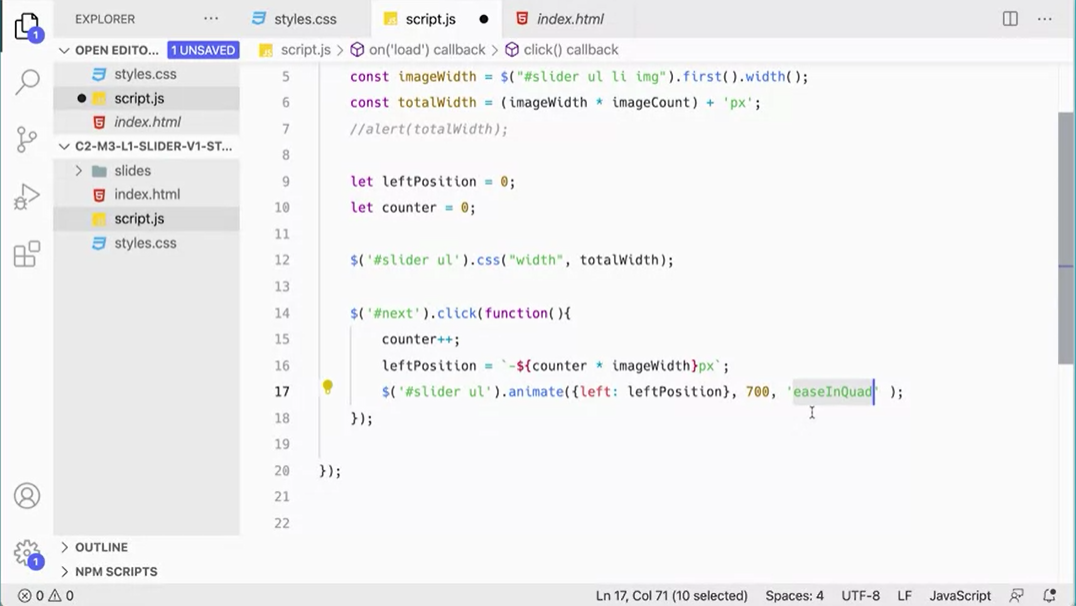
So when we're here now, we're going to take counter, and increment it plus plus. So counter has now gone from zero to 1 and we're going to set the position of the of that slider over to the left -400 pixels. So we'll set leftPosition. That variable there is going to be set equal to counter times image width and it should be a negative number, counter times imageWidth a negative so that's going to give me a -400 and then I also need plus PX and that will set that left position to what I need it to be.
I think it's a little bit easier to read if I use my tick marks, put the whole thing inside of tick Marks and then I'm going to use the dollar sign and the curly braces. $ and curly braces like that. So I've got counter times imageWidth. So I'm using my string literal here to get to give me a negative to counter multiply by image width. That's going to generate a 400 and put a negative there and put a px at the end. That will set the left position.
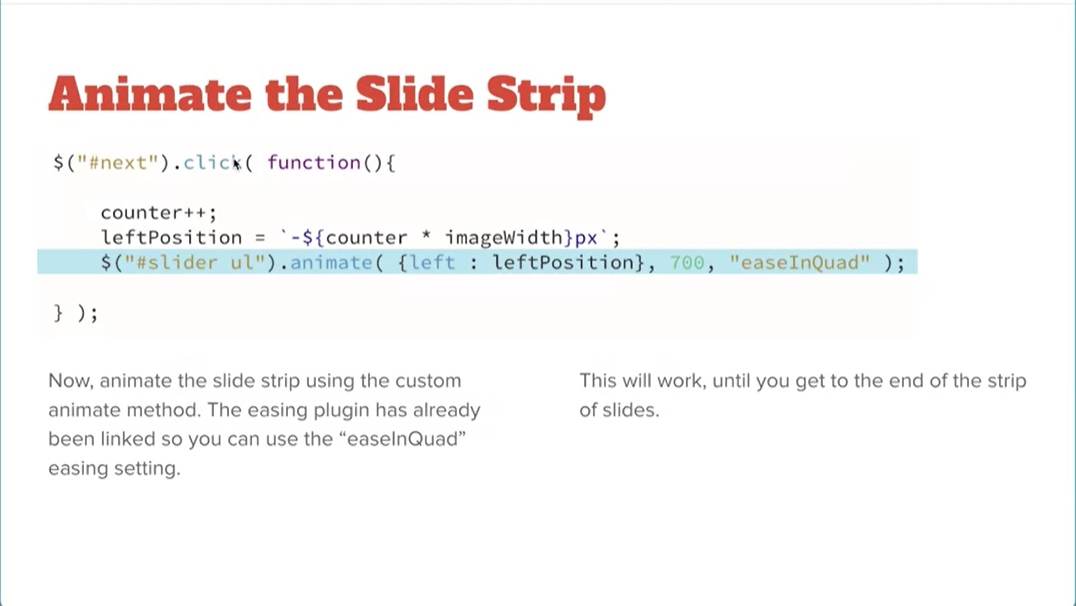
Now we want to animate that element and what will that look like?
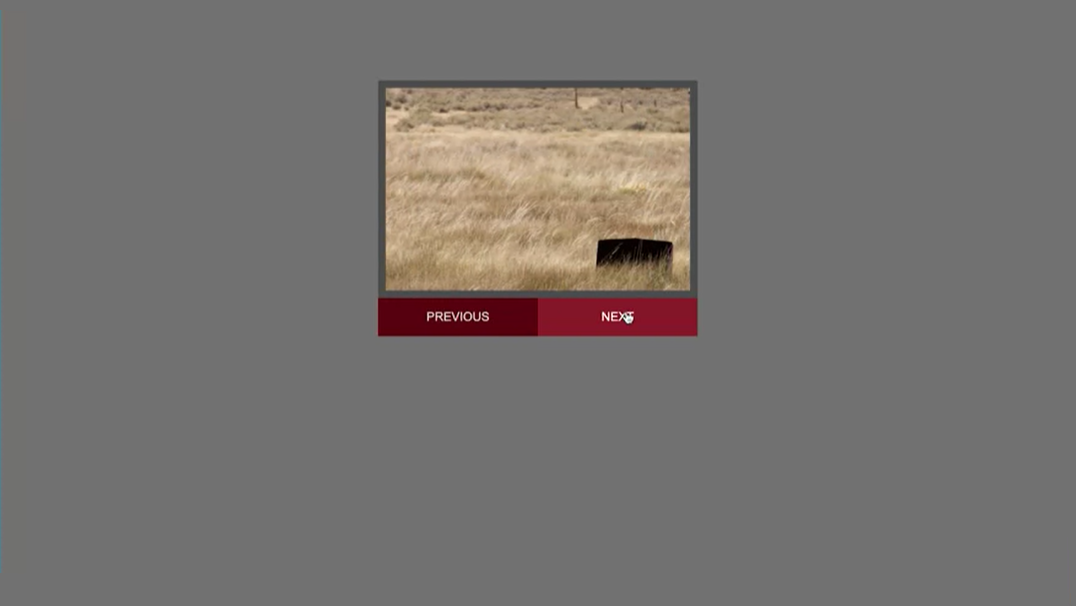
It'll look like this. We're going to go get that slider and we're going to animate the left property to left position, which we know is going to be when you click it the first time it's going to be -400. When you click it the next time it's going to be -800. When you click it the next time it's going to be -1200. It's going to move over 400 pixels each time.
For each image, we'll set it to a speed of 700 milliseconds and then we'll use the easeinQuad easing method of the easing plugin already put into the project.

Next, I'm going to get pound slider UL and perform the animate method on it, our custom animate. And in there we're going to pass in an object and we'll get more into objects and how they work in a later lesson. But for right now it's just takes key value pairs. We're going to animate the left property and what are we going to animate it to? We're going to animate it to the leftPosition, which the first time you click the button will be -400, then a comma and then I'm going to say 700 because that's the only property I'm actually animating.
700 milliseconds is how quickly it's animating and I'm going to do easeInQuad, which is the easing that I have selected for this particular animation. You could do a different one if you wanted to, but that will get the correct animation. And that needs to go inside quotes. Now with that, this should be somewhat functioning. It'll function until we get to the end of the end of the strip.
Let's give it a try over here. Now if I click next, it will animate right to the correct spot, and then it goes to the next one, and then it goes to the next one, and then it goes to the next one. And if I click it on the last one, it animates right outside (see image) of the strip. The entire strip is off to the left over here. That's what we'll need to fix next.
In the previous lesson, we got our click handler working. So that you can click on the the button, and the images will move forward and the slider will function. But when you get to the end of the strip slides right outside the slider window. Which is not really what we want.

What we need is an if statement to make this work. We're going to add an if statement to check to see, if the counter is the same as imageCount. And if it is, then we're going to set imageCount back to zero. And that will put the strip right back to the beginning. What we want is remember imageCount saying how many images we have. So it's five. We want a number that's either, we want count to either be zero, one, two, three or four. As soon as it hits five, then we're out of range and we want to put it back to the beginning.
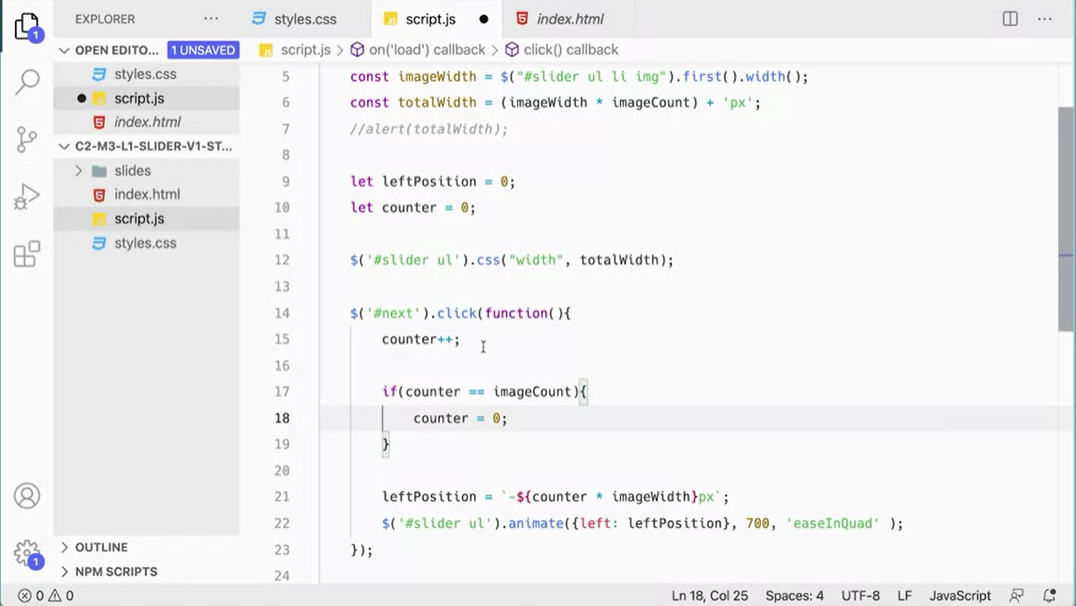
Let's add this "if statement" into our script over here, to handle that. Down here, I'm going to increment the imageCount and then check to see if the counter is the same as image count. If it is, reset the counter back to zero equals the same as you could also do triple equals. Which would be exactly the same as, in this case I'm not really worried about type coercion. But you might want to be extra careful and triple equals in there, and there we go.

Now if we come back and test this, refresh the page, when I click next, it'll go all the way through my slides. And when I get to the last one it goes back to the beginning. And that will continue to work, as we go forward through the script.
Now your job is to think about what you could do to create the click handler for the previous button. Because currently this button doesn't have anything going on with it here. It doesn't have any event listener at all. So, we need to add an event listener for this. That will make the slides trip go, the other way.
Now, the way to think about this, is to start with thinking about what happens if you're at the end. Website went too far. There we go. If we're at the end of the strip and we click previous, we want to document the counter. And move the strip the other direction. Think about what you could do, to create your own event listener for the previous click button. And then we'll take a look at it together in the next lesson and see if you got the same answer I got.

In the last lesson, we created the Click Event Handler for the Next button and it's your job to create the Click Event Handler for the previous button.
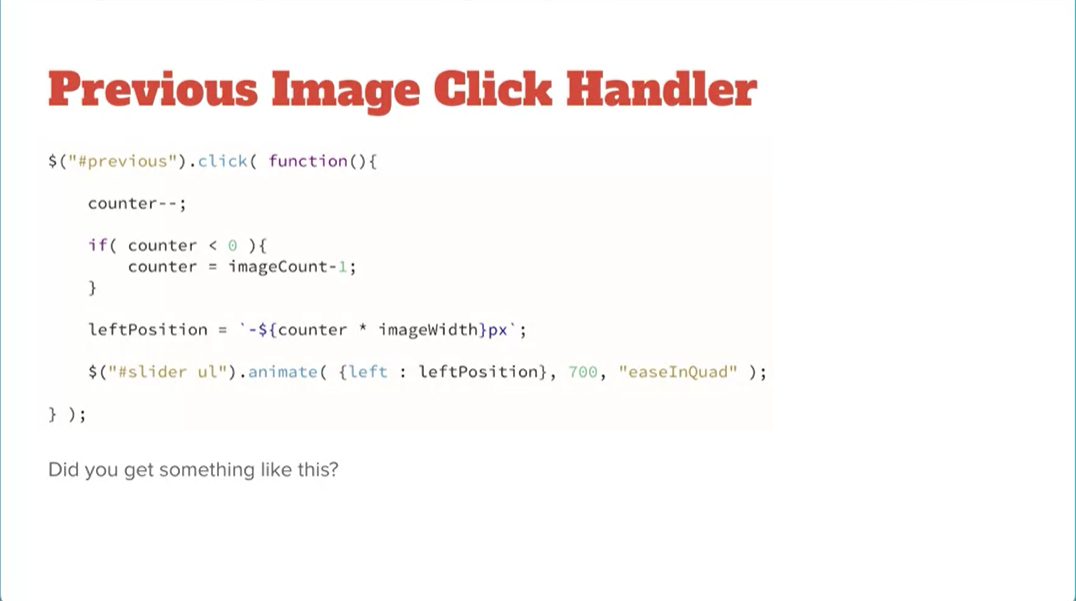
This is the answer I came up with. I have an event handler looking for that Previous button and click on that Previous button. Then take the counter and decremented by 1. Here the if statement is going to change so that if the counter is less than 0, then I'm going to set the counter to image count minus 1. I don't want to set it to five and want to set it to four because remember our counter needs to be a zero, a one, a two, a three or a four for our five images. If the counter is less than 0, then it's out of range. Then we want to put it in range by putting it at the end of the strip.
The way to think about it is to think about it from the right end of the strip, the right-hand end or a fifth image, so that if we're on the fifth image, we're going to decrement to four and then we're going to decrement it to three and then to two, and then to one and then when we get to under zero, we're going to set it back to the last image. Then we're going to leave the leftPosition. These two pieces (counter and imageWidth) stay exactly the same. In fact, we could actually make the script, make this event handler by copying and pasting the next, because a bunch of it is the same.
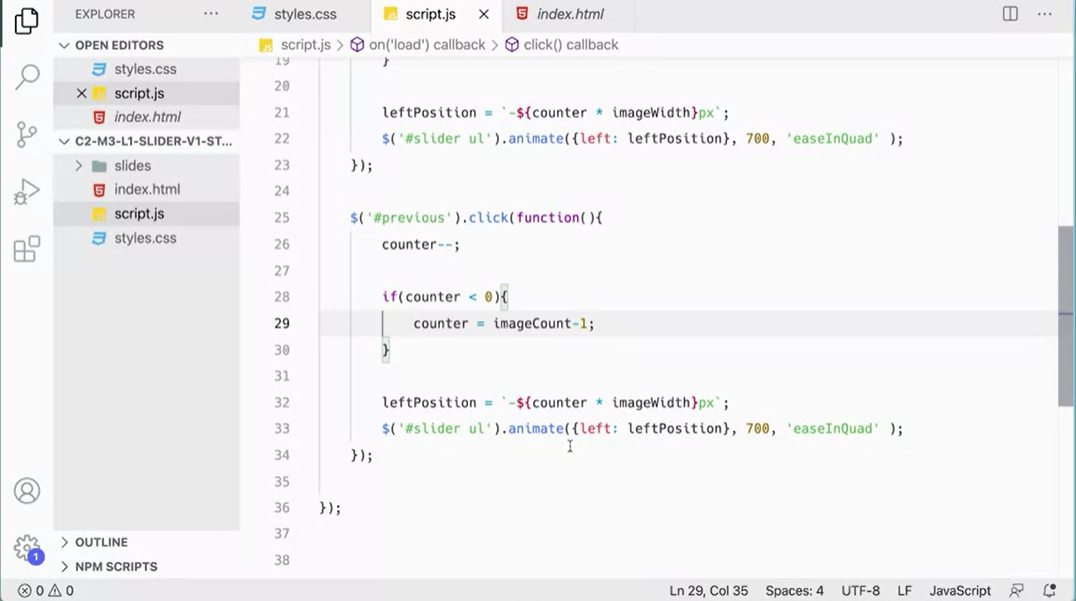
What we're changing here is instead of next, we're changing this to previous. The character instead of getting incremented, gets decremented minus minus. Then instead of setting counter, checking to see if it's the same as image count, we're going to see, is it less than zero? If it's less than zero, then we're going to set it to image count minus one.
Remember we're talking about an array here. We want our counter to be a zero, a one, a two, a three or a four. But when it's five, that's too high. Image count is going to be five in this case because we have five images. Last two command lines remain the same.
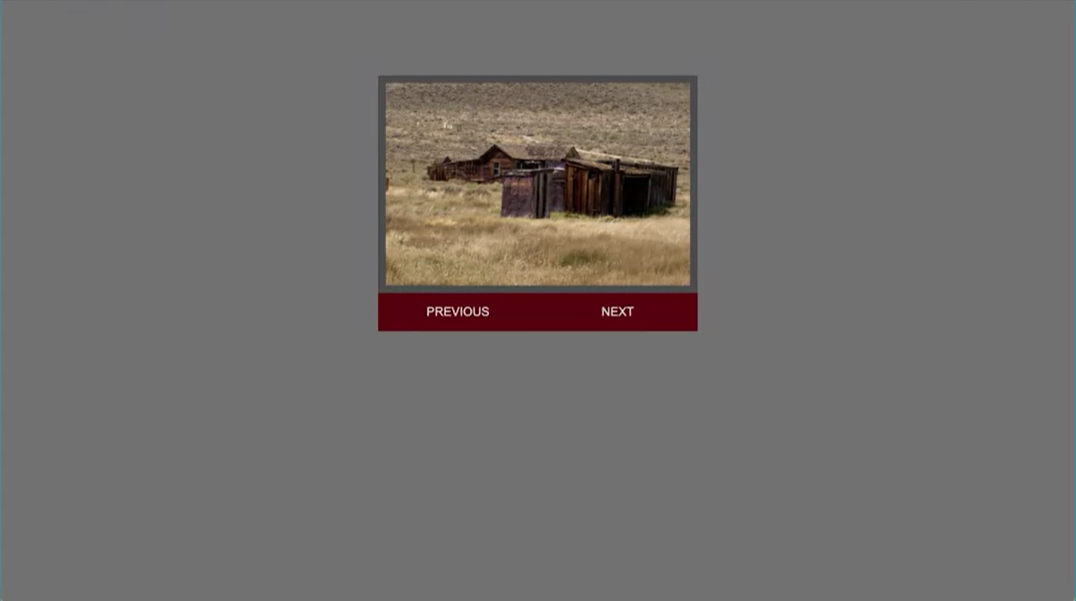
Come back here, refresh the page. Our next button works, our previous button works. If I go all the way to the end, I can go all the way to the beginning. If I'm somewhere in the middle here and I click "Previous" and then click "Previous" again, it will go all the way to the end and there we go. I can go next and previous and I can go.
Basically this is a strip of photos that's moving back and forth inside of this window. Here you have a basic image slider that you could style and work with images on your website for any website you want. You just want to make sure that your images are all set up to be the same size to begin with and it'll work. You could have as many of them in there as you.
Now it might seem weird that the images, when it gets to the beginning here, it moves the whole strip over to the end. Wouldn't it be nice if it wrapped around instead? That's what we're going to do in the next project. We're going to take this script and push it further so that we can actually make it so that it wraps all the way around. We'll take a look at that in the next project.

jQuery Image Slider Version 2.
In this version, we're going to take the slide show that we already have, the slider that we have, where the image is sliding in. The one that goes to the end and then brings you back to the beginning and works as a strip. We're going to take this thing and make it so that it wraps around so it feels a little bit more natural. And I think that will be kind of a nice effect if this thing wraps around like that.
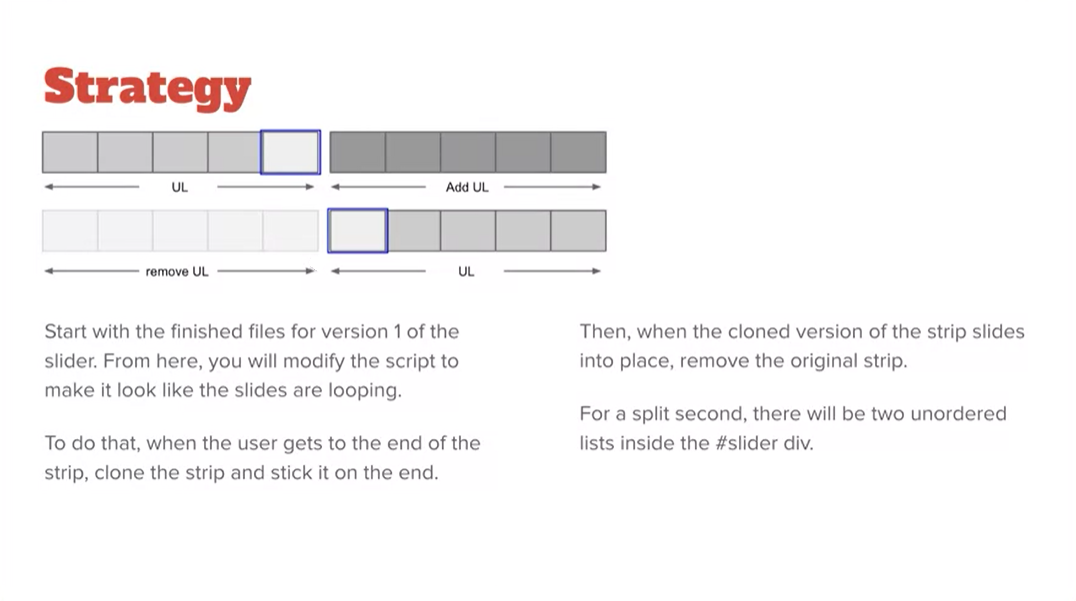
We're going to take the same set as files that we've already worked on and we're going to rework them to create this next version of the slideshow. And by the way, this is a great way to learn JavaScript, is to make a small project and then look at it and go, what could what could I do to make this a little bit better and work on ways of revising it to improve it and make it a little bit better.
How are we going to make it wrap around? What we're going to do is we're going to basically clone the entire strip of slides. So that if we look at this top picture here, if you click the next button all the way till you get to the last slide in the strip of slides, we're going to clone the entire unordered list, the UL. Which is the unordered list with all the slides in it.
We're going to clone it and tack it on the end. So that when you click next again, this one slides into place and it's on the first slide. Then, we can remove the one, remove the unordered list that was there before and it will go away, and we're right back where we started with a strip of slides on the first slide and we can keep going forward.
And then if you click the reverse, the previous button, it's just going to do the same thing in reverse. Instead of tacking it on at the end here, it'll tack it on at the beginning. So that way, we will always have kind of an unending loop of slides, whether you're going forward or backwards through the slides. That's the basic strategy that we're going to use to make this thing work.
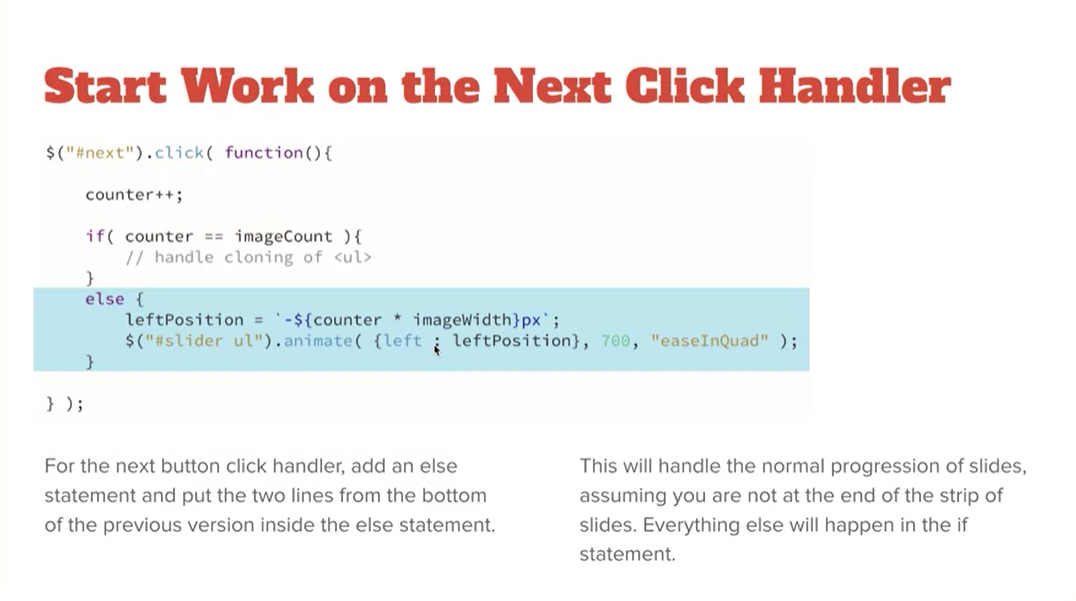
The first thing we can do is to start to work on the next click handler and make it a little bit different from what we had before. We're going to add an else statement in. The if statement is going to handle the cloning of that unordered list. And what happens when we get to the end? But the else is going to handle what happens if we're just on a slide in between, in which case we're just going to move forward in our slides.

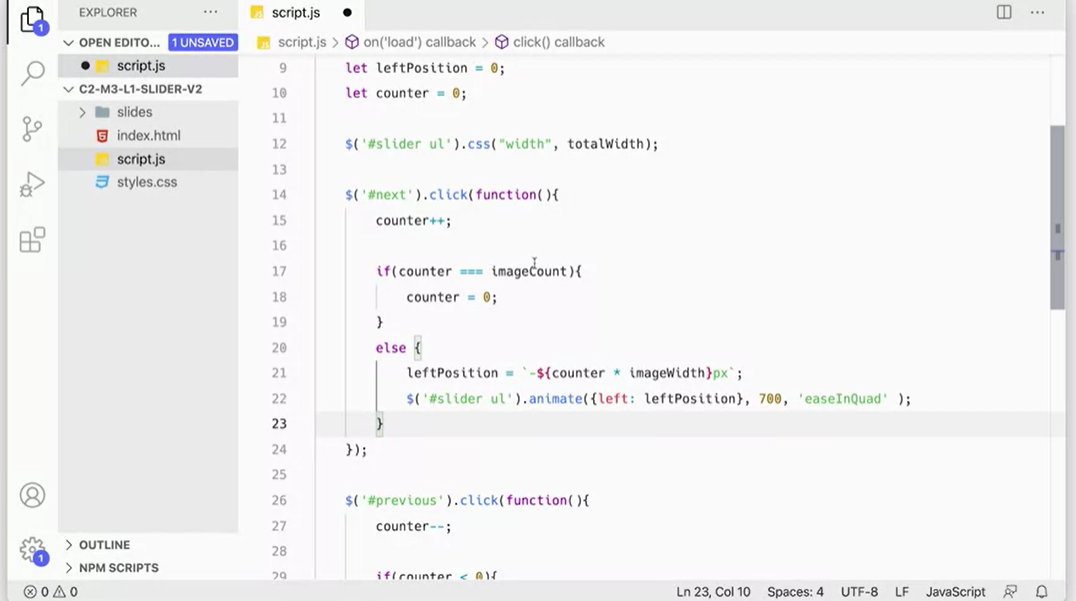
So this is the exact same code that we had before. We're just going to move it so that it's inside of an else statement. So let's go over to our files. And here, I have, nothing has really changed here. This is the exact same set of files that I had at the end of the previous script, the previous version of this slider. And in here, I'm going to just come down to my next click handler. I'm going to add an else in here. Else like that. I'm going to move this stuff Into the else. We're going to do something very different here, and we'll take a look at what's next in the next lesson.

The next thing what we are going to do, is we are going to clone the on ordered list.
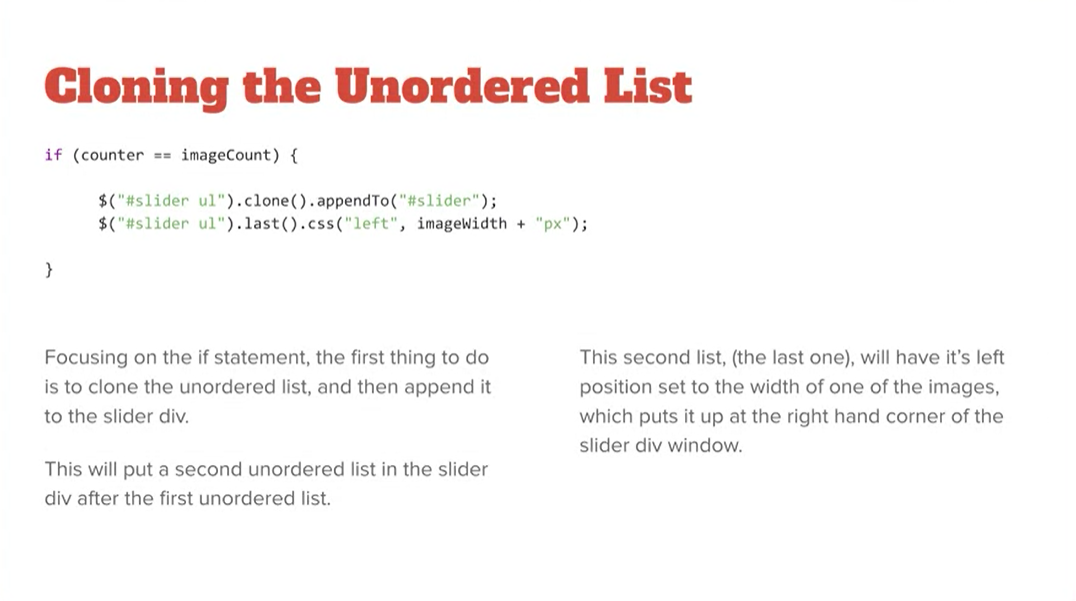
Using the jQuery clone method, you can see here, we have got a clone method that allow us to take that entire un ordered list to make a clone of it. And then we are going to append it to the slider that will put it at the end of the element slider.

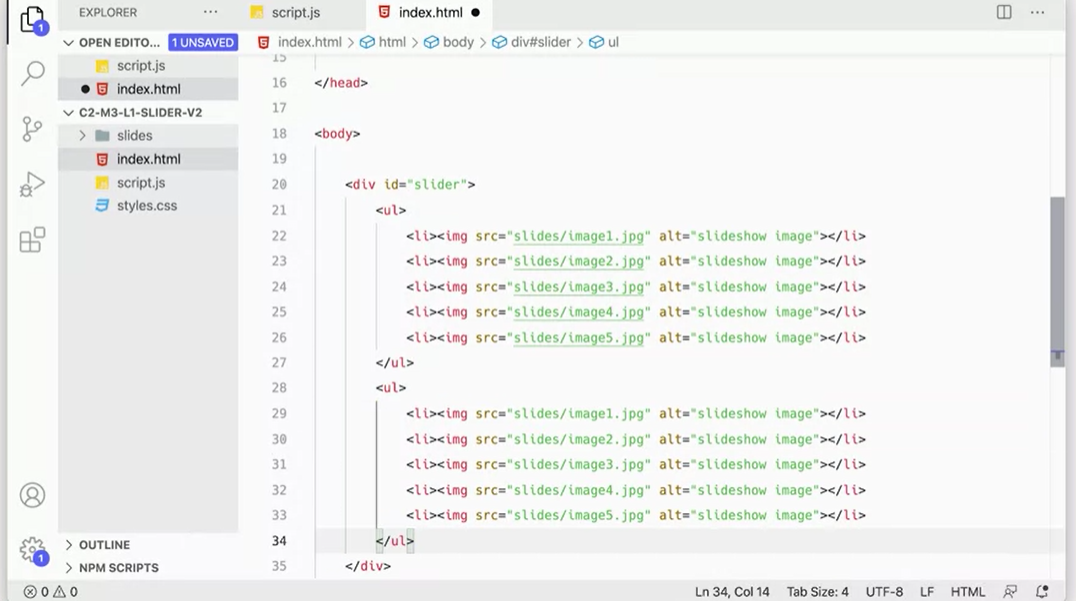
So what that will do if we come over and look at our code here, if I look at my index here is it will take this entire a unordered list and make a copy of it, and stick it right here like that. That is going to end up looking like that when it is done when it is done cloning and appending. That is what it is going to do sort of in code rather than physically adding the html like I just did there. So it is going to add that on there, it is going to clone it, and then appended to the slider and then I need to set the CSS of that of that second. A new ordered list.
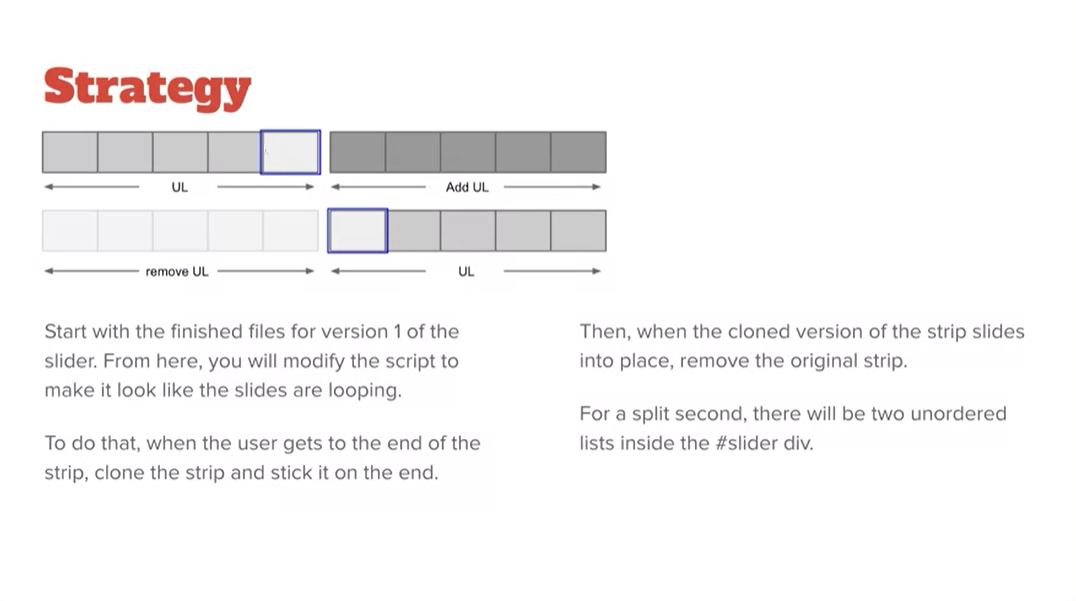
The last one I am going to set the left to image with plus pixels so it is going to be positioned right here because, this is our little window. So it is going to say, okay left, since the images 400 pixels wide, it is going to set the left at 400 pixels. That will put the corner, the left corner right up against the edge here, which is exactly where we want it to be.
You might be wondering how would I know about cloning in jQuery? You can go to the jQuery documentation for all the different things that you can use with jQuery, and it is just a matter of looking through and seeing what the different functions are, and what they do and looking them up.
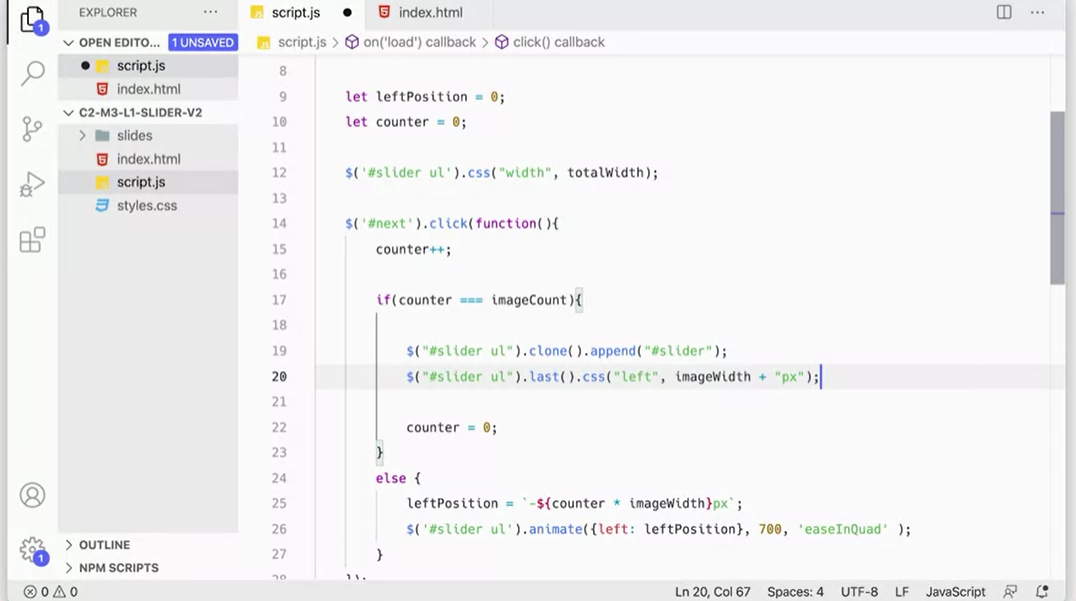
Let us add this to our script. I am going to go back to my script file here, and you can leave the counter in if you want. All this stuff is going to come before the counter. We are going to do the counter thing at the very end. You can leave the counter in if you want or you can take it out and put it back in at the end. It does not really matter. But I mean you use my jQuery object to go get pound slider, and get the U L. The site pound sider in ordered list. And then I am going to clone it dot clone. And that will make a clone of that annoy ordered list.
And then I need to append that clone. Two slider, pound slider. Do not forget the pound sign, send it to pound slider. And that will actually make when when we get to the last slide that will make a clone of it and put it on there. And then, I need to set the position for that one. I am going to say again, I am going to get my jQuery object town slider. You will but I want to get the last one.
Now I have to so I want to get last. We are going to use this last method again, I am going to get the last one, and I am going to set at CSS, and I am going to set the left position left. And what am I going to set it to you? I am going to set it to image with, yes. Image with plus I probably need pixels on there. Right, image with plus PX, right image with plus quote PX. And that will put it in exactly the correct spot here on the page. That will put it so it shows up at the end. The next lesson will handle the animation.

Before I do the animation, I want to set the variable left position equal to a value where I'm going to move that first unordered list to.
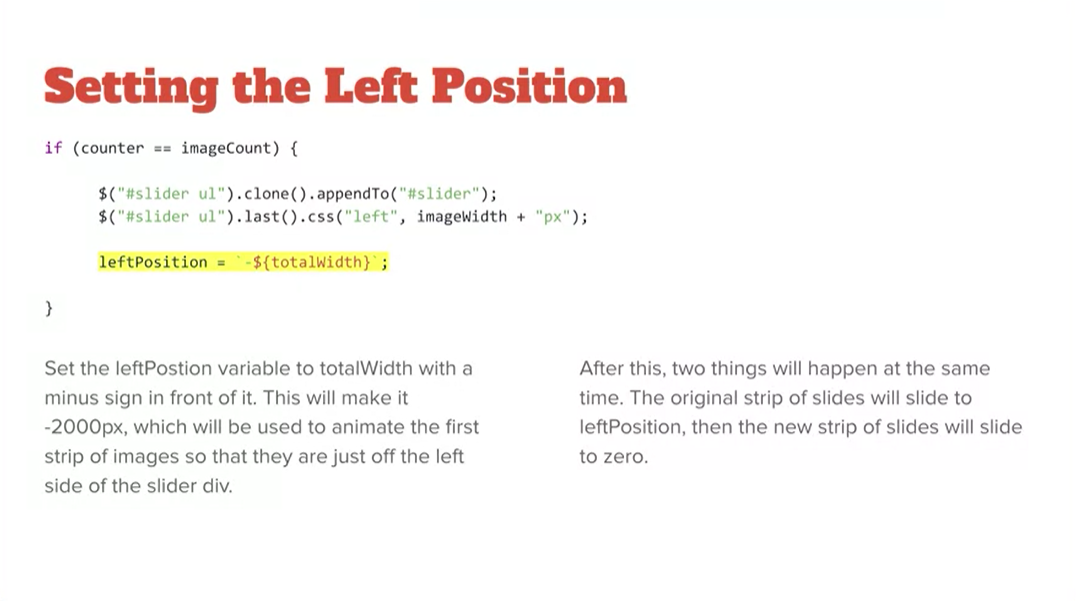
In this case, the unordered list is 2,000 pixels wide. So I'm going to move the left position to minus 2,000 pixels. What that'll do is it'll move that entire first unordered list where it sets the correct position for that first unordered list, so that it's entirely off the left side of my slider window.

Let's go ahead and do that first. I'm going to put in left position equals and then use my tick marks and a negative sign because it's going to be minus and then total width is going to evaluate to 2,000 pixels. That's going to say minus 2,000 pixels right there. That puts that into their correct place. We've got that variable set. Now what we need to do is animate both unordered lists.
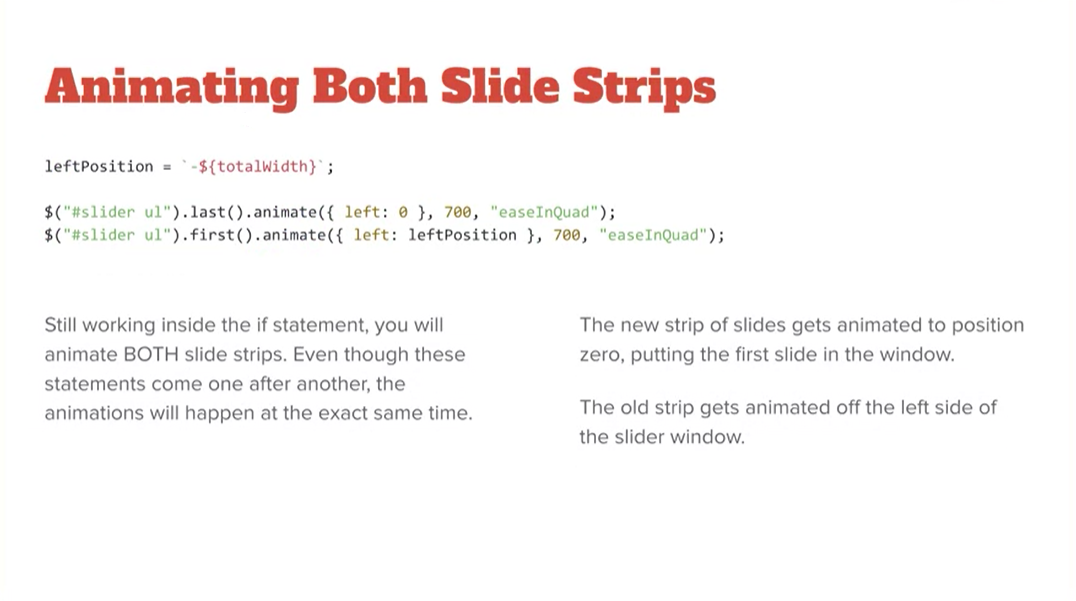
I'm going to animate the first one and the last one. They're going to animate at the same time. In this list, the first line moves, the second unordered list, the last one, the one that we added with our cloned unordered list. It's going to move that to left zero. So that it's moving it from the left side of that window.
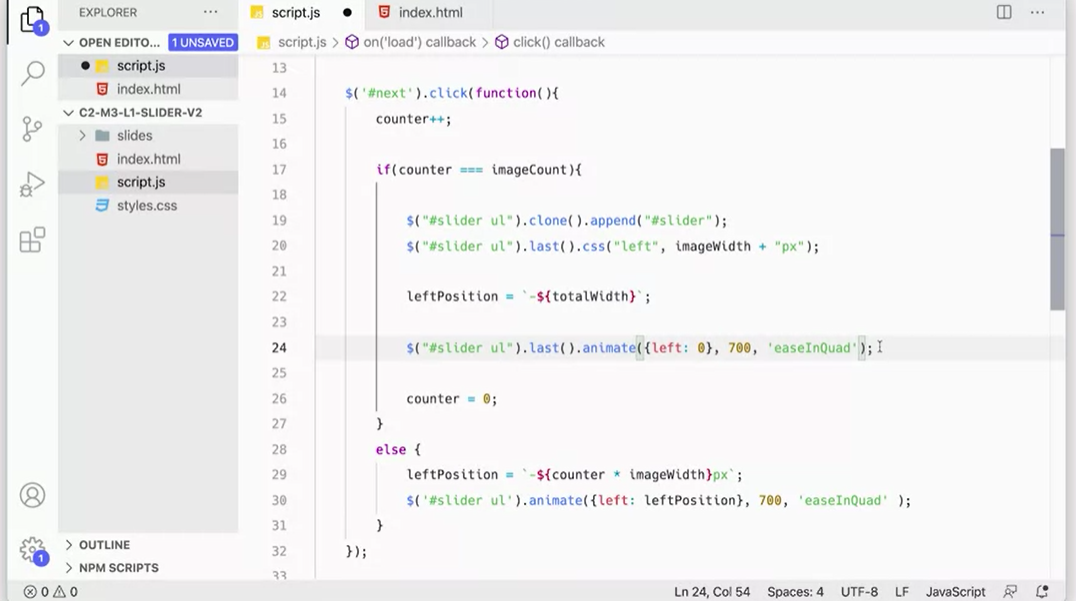
If we come back up here to here, it's moving it from this left corner of the window into its space here. So that's going to put that into the correct place, whereas the second one is going to move from this space all the way out, so that at this point, it's at minus 2000 pixels, which will put this edge right at this edge here. You can see you're on getting slider. You're at last, the last one, animating it. I'm animating the left property to zero. So that will put it right, so that the first image is right in position inside my slider at 700 using easeInQuad, whereas the first one gets animated to left position.
We just set that to minus 2,000 pixels also at the same speed using the same easing. So they move together. Let's go ahead and add this into our script over here. I'm going to say, get my pound slider ul.last. This one. I'm going to animate it. How am I going to animate it? I'm going to animate the left property to zero. That one goes to zero. Left goes to zero. I'm going to just use the same easing and everything else that I had down here. I can even just copy and paste that to move that into place. That moves that one.

I can copy this line and paste it here, but now I'm going to move the first one, animate left, and it's going to get moved to left position. There we go. That will move both strips at the same times. Can animate them into their correct place. Then the last thing that we need to do is remove this one. We'll look at that in the next lesson.

Adding a Callback Function.
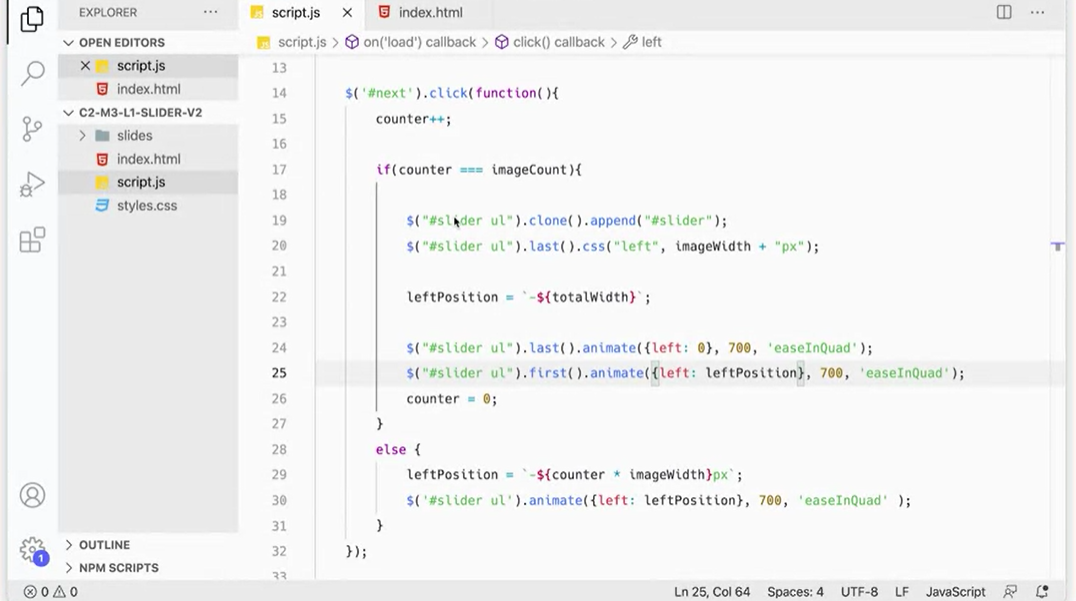
So far, in our next click handler, we've checked to see if the counter equals the image count. If it does, we have cloned the unordered list and then added it to our slider and then set it's position into the correct place. Then we animated the two unordered lists at the same time, the first one and the last one. We animated the last one, it's left position writes that the first picture is inside the window and we animated the first one off the left side of the slider.
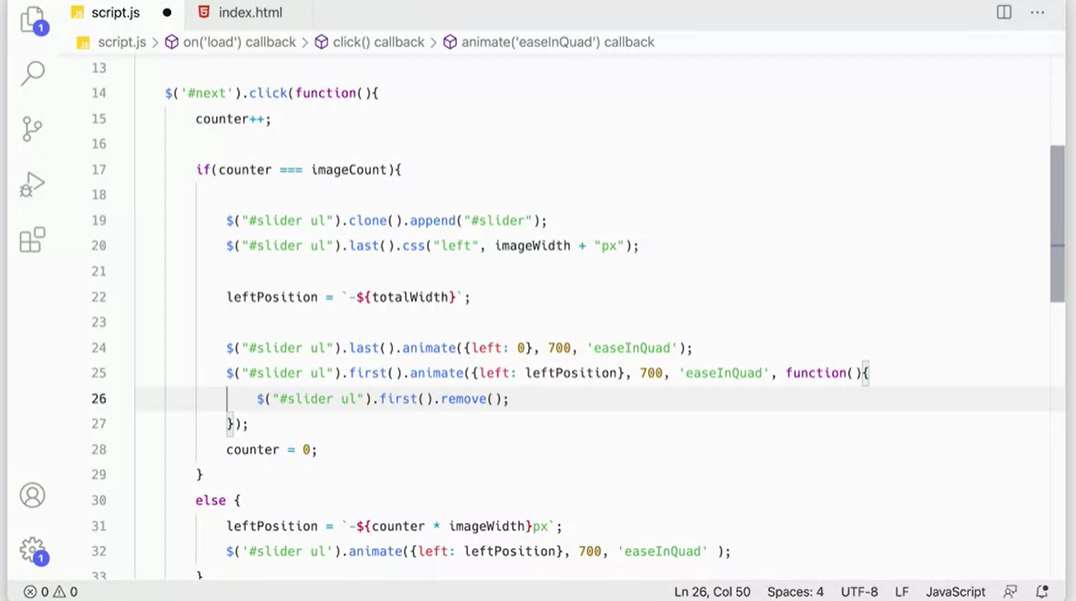
Then the last thing we need to do is after this animation is completed, I want to remove it from the DOM altogether. The key word there is after this animation is completed. That means I need a callback function. In here, after the easeInQuad, you're going to put a comma, and add a function like so and it's wrapping around funny and includes this explorer here, so you can see it better.
But this function is a callback function that runs when this animation has completed and that's what I want to do here. I'm going to click inside of there and move that down. Then I can say, I want to actually remove this first one, so I can say dollar sign, get my jQuery object and say here, pound slider ul.first.remove.That will take it off the DOM entirely.
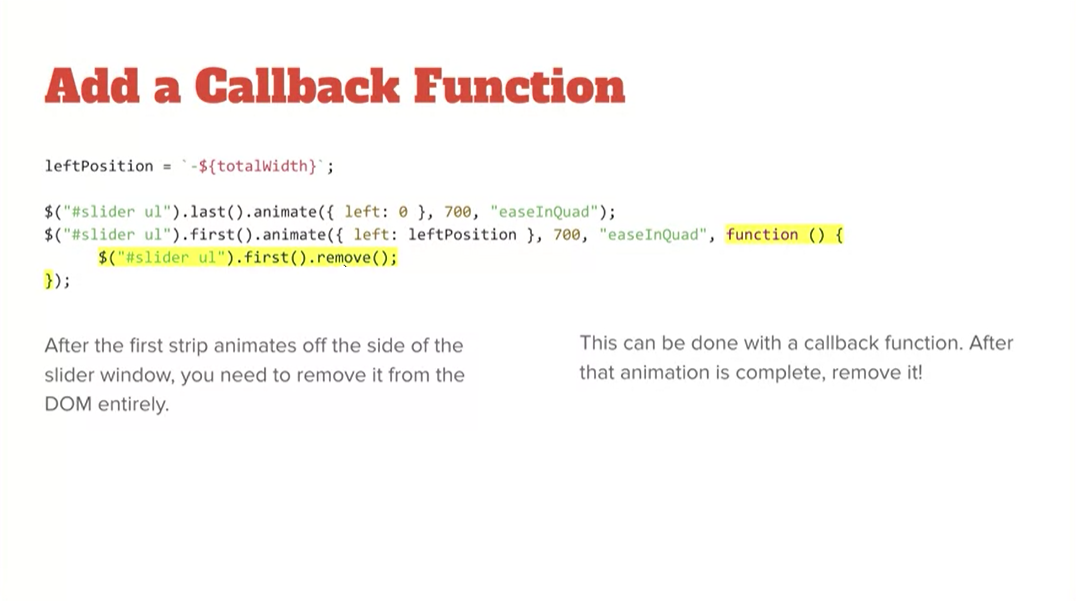
You can see here at my slide, that's what I have here, pound slider first remove, so that will take it off.
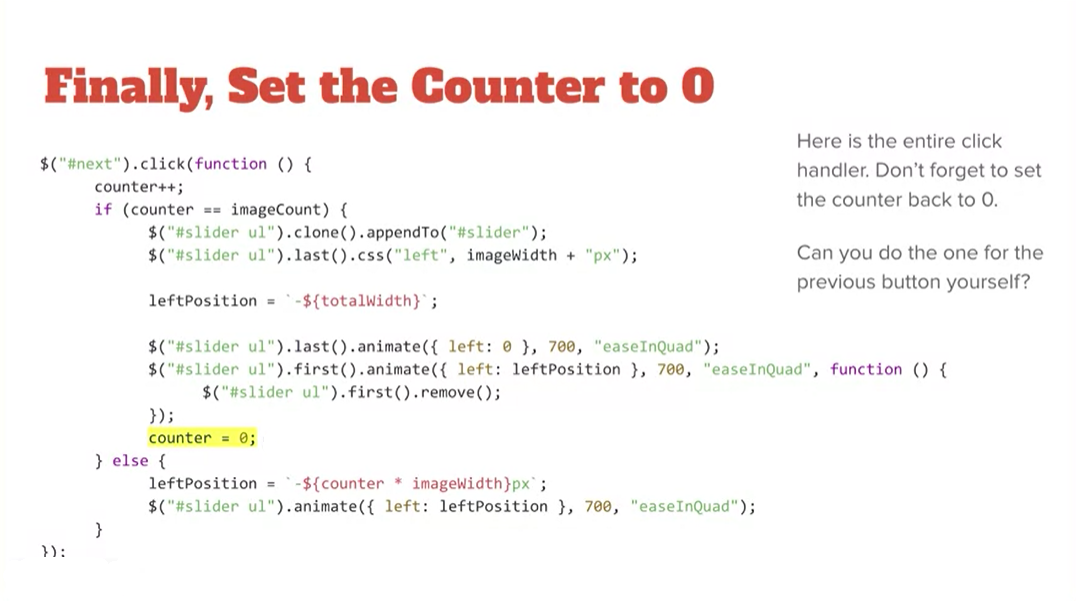
And then once that's off, I can set my counter to zero, and everything's back where it should be. You could add some comments if you need to. Sometimes it helps make sure this thing is running as a callback function and that these two are running at the same time.
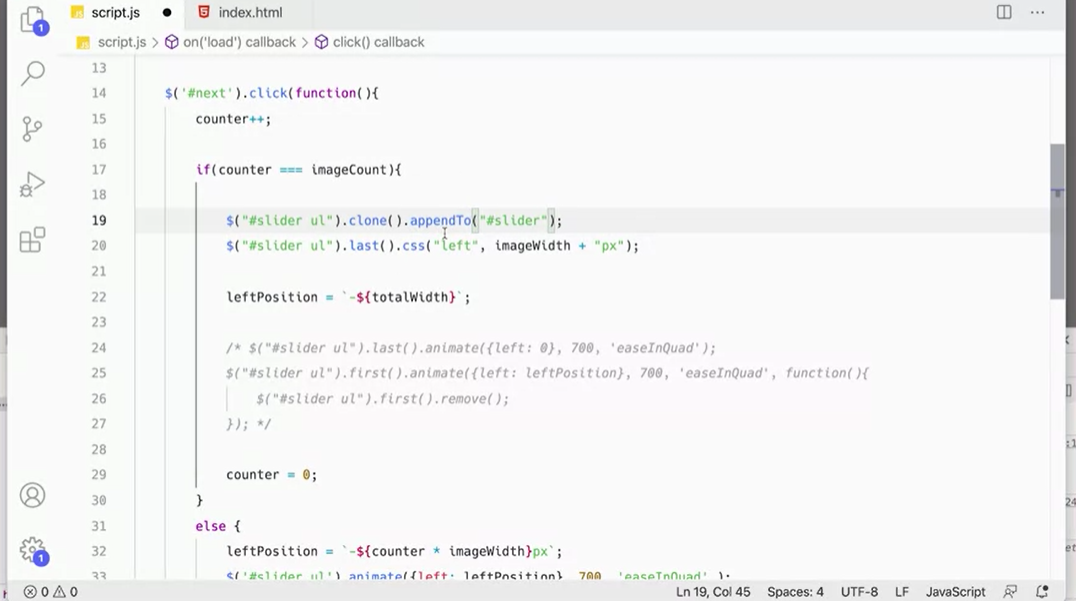
But now the question is, can you do the previous button? Link yourself, see if you can do that one, try it on your own and then we would come back. You'll see my solution for it in the next lesson.

In the last lesson, we figured out how to get the next click handler to function properly.
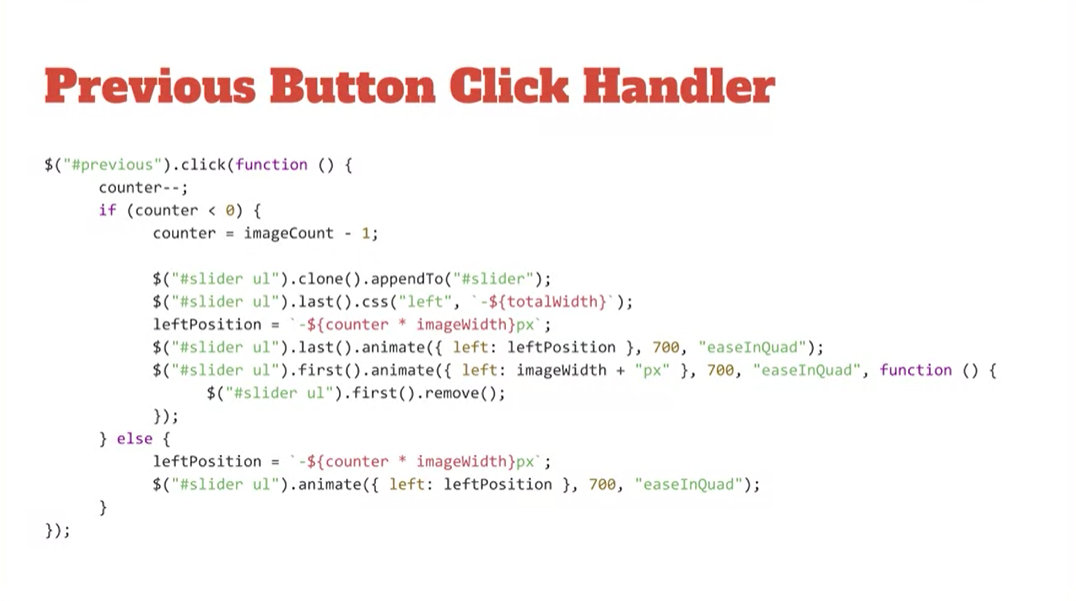
Let's do it together and sort of see how it's actually going to work. So the script I came up with looks like this. What's going to happen here is when you click the previous link, the counter is going to get documented. And then we're going to check to see if the counter is less than 0, which means we've run through all of our images. And then we're going to set the counter to image count -1.
So we've got five images and so we're going to set the counter back to 4. Remember our counter is always going to be a 0, 1, 2, 3 or 4, any of those five values, so we set it to image count minus one, so it's now a four, then we're going to clone our unordered list and append it to the slider, just like we did before.
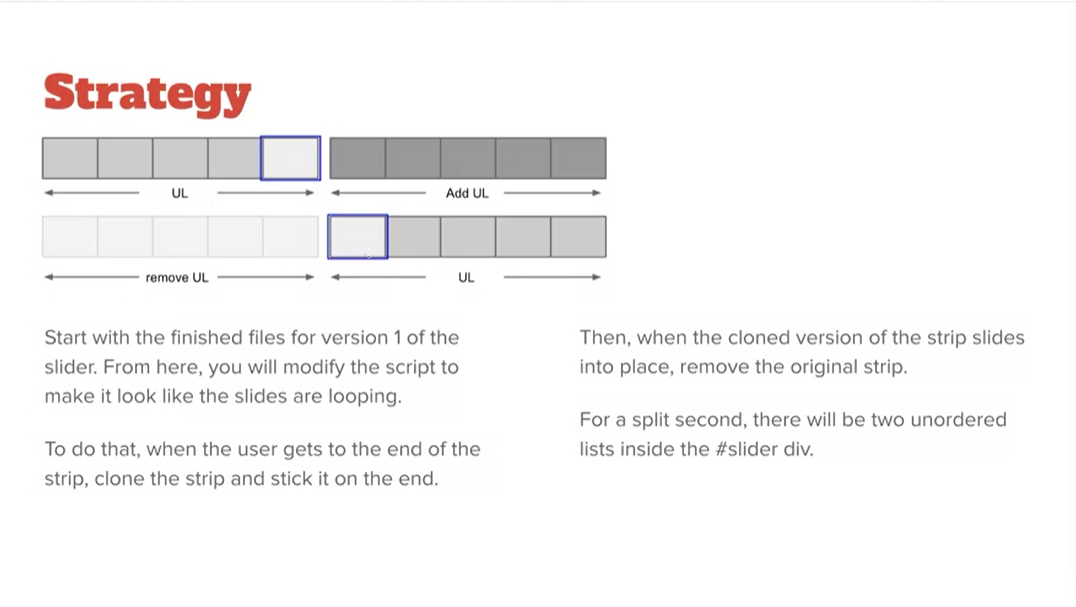
But here it will be helpful to go back and look at our diagram, once again. Looking at our diagram, this is our situation in this part down here our strip is at this position and we've clicked the previous button. What we want to do is we want to add the new strip and append it on bottom slider, instead of appending it on the top slider. Bottom slider, left corner is going to go from -2000 pixels to -1600 pixels. 2000 because our images 400 pixels wide, we've got five of them here.
And that will push this first picture (blue box) into our slider. And then the same frame will go from 0 pixels to 400 pixels to move that there. Hopefully the diagram helps. And maybe you drew your own diagram and trying to solve this problem.

Here we are with our script here. But we're going to clone our own ordered list like we did in the previous one, but I'm going to set that last one that I've added into my DOM, the one that I've appended to, the slider, I'm going to set the left to minus total width again.
So that sets its left corner at that -2000 pixel mark. And we're going to set left position to minus counter times image width. Remember the counter got set to 4 here because its image count minus 1. So counter is 4. 4 times 400 gives us 1600 pixels.
And remember we're moving our strip from -2000 pixels to -1600 pixels to move that left edge, that's way over off the side there into the correct position. That's what that leftPosition is going to be set for. Then we can take that last one and move it into the correct place. That moves that strip onto the screen and then we take the first one and move it so it's off the screen. And then we can, with our callback function, remove that first one.
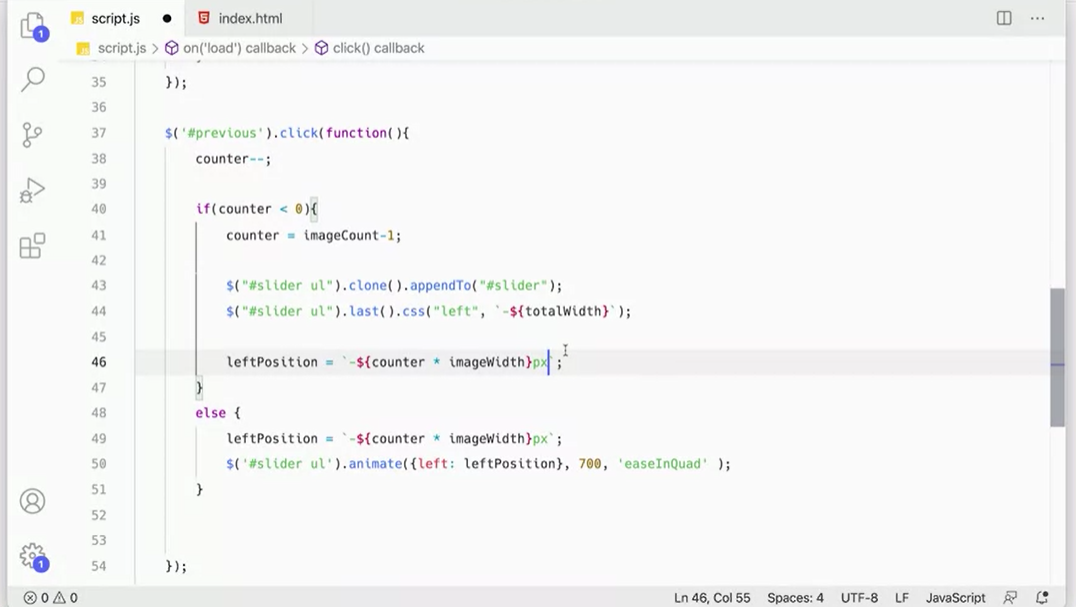
We’re going to do the same thing we did before and add the else and move this stuff in here. We're going to document the counter and then we're going to set the counter to image count -1. So that all stays the same. Then we're going to do the thing that we did with the cloning up here so I can actually copy this. And paste it in here. But the position is going to be a little bit different here.
This position, the last one is not going to be set to imageWidth, instead it's going to be set to tick marks. I'm going to put that in the tick marks, -${totalWidth}. I want to set it to minus totalWidth, left minus totalWidth. Then I'm going to set the leftPosition to counter times imageWidth plus “px”.
So let's put that in next. I'm going to put that in here. But instead of minus totalWidth, it's going to be minus counter times imageWidth, that's what it is counter times not totalWidth but imageWidth. Plus “px” on the end of that. Now we just need to animate the two pieces and we'll do that in the next lesson.
In the last lesson, we worked out the logic of how the previous click handler is going to work and where we left off was actually animating these strips into place. That's what we need to do here.
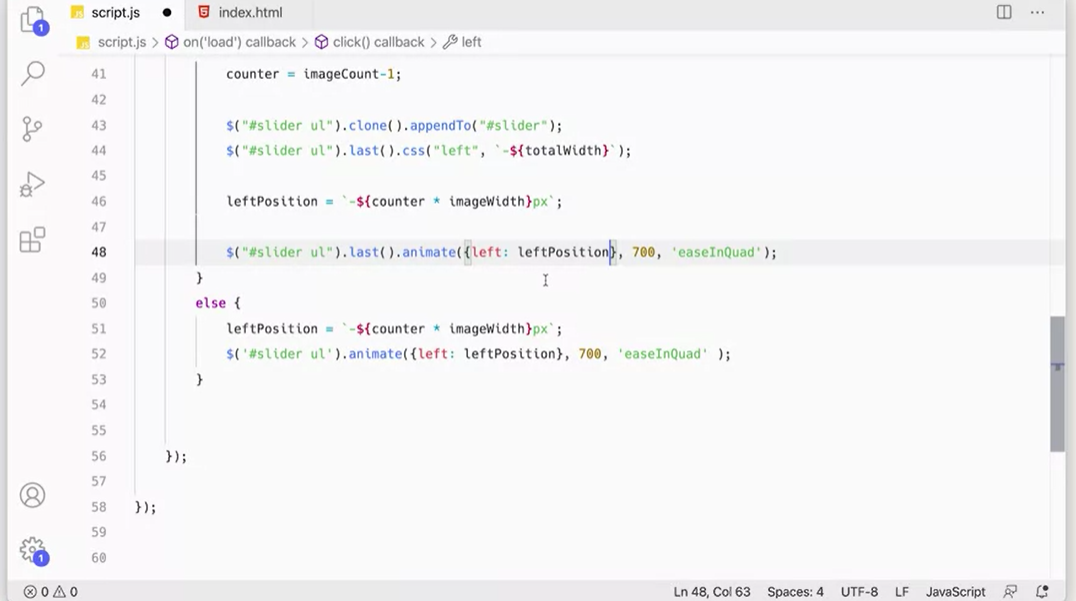
We're going to take an unordered list that we cloned in there and animate it into its position. And again, what we're doing is we're moving it from one position to another. This corner when we added it to our clone, is set to minus 2000 pixels because these are 400 pixels wide and there's five of them.
Next, we're going to move it from minus 2000 pixels to minus 1600 pixels which will move it over 400 pixels. That will push the right side of this into our slider. We have our last element, we're animating to the left position, and left position is now minus 1600 pixels over 700 milliseconds using easeInQuad.
Add this into our script. But instead of left 0, we're moving to leftPosition. Which is that minus 1600 pixels, the counter which is four times imageWidth which is 400 that's 1600, with the minus sign in front of it and with the px that's going to move that into the correct place.
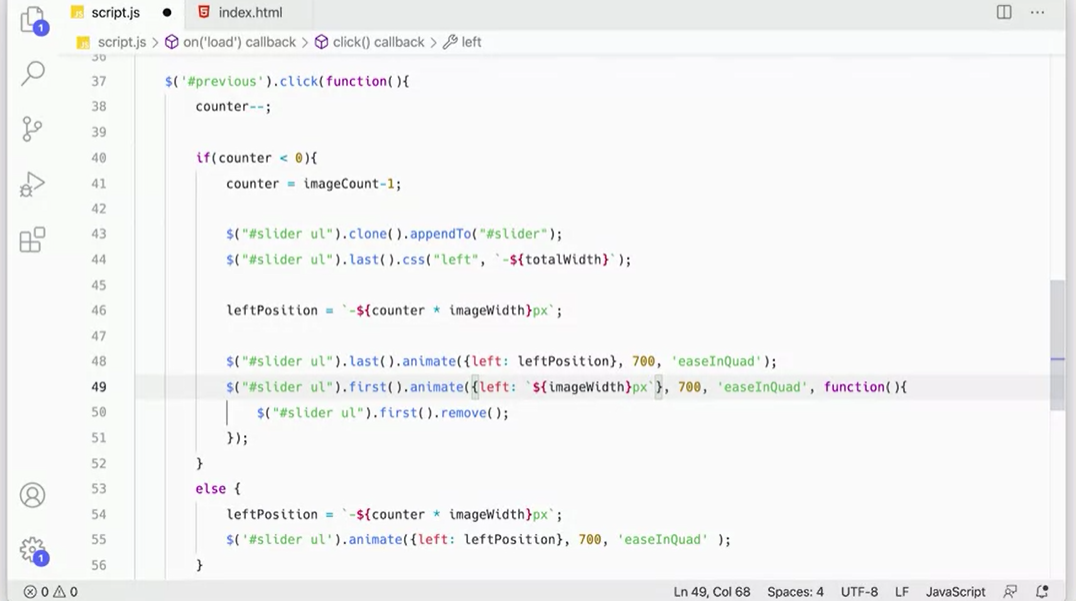
That gets that one into the correct place. The other one, the first one, this one here, I'm sorry this one here first can actually copy this whole thing because we are going to remove it, we can come down here and we can add that in here. But instead of moving it to leftPosition, it's going to be moved to imageWidth which is the width of that image.
So we're going to need a px on there, imageWidth let's do our tick marks And then I can do ${ imageWidth} px like so. I believe is that what I had over here. I have plus px I'm adding it on there, you can do it either way with the template literally you could add the px In there like that.
And then we are doing it over 700 milliseconds easeInQuad and then we've got a callback function again to remove that first one from the list. Let's see if it works. I'm going to save this, come back here, refresh it, we know the next one works but does the previous one work? There's our first slide and boom it works. There's our 5th, 4th, third, second first and once again we can go around that way.
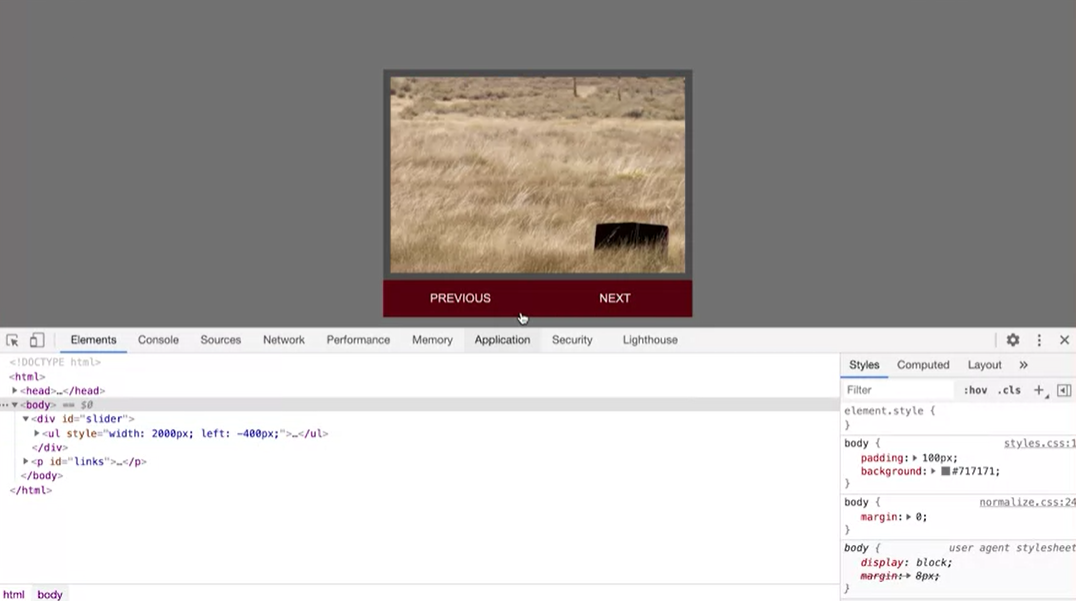
If you choose the inspector, you can see it actually working. I've got my slider here, I've got my unordered list inside of there, click next, you can see that's going to minus 400 click previous. It's going to zero when I click previous again, you'll see it, add the unordered list, move it into place and then remove the other unordered list.
Now you have a slider that will work in a looping kind of way rather than just a strip that moves back and forth. But these types of projects in these types of lessons are helpful for thinking about different ways and different kinds of things that you can use on your websites. And build that will make use of jQuery, make use of the built in effects library and teach you how to handle and think about these different types of situations that come up.

Slider, using JavaScript. In the previous lesson, we worked on making a Slider using jQuery, we did a couple versions of it. Here, we're going to do the same thing using plain JavaScript without jQuery, just so you can compare the syntax and see how different it is. There will be a few little minor differences in the script, but it's very similar to what we saw with jQuery. Here, the animation is going to take place in CSS and we'll be using JavaScript to trigger the animation.
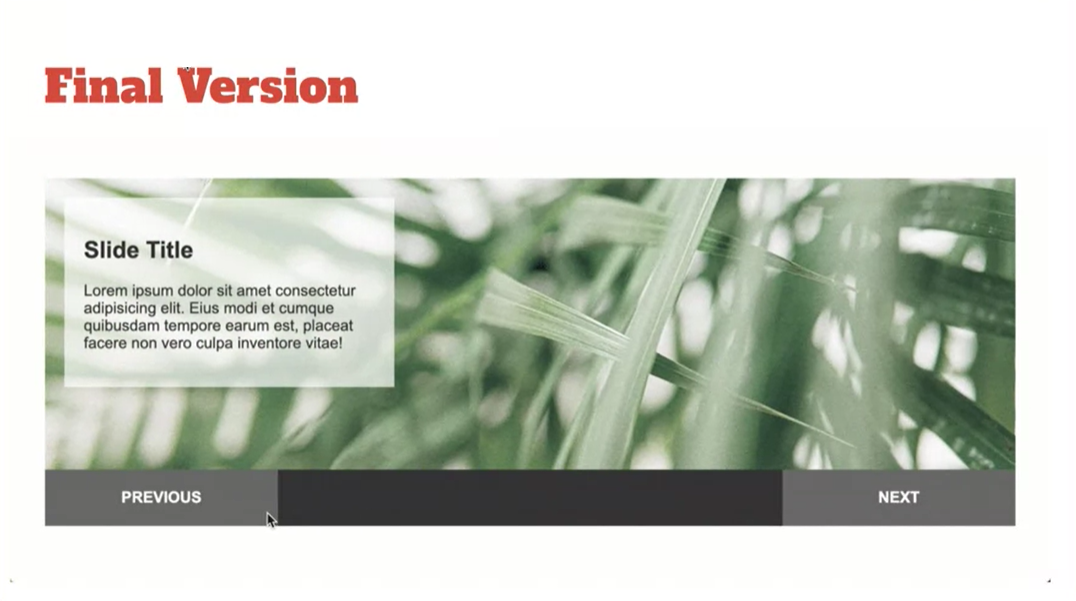
In the end, you should get a slide that looks like this. It's a little bit different in that the slides are going to have some actual content on them. The pictures will actually be in the background of the slide, and then they're going to have little bit of a title and some text on them.
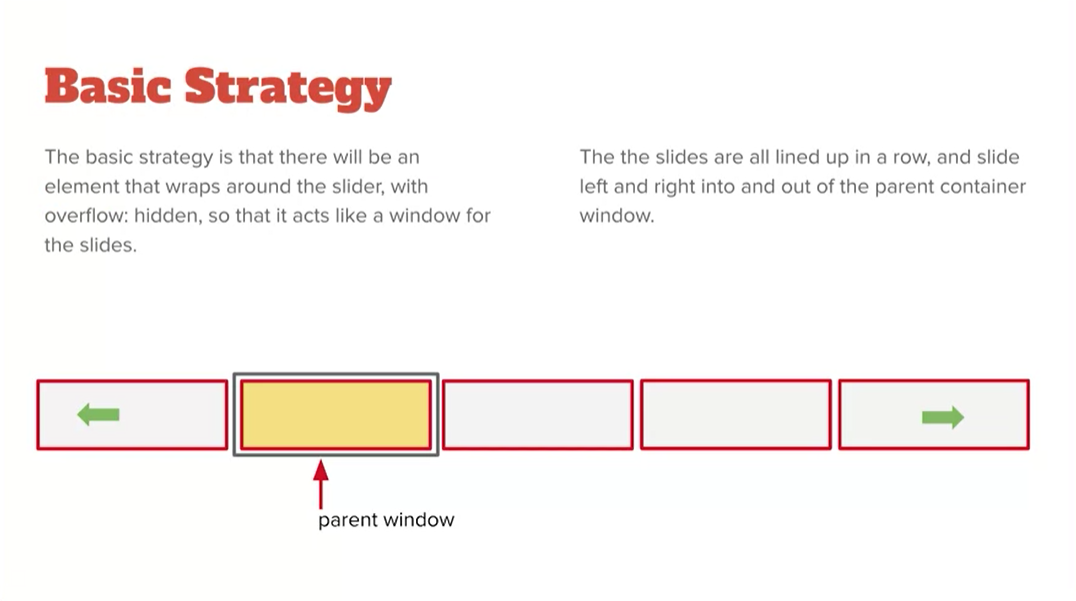
Let's take a look at how that set up. The basic strategy is the same and that we're going to have a parent window that has overflow hidden set on it. And that's going to act like a window for these slides and the slides are all set up, in this case I have them floated. But they're all set up to float next to each other so that they end up in one long strip. And as you click on the buttons either left or right, the strip of slides moves in and out of the parent window showing only one image at a time. There's our basic strategy, very similar to what we had with the jQuery version.
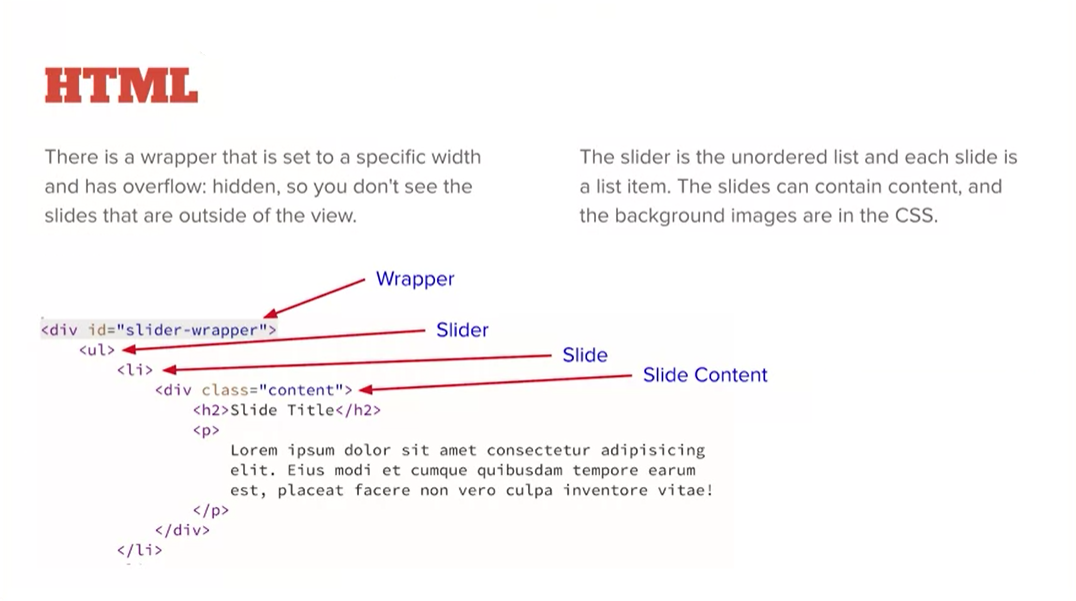
Now the HTML is a little bit different in this case, because instead of the list items just having a picture in it, like what we had for the jQuery slider, the list items have a div inside of it. And the div is going to have an h2 and paragraph inside of it to create some content on that slide. The actual picture will be in the background of the list item, so that the list item is actually showing the picture as a background image.
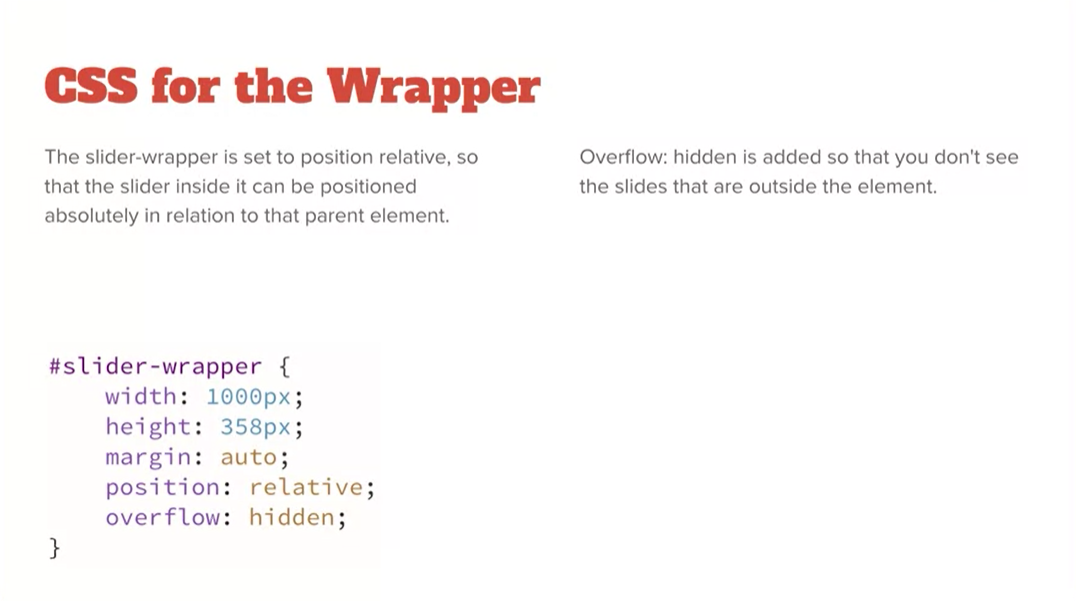
Now let's take a look at the CSS for the wrapper. The wrapper has a width of 1000 pixels and it's set to a height of 358 pixels which is the size of my pictures. And I'm setting margin auto on it to center it on the screen. And then position relative because we're going to absolutely position that string of pictures inside this window. This is the window that's going to show only one image. And then overflow hidden so you don't see the other pictures.
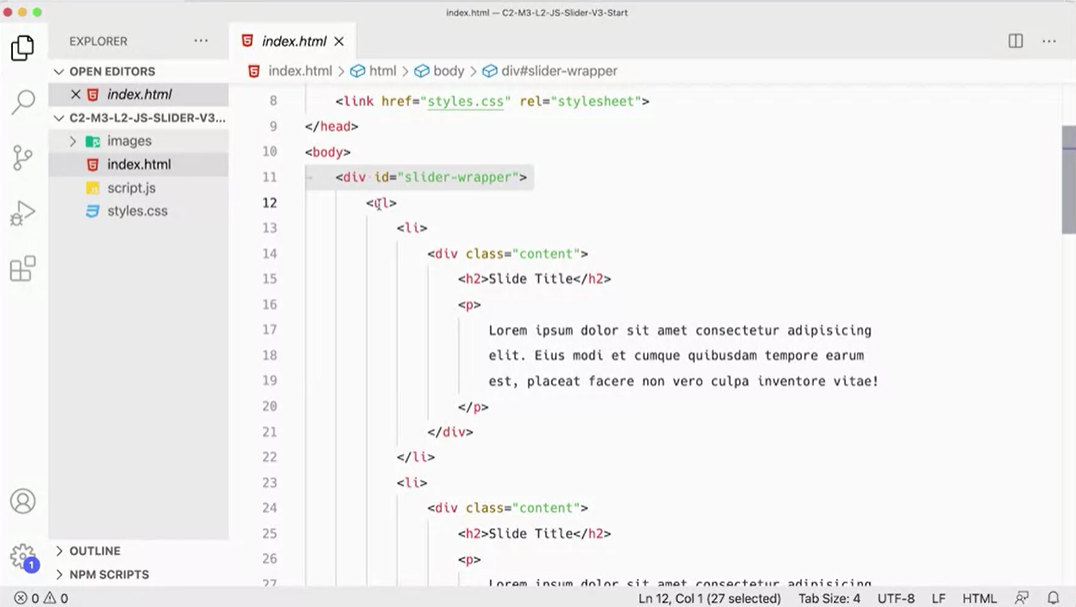
And we can come over to our code over here and see this markup in place. You can see here I have my div with the slider-wrapper. I have an unordered list with the list item. The list item has the div with the content which includes an h2 in a picture. And I've got a bunch of these list items in here.
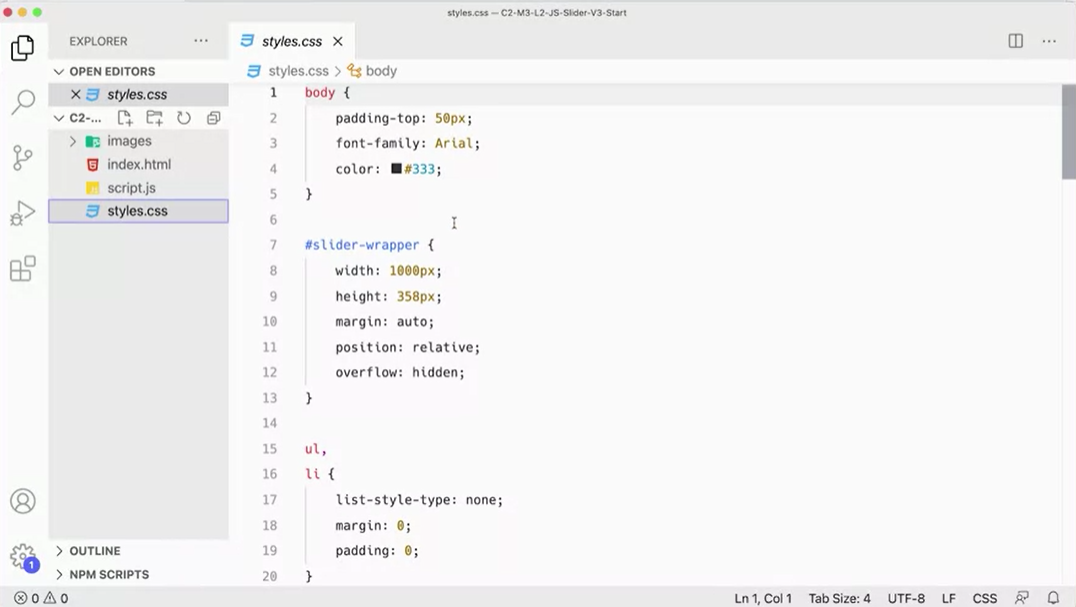
On the CSS, you can see that I have slider up here set to width 1000 pixels and the height for the picture. And then margin auto to center at position relative and overflow hidden.
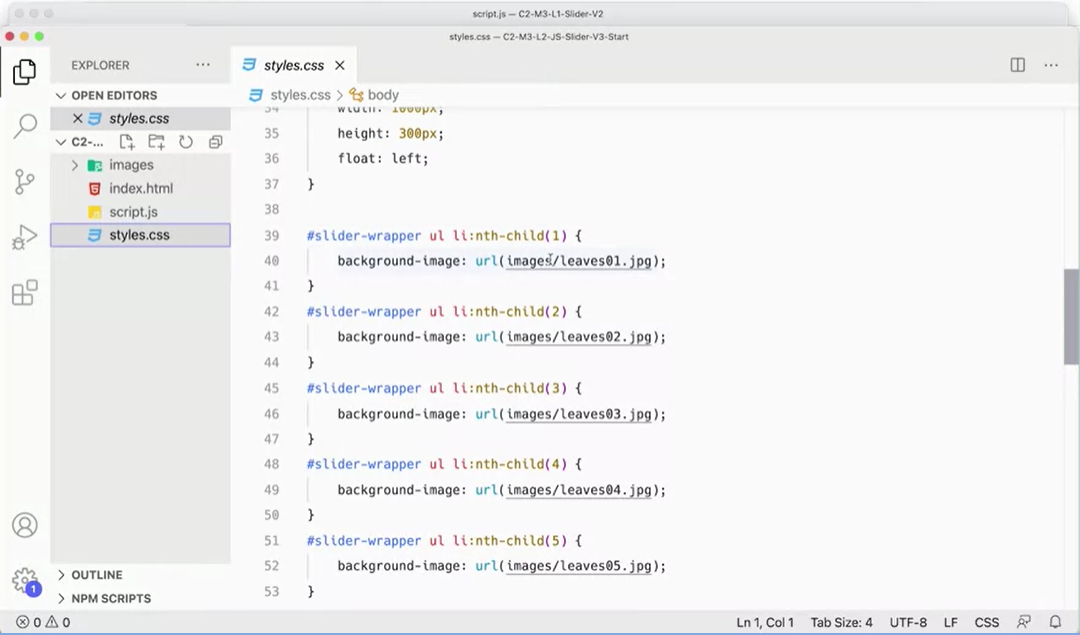
Down here as you look down through the CSS here, you'll see this is where the background images are. It's on the list items. So the first list item gets this background image, second one gets that one. The images are here in the folder.
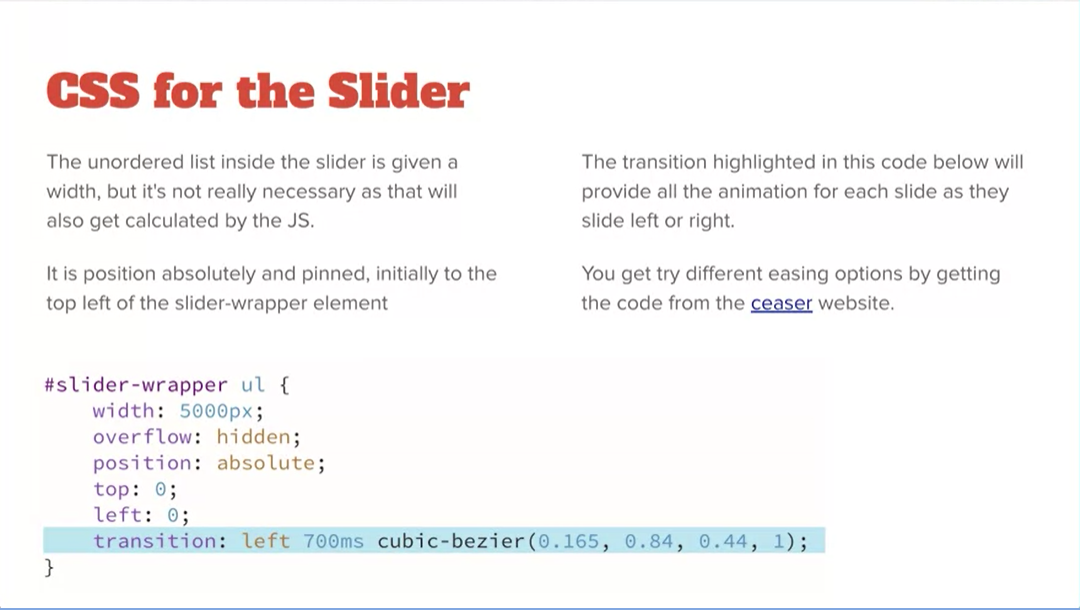
The actual animation is happening in CSS. You'll see this transition left 700 milliseconds cubic-bezier with a bunch of numbers in here. And I'll tell you about where those come from in a minute.
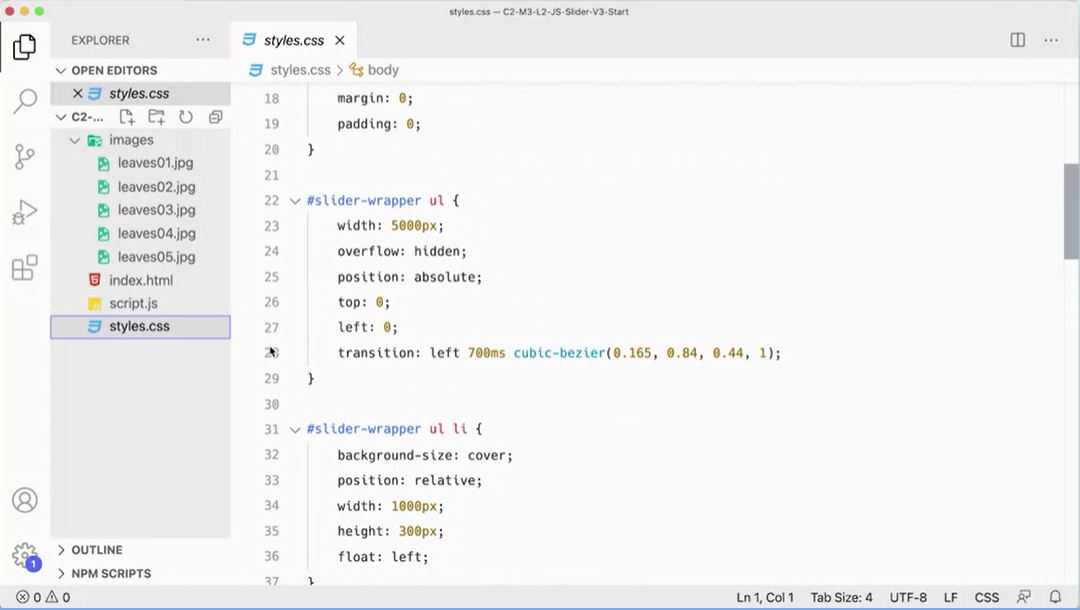
But we can see this in our CSS over here, right here. Using this transition we're going to transition the left property over 700 milliseconds. That's the same as what we had in the jQuery version. But this cubic-bezier, where is that coming from?
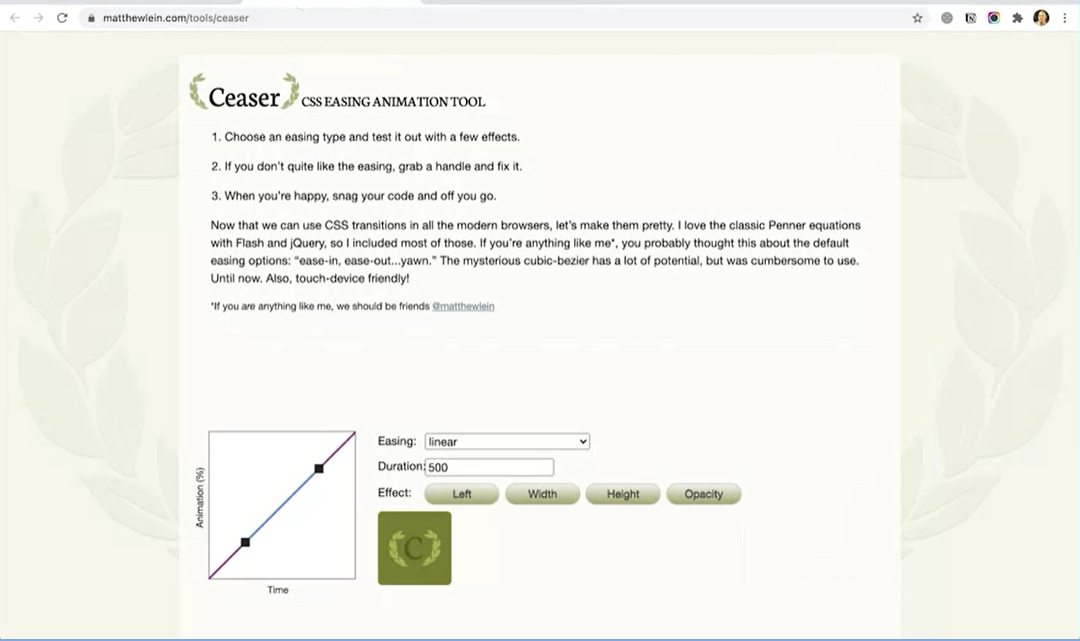
What I used to create those is this little web tool called Ceaser, it's an animation tool. And you can see here, linear animation.
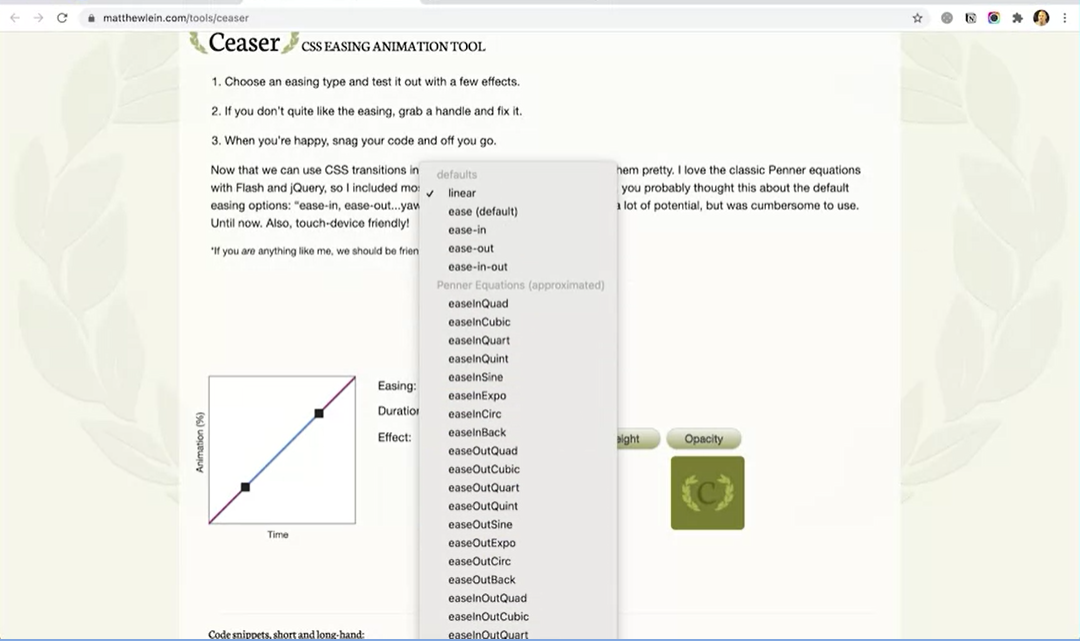
If I click left, it just moves it at the same speed and you can pick one of these built in options here to see what it looks like. We can change the amount of time. So that's starting slow and ending fast. Whereas if you were to do easeOutCirc it would be the other way around, start fast and slow.
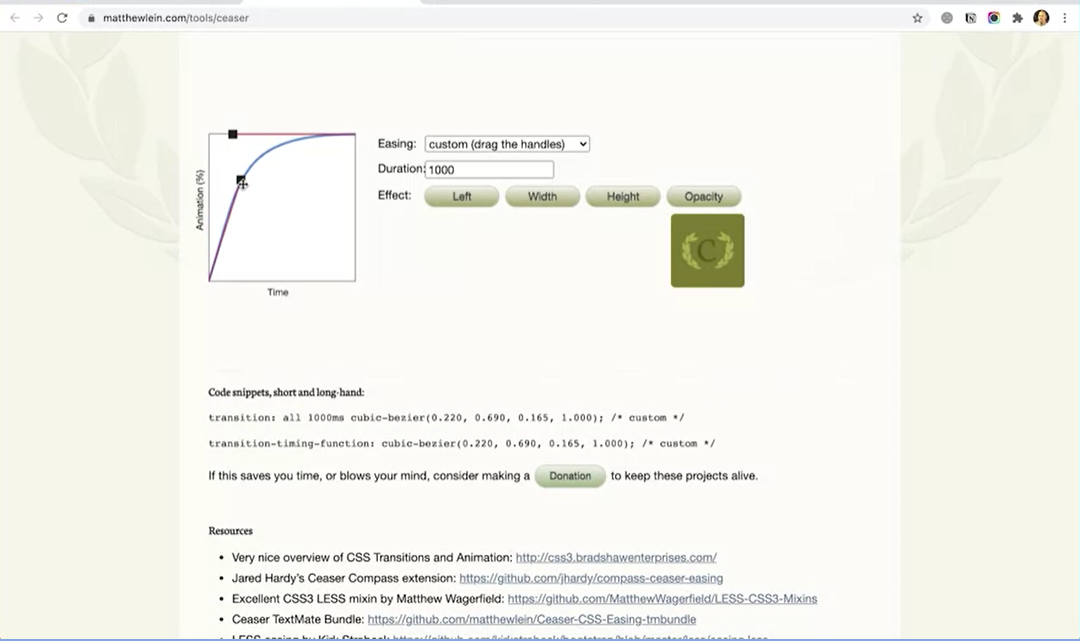
And then down here you can see the CSS that you actually need for this transitional. But instead of transitioning all, I'm just transitioning left. But you can see that that's the code that we need in order to do this. And you can even customize this. You can drag these handles and create your own custom using to do whatever you want it to do. And it will adjust these numbers accordingly.
That's going to create the actual animation for the slides. Each time a slide moves, this transition is going to take effect. Or each time we change the position of the slide, the left position, this animation is going to take effect. And that's where we we'll see the actual animation for our slider.
We have a little bit more CSS to talk about before we start working on our JavaScript. And the first thing is the actual slides themselves.
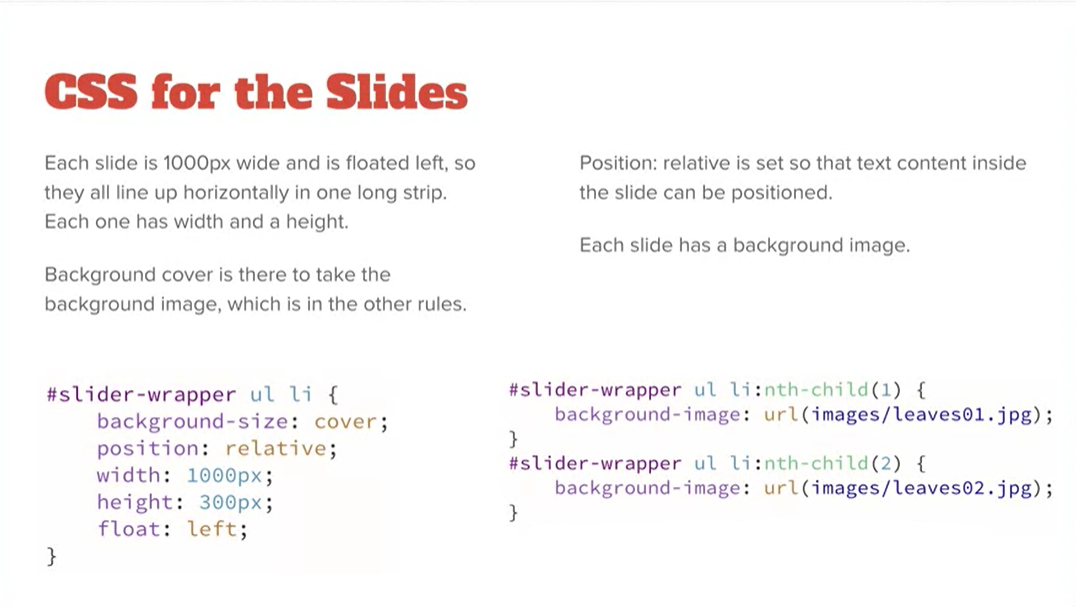
The list items that are inside the unordered list that are inside the slide wrapper, which are these elements here in my index page.
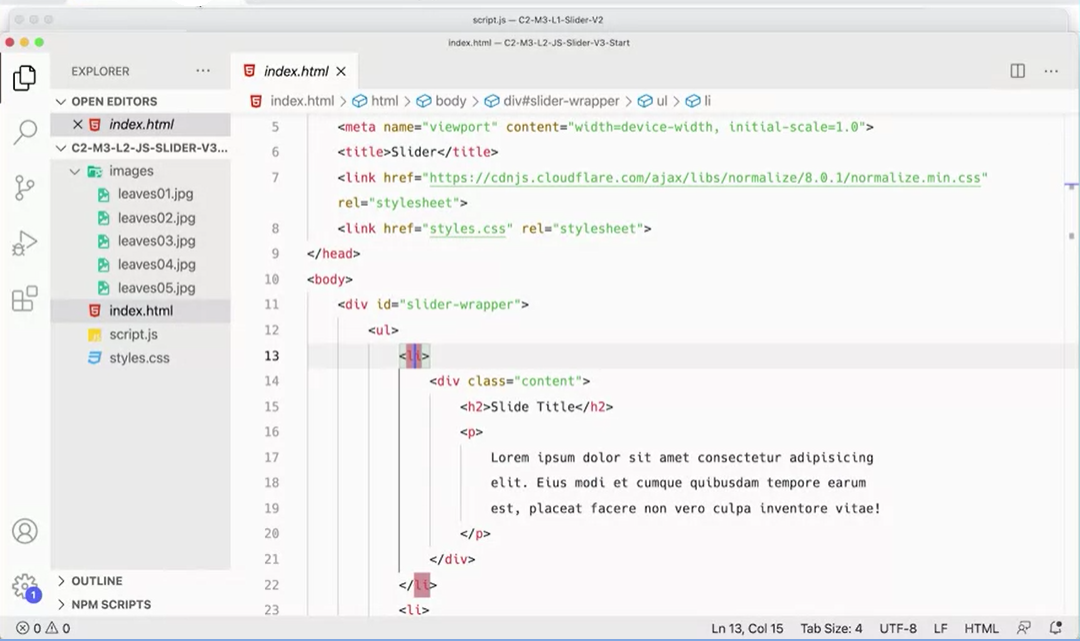
These list items here. These are my actual slides. And I want to set some styling for those. First of all, I'm going to make sure the background image covers the entire list item. Even if they were to get a little bit cropped, then that's fine.

I want to make sure the image covers the whole thing because it's a background image, as we see over here. And as we mentioned before, each slide, each list item gets its own background image.
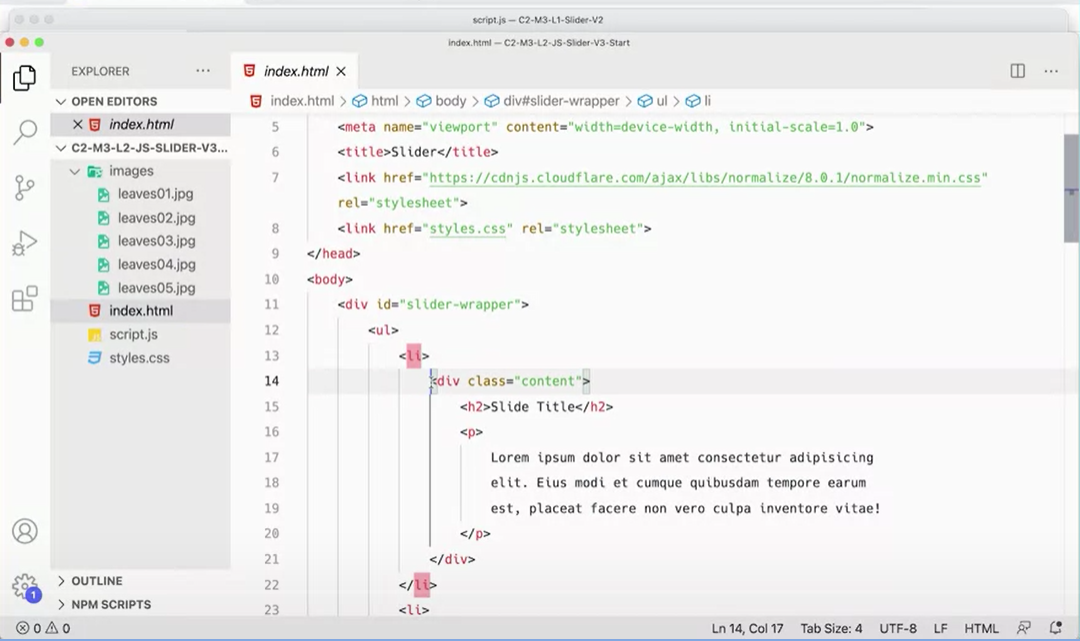
Those images go in the background and they cover the background of that list item. And then they're set to position relative because the content that's inside these slides, this div with the h2 and paragraph is going to be absolutely positioned.
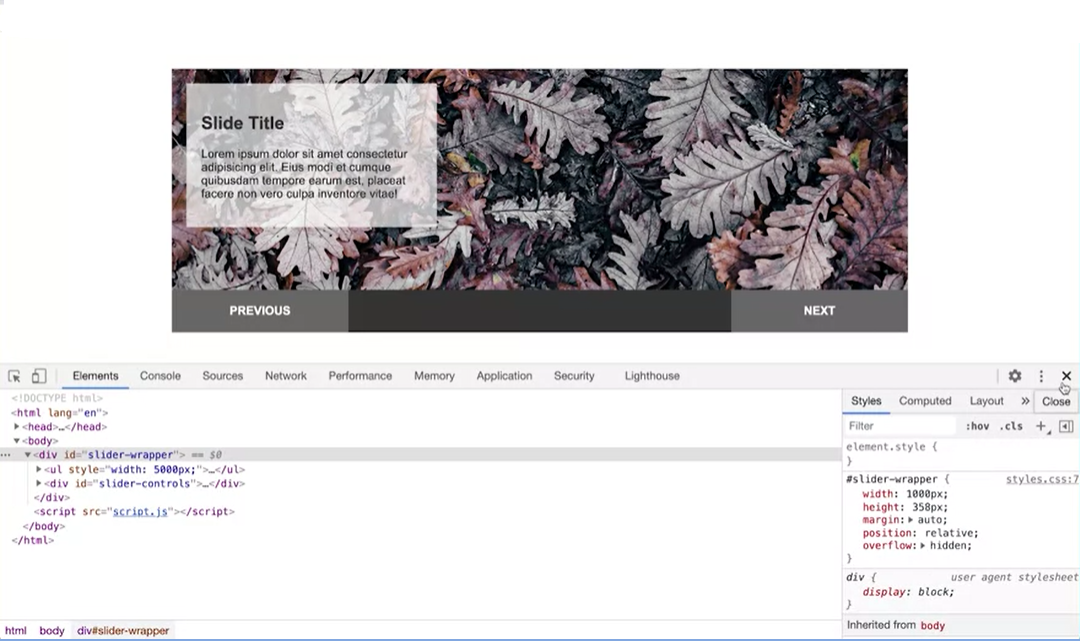
This div here is going to be absolutely positioned here. These are set to position relative because those divs are positioned absolutely. And then we set the width of the slide and the height of the slide and I have them floated left, so they all go in a line next to each other.
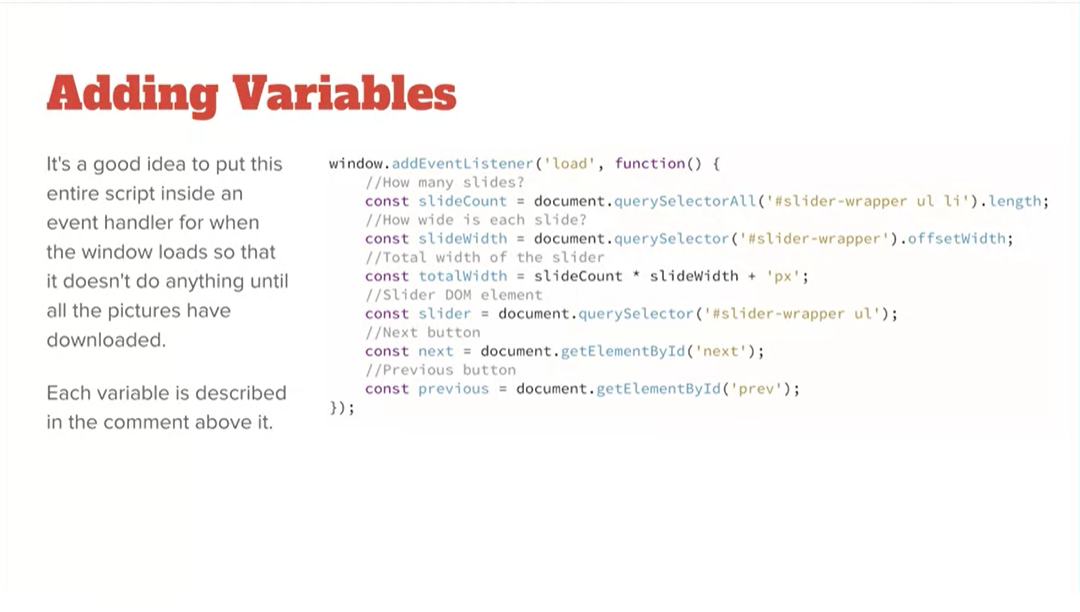
And now we're ready to start working on our actual JavaScript. And for our JavaScript, in the j query version of this, we used the on method to make sure that the window has loaded. We did an on load method, and that was an event listener in j query to check to make sure that all those images have loaded.
Here, we're just going to add an event listener with the add event listener event and the event listener method and put it right on the window. And we're going to check for the load event. And that will also do the same thing where it's going to check to make sure that all the assets have loaded before it runs the callback function. Which is the anonymous function you see on that first line of the script there. And everything is going to happen inside of that anonymous function that runs after the page has loaded.
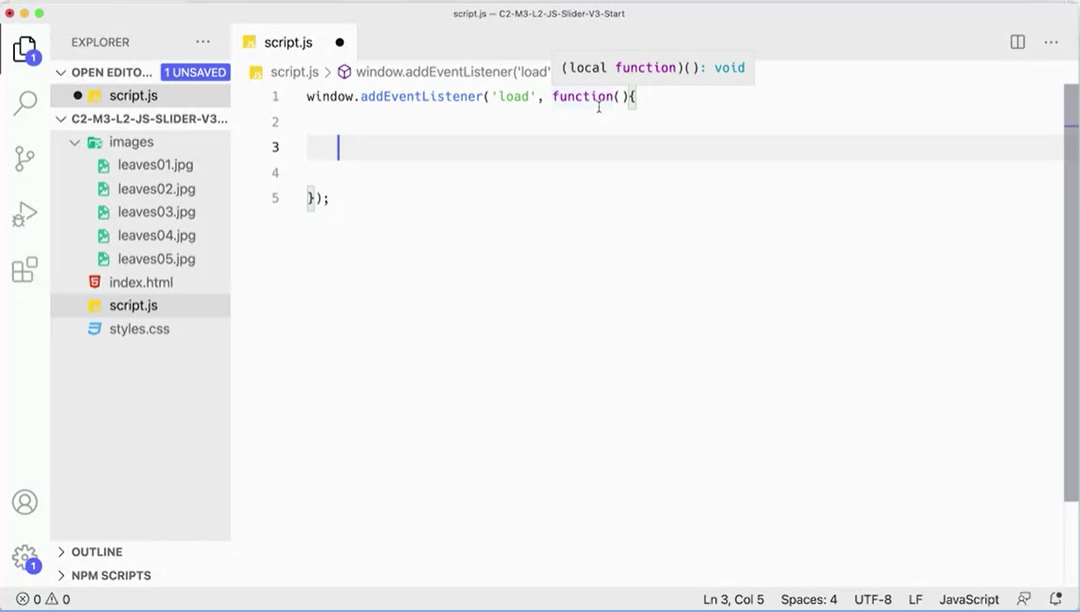
Let's add that event listener to our script first. Come over to my script file and I'm going to add a window, if I could type it, window.addEventListener. And I'm looking for a load event, I'm going to run a function that runs when the page has loaded all of its content. In here I'm going to add a number of variables. A lot of these variables are going to look familiar, because it's very similar to what we did with our jQuery version of the script. Also, this function here will function as a closure for this whole script.
I don't have to worry about adding an IIFE immediately invoked function expression, because this function will make sure all the variables, everything in here are local to this function. And nothing will be leaking into the global scope. We don't need to worry about doing that for the script either, because we're putting it in this event listener for when the page loads.

What do I need to know? I need to know how many slides I have? How wide is each slide? What is the total width of the slider? And then I need to get some elements that I'm going to work with on my page, the actual slider element itself. If I make a variable called slider, I don't have to type document.querySelector every time I want to work with the slider, same thing with the next button and the previous button.
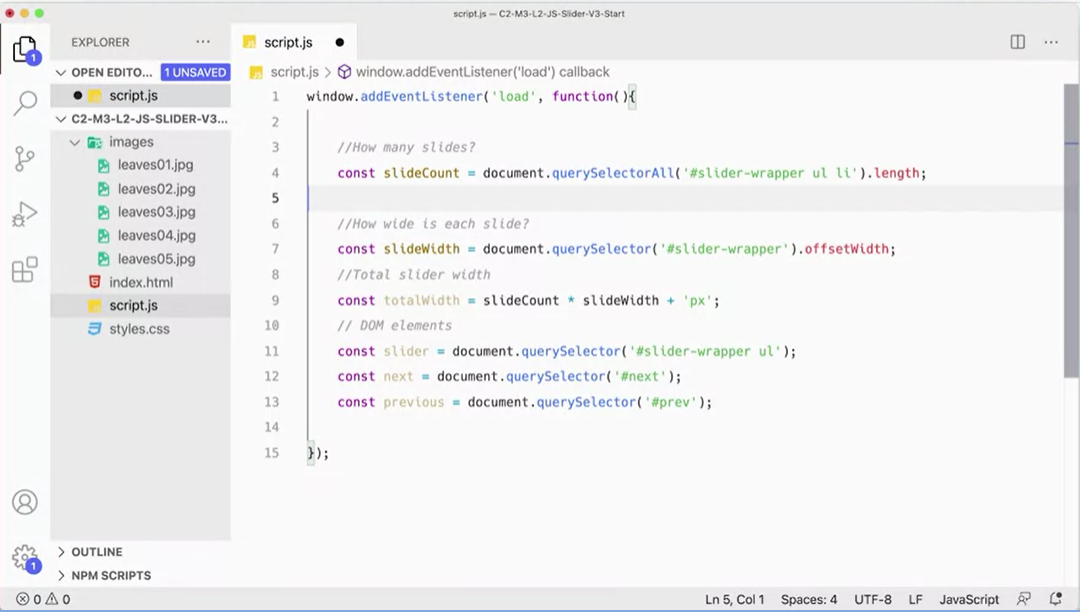
Let's add these in over here. I'm going to go back to my script over here and type it in. I'm going to make a variable called slideCount, and I'm going to use querySelectorAll to get the length of how many list items do I actually have?
The next thing I need to know is how wide is each slide (slideWidth)? And there's a property in JavaScript called offsetWidth. I can go get this wrapper and say, well how wide is my slider-wrapper? The next thing I'm going to need is the total slider width (totalWidth), which is going to be the slide count and it's the slide with the pixels. Then I need my DOM elements; the slider itself, the next button and the previous button.
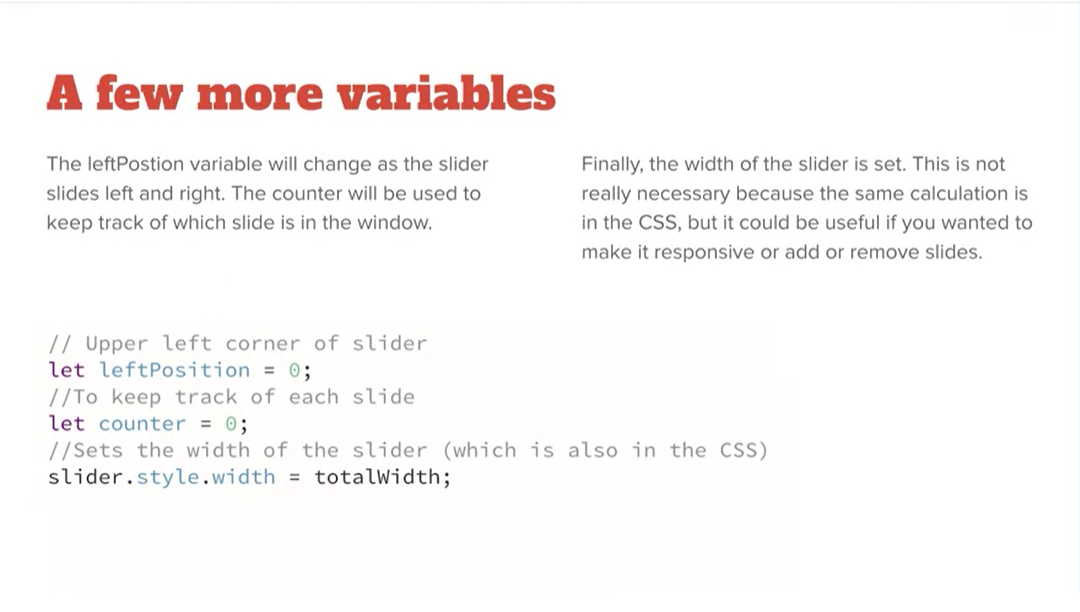
We're going to need a few more variables to get before we get started with our next click handler. Okay, here are a few more variables that we need. We need to know the leftPosition and set it to 0. We need a counter, and then we want to set the slider.style.width to the totalWidth.
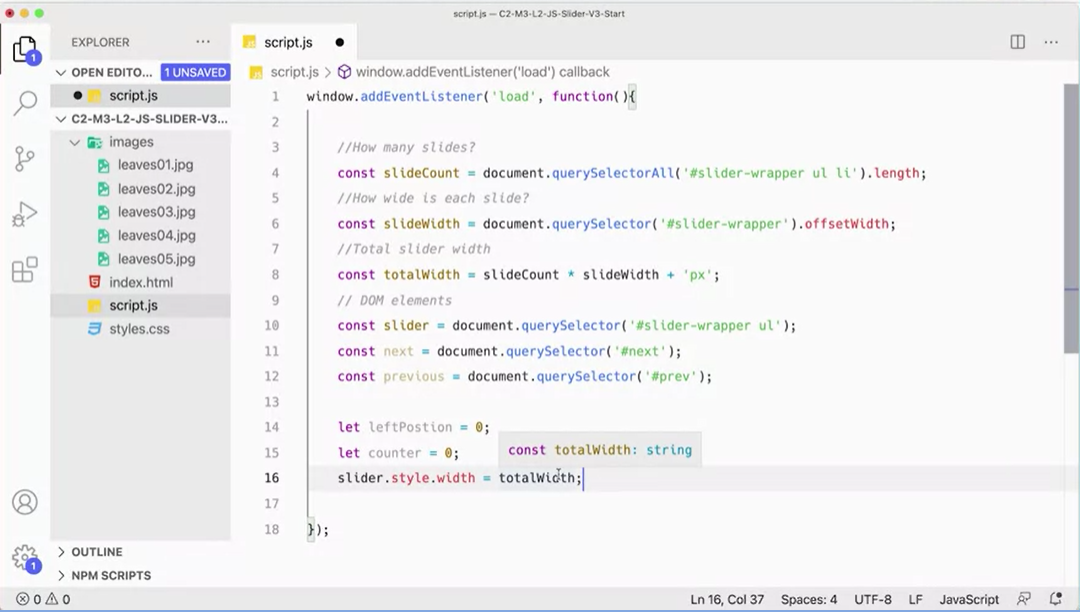
Setting slider.style.width, that's the totalWidth. It will set the width of that element, and we'll talk about that and look at it a little bit more in the next lesson.

In our last lesson, we got some basic variables in place for our slider and they're very similar to the variables that you saw for the jQuery version of the slider. But now we're using plain JavaScript, so the syntax is slightly different.
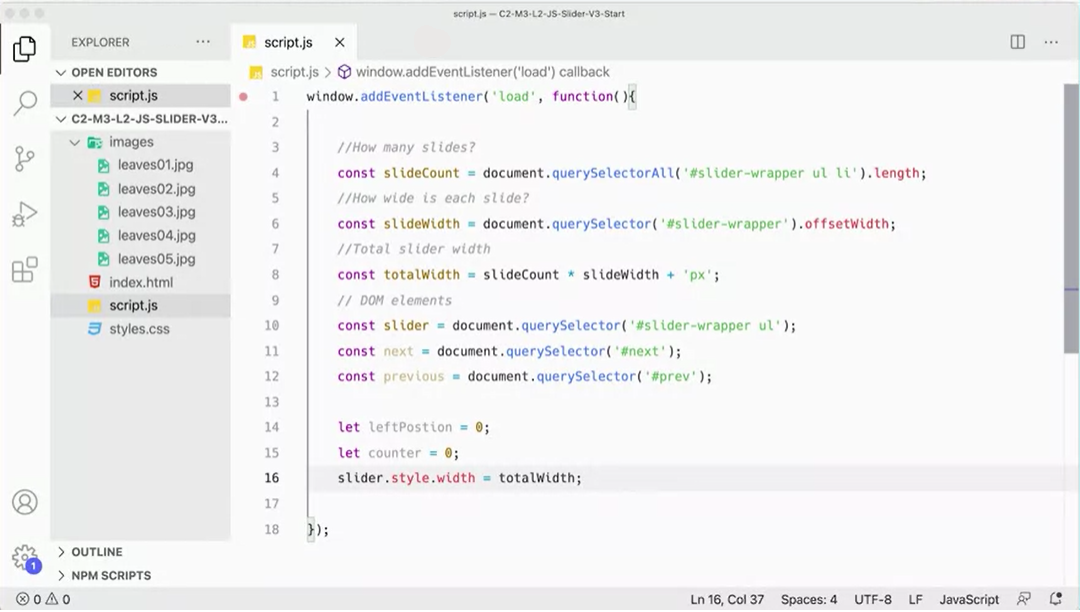
Here we've set the slider.style.width to totalWidth and remember totalWidth is the slideCount times the slideWidth + “px” at the end.
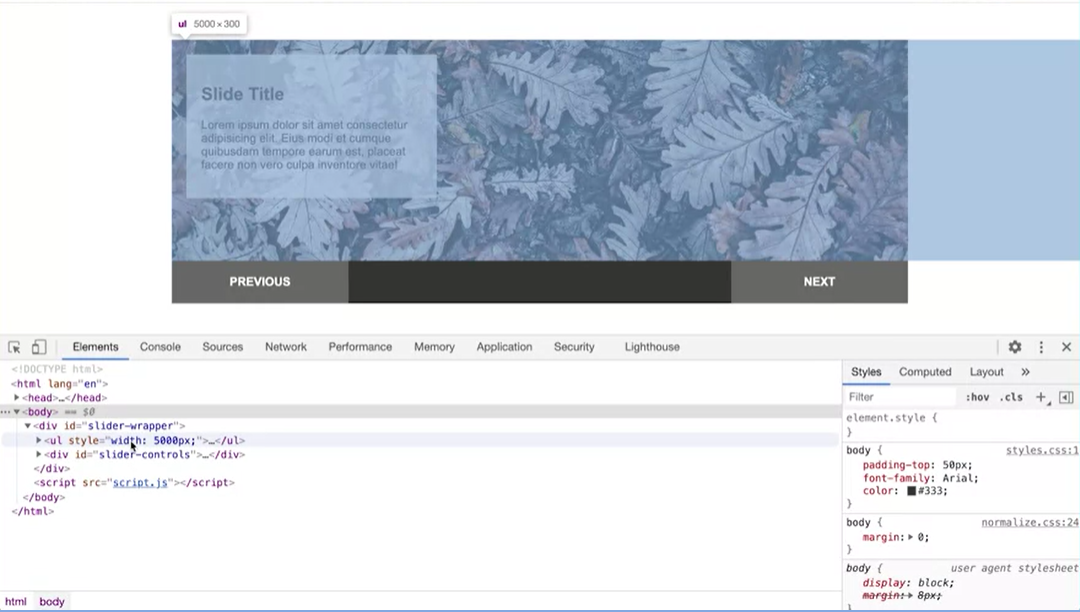
We're setting that locally in the style here and over here, if I come in and look at my slider and refresh this, and then click “Inspect”. I should see in here for the unordered list and actual number of pixels here, UL style with 5,000 pixels, because I've got five slides and they're 1,000 pixels wide, so that's 5,000 pixels. The reason why I want to set that here is just in case I add more slides to my slider. I could add more if I wanted to or remove some if I wanted to and I want to keep the script as general as possible.
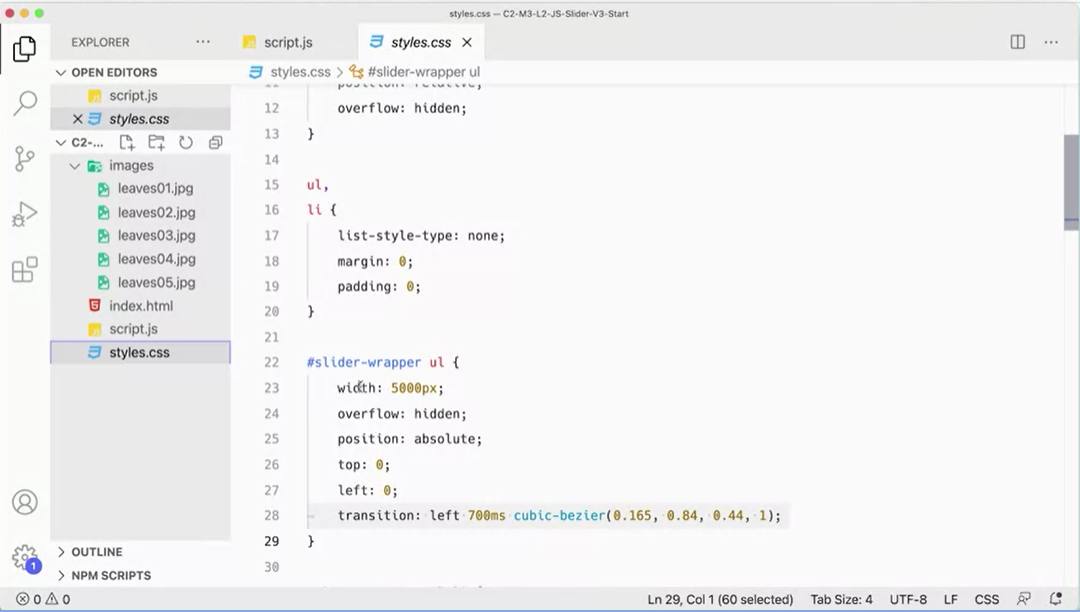
Over in the css for this, in here I have probably, I think I have 5,000 pixels set here, I have it set here. I could remove that from here if I wanted to know. I don't really need it here, it's getting set on that element manually with an inline style and JavaScript is setting that, so I don't really need it here. Really I don't want it here I want it to be handled by the script because I want to be able to add or remove elements here and the script is going to override that anyway, so it's not even really necessary to have it there. That's a nice thing to pay attention to and to realize that I can take that out of there.
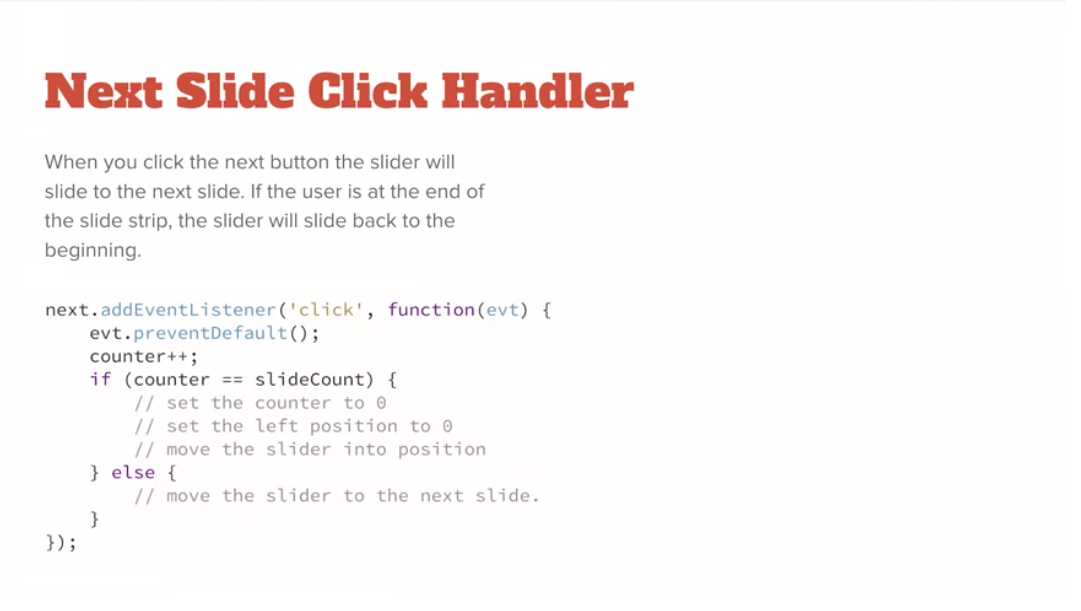
The next thing we need to do is set up our event handler for when you click the next button. The first thing we'll do is handle an event for what happens when you click the link will pass in the event object and prevent default so that you don't get the little hashtag for clicking the next link up in the URL. We will increment the counter and then we're going to have any if and else for if the counter is equal to the slide count, in which case we'll set the counter to zero, we'll set the left position to zero, and then we'll move the slider into position. Otherwise, we're going to just move the slider to the next slide.
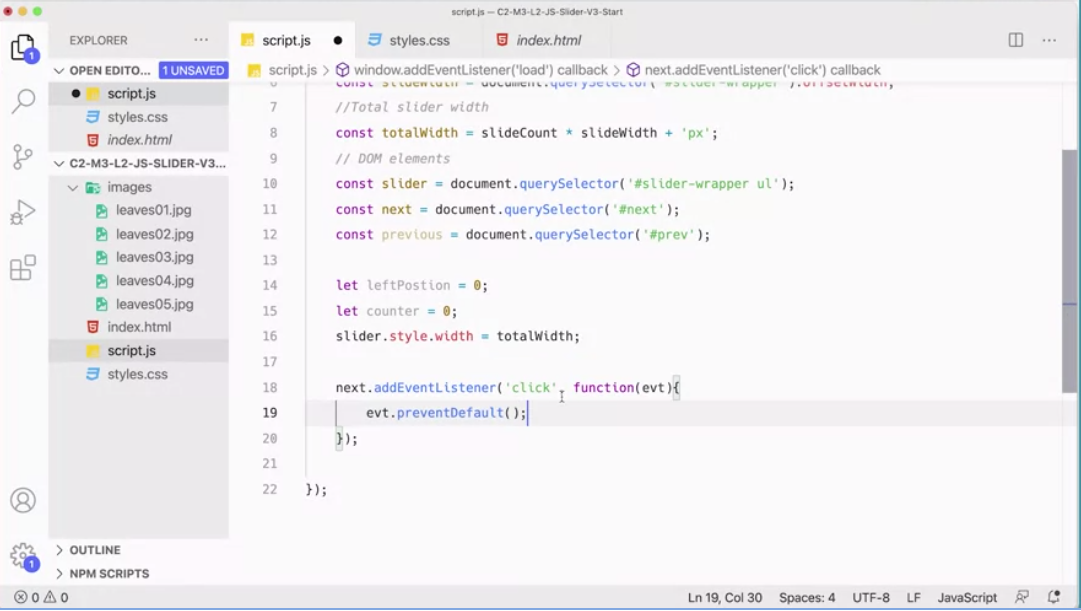
Let's set up this event listener on our next button. Go back to my script here and now I can just use the handy shortcut next because I know that that is actually from here it's going in and getting my button pound next. Next, add EventListener. I'm listening for a click and I'm going to run a function when you get a click, like so. Then I'm going to pass in evt. It represents that event object that we're passing into this function. The event that happens when you click on this next button. Then we're going to do evt.preventDefault.
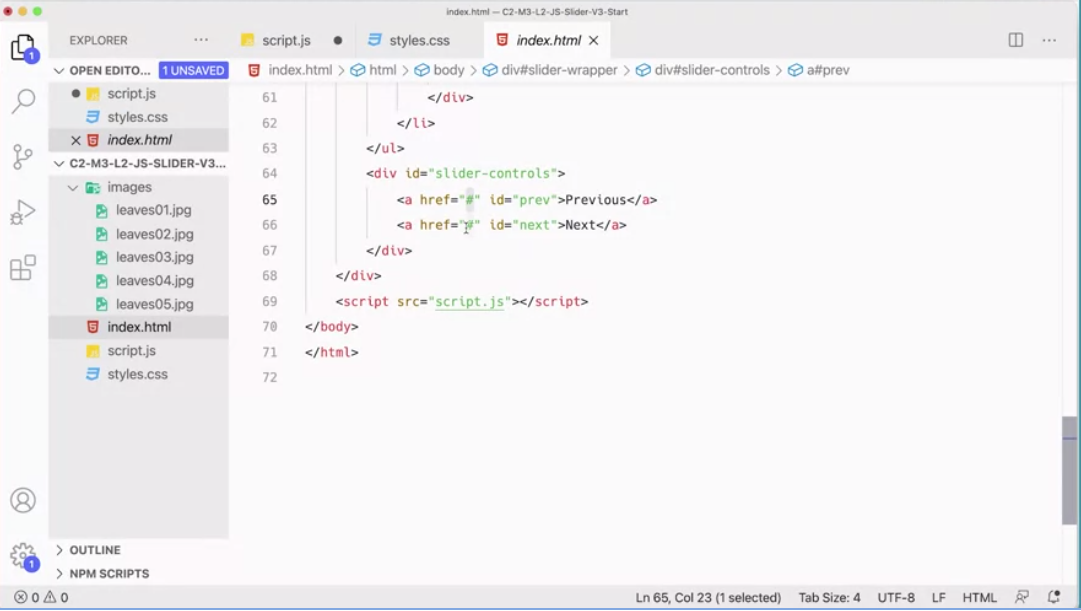
That's because these buttons over here are really just links. If you click on the link without that, then this pound sign ends up in the URL, this hash and I don't really like that. The event prevent default, keeps that from happening, evt prevent default passing in that thing.
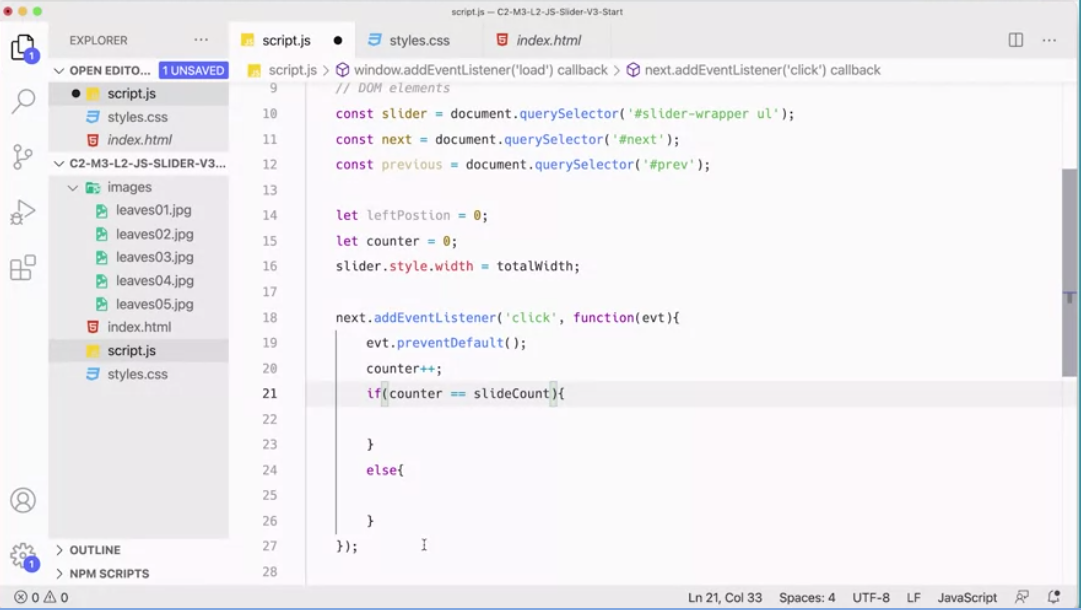
Then we're going to have an if statement, if will handle what happens if the counter has gotten to the end of the line and in else. We also need to increment the counter. Counter is the same as slide count equals, equals the same as. Read that as the same as. Don't forget, we need to increment the counter, counter plus, plus. It's the same as counter equals counter plus one. Just a nice little shortcut there. Then if counter is the same as slide count, then we're going to do something in here and then we've got an else in there. Then we'll pick up the rest of this next EventListener in the next lesson.
If we've reached the end of our strip and the counter is the same as the slide counter, then the first thing I want to do is set that counter back to zero.
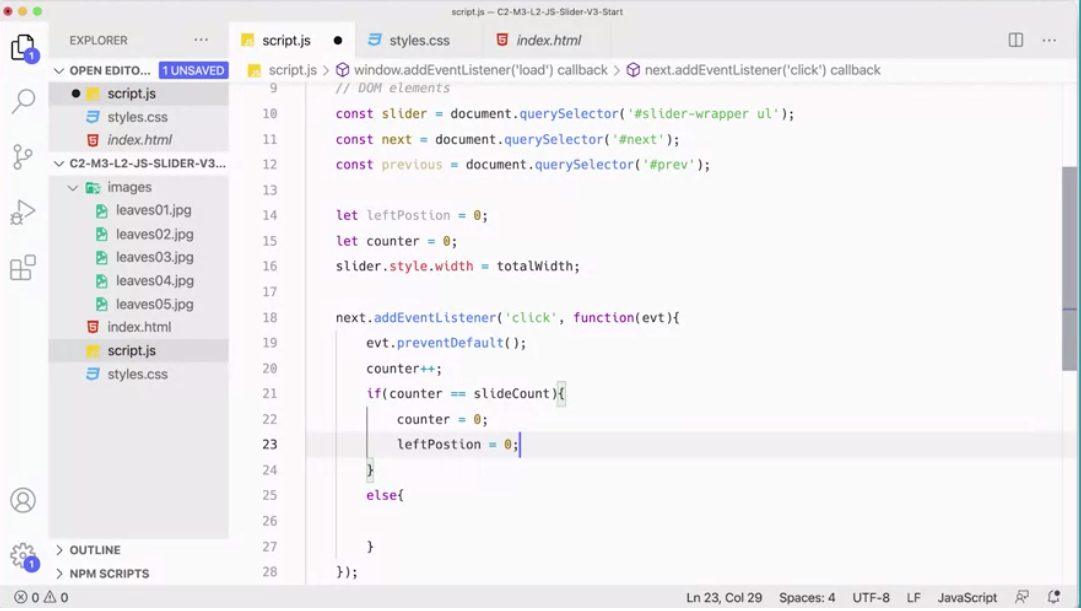
Then I want to set this variable left position and make sure it's set to zero, left position. It was set to zero initially, but I just want to make sure it gets set to zero again.
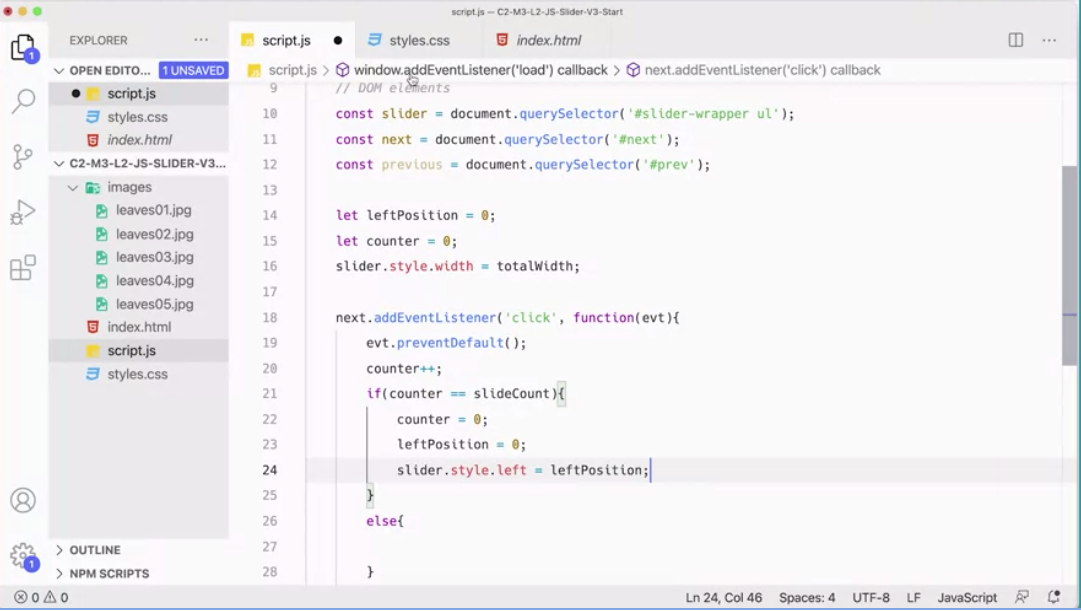
Then I'm going to take my slider.style.left and set it equal to left position and that will put it into the correct position on the page.
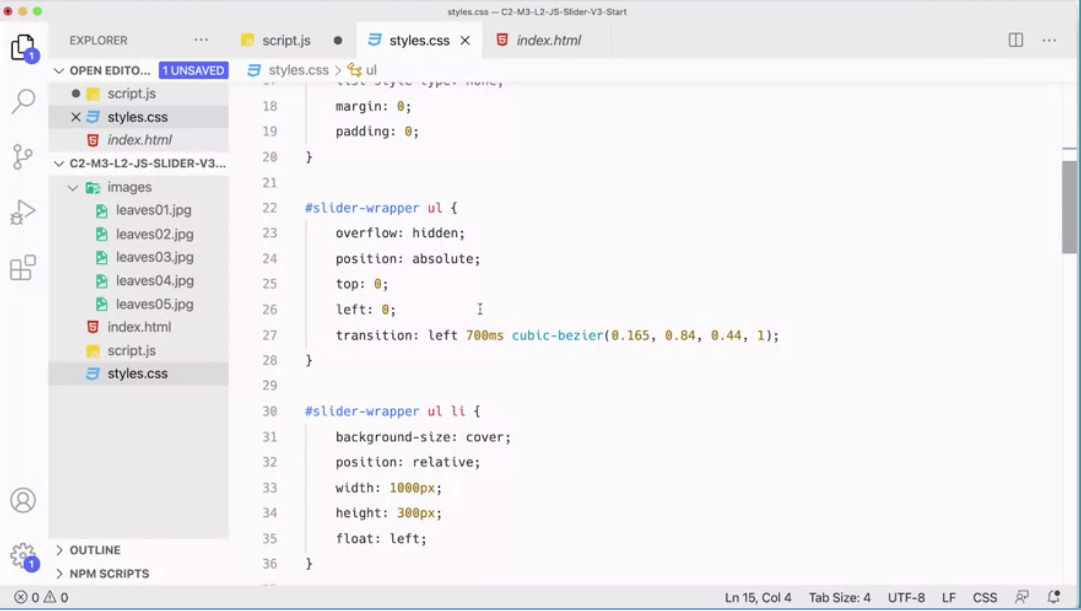
Now remember over here on the styles, when we talk about slider, we're talking about this unordered list here and it has the transition on it, so that's going to take care of the animation, I don't have to do the animation over here.
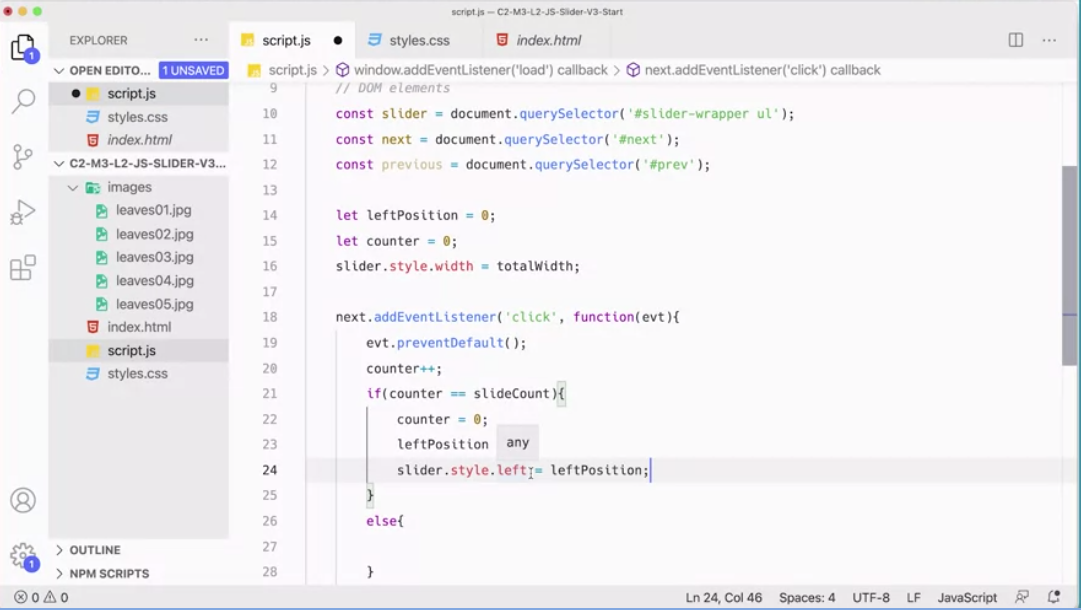
All I have to do is set that position left and CSS will handle the animation. That's one thing that's different between the JavaScript version and the jQuery version. In the jQuery version, we're using the jQuery animate method, which is using the built-in effects library for doing the animation. Here, we're just setting the CSS position of the CSS property to leftPosition, which in this case is zero, and then we let CSS handle the animation.
Because CSS uses the GPU instead of the CPU, it's nice and buttery smooth. It'll work well on older devices that don't have a faster processor. In newer device the jQuery will work fine, but older devices, the CSS in particular will work a little bit better and be a little bit smoother, but I think it's even smoother on newer devices, honestly. That takes care of the if statement here.
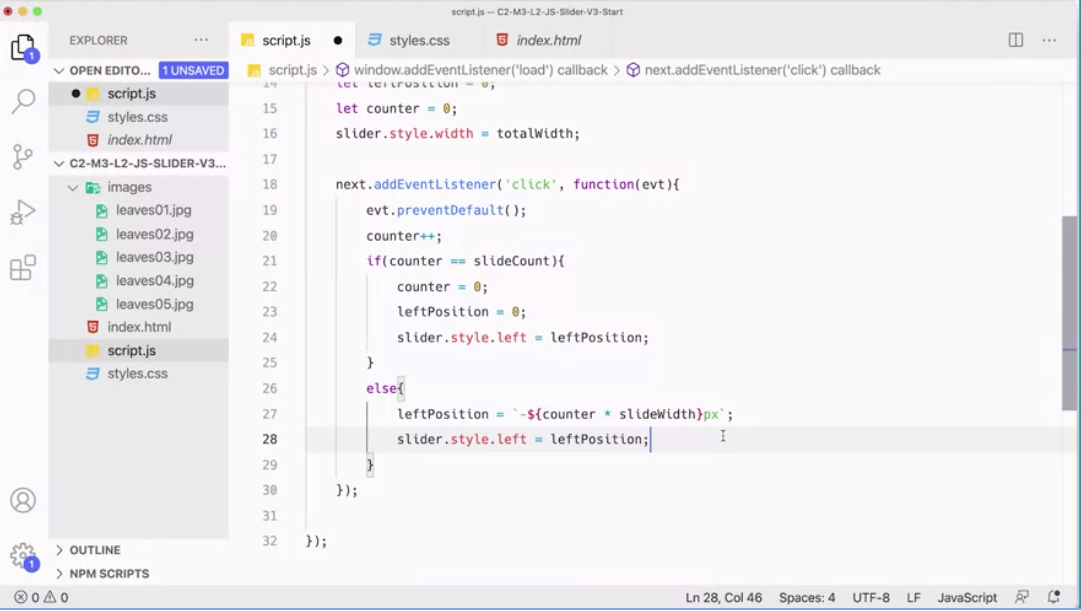
For the else, we need to increment the slide forward, if we're not at the end, we're just going to move that slide forward. I'm going to set left position here. LeftPosition. I'm going to use a pair of tick marks and I'm going to set it to a 'negative number', and what I want it to go to whatever the counter is times the slide width. I'm going to put in here dollar sign curly brace counter.
If I'm clicking it the first time that counters going to go from zero to one, that's going to be one, and then when I multiply it times slide width. Of course, I want to add a px in here. That sets that left position there. Then I just need slider.style.left = leftPosition.
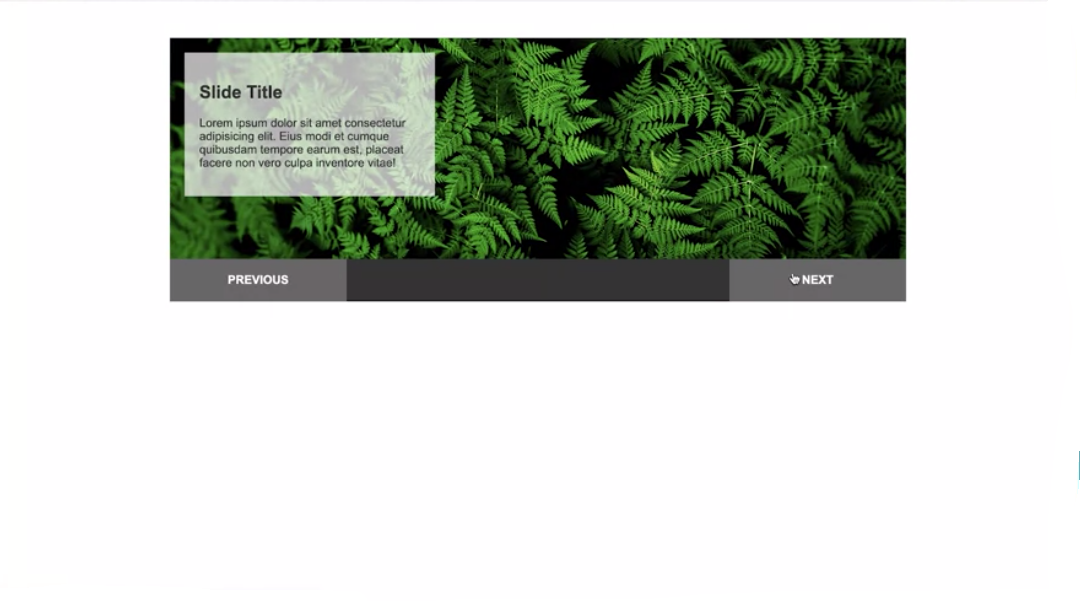
Let's go check it out. Notice it's nice and smooth with the animation. When I get to the end, it goes back to the beginning. We have a script that's working and this is perfectly fine the way it is, but it could be simplified a little bit.
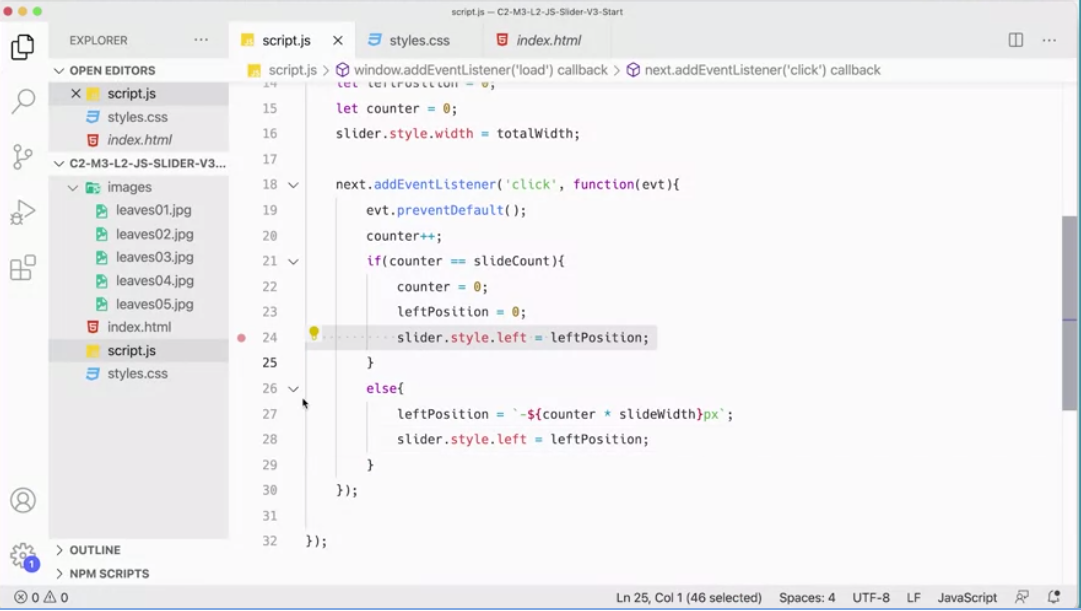
If we look at this, you'll notice this line is the same as this line, and if I set the counter to zero, I don't need to explicitly set left position to zero because this will do the same thing.
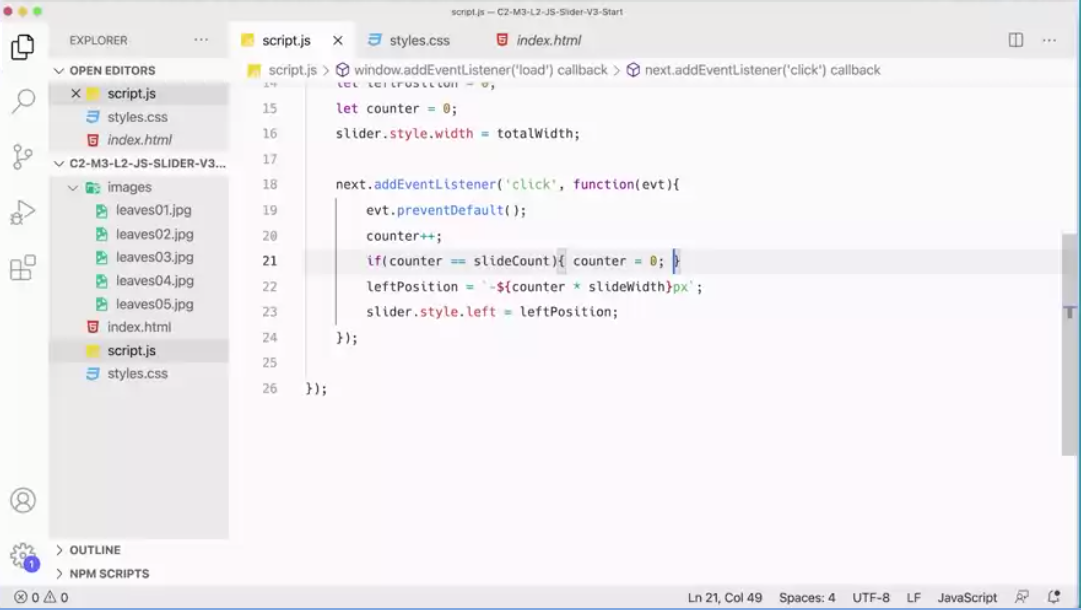
If I could set counter to zero, zero times slide width px, is going to be zero, I don't really need this line either. In fact, my if statement could get much shorter, It could just be if counter is zero, counter is the same so I can set counter to zero, and then I don't really need an else because this is going to happen no matter what. If you wanted to make the script even shorter, you could put these on one line, I think Visual Studio Code is going to scream at me when I try to do this and put those back in two lines as soon as I save this.
But you could even just put this all in one line. It makes this really nice and short and compact where setting the event prevent default, we increment the counter. If the counter is the same as slide count, we set the counter to zero and then we set the left position to whatever the counter is times the slide width. If it's zero, then it's going to be zero, and that's fine. If it's one, then it's going to be one times side width 1,000 pixels minus 1,000 pixels, so on and so forth. Then we set the slider style left to left position and let the CSS do the animation.
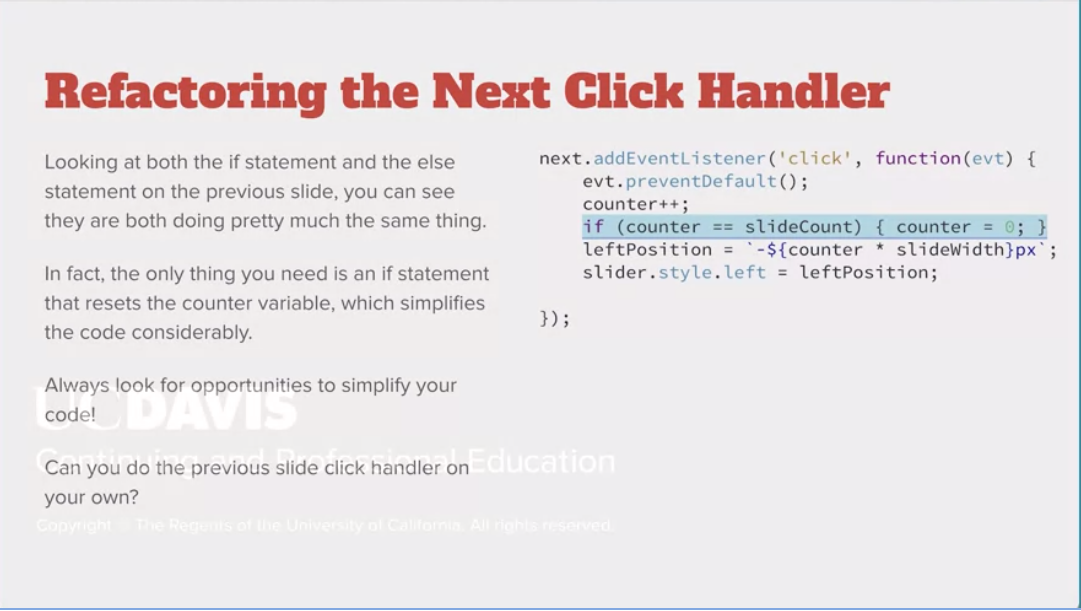
Your chore is to do the previous EventListener.

In the previous lesson, we completed the event handler for the next button.
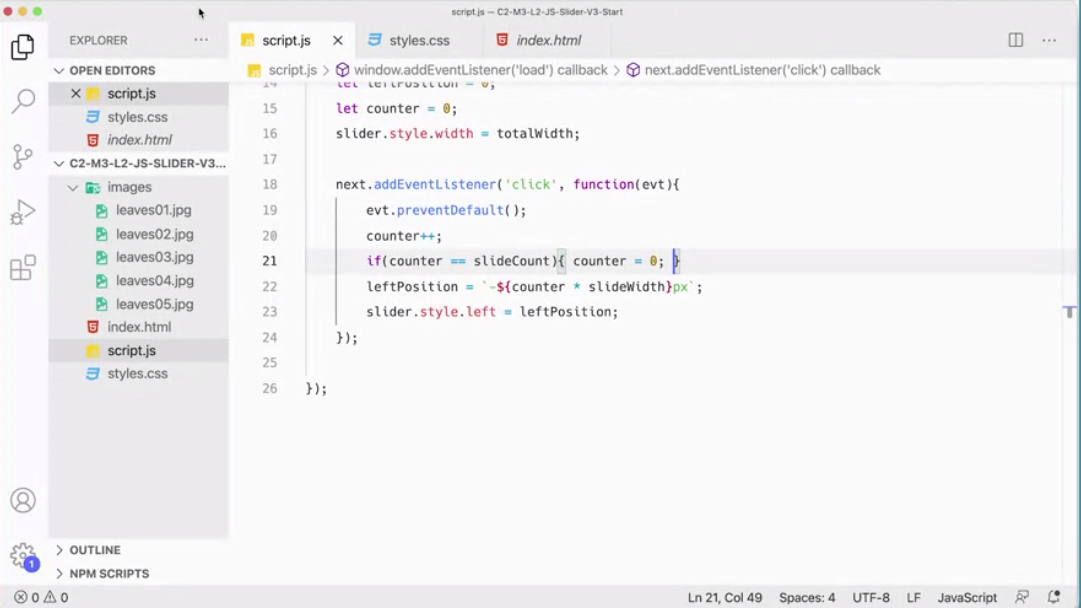
Your challenge was to write the event handler for the previous button. Hopefully, you gave it a try and were able to do it. If not, let's do it together here. But it's good to at least try, even if you tried and got stuck and couldn't quite get it to work, then that's fine. We want to make sure we try these things because that's the way you learn JavaScript, and then now we'll try to do it together.
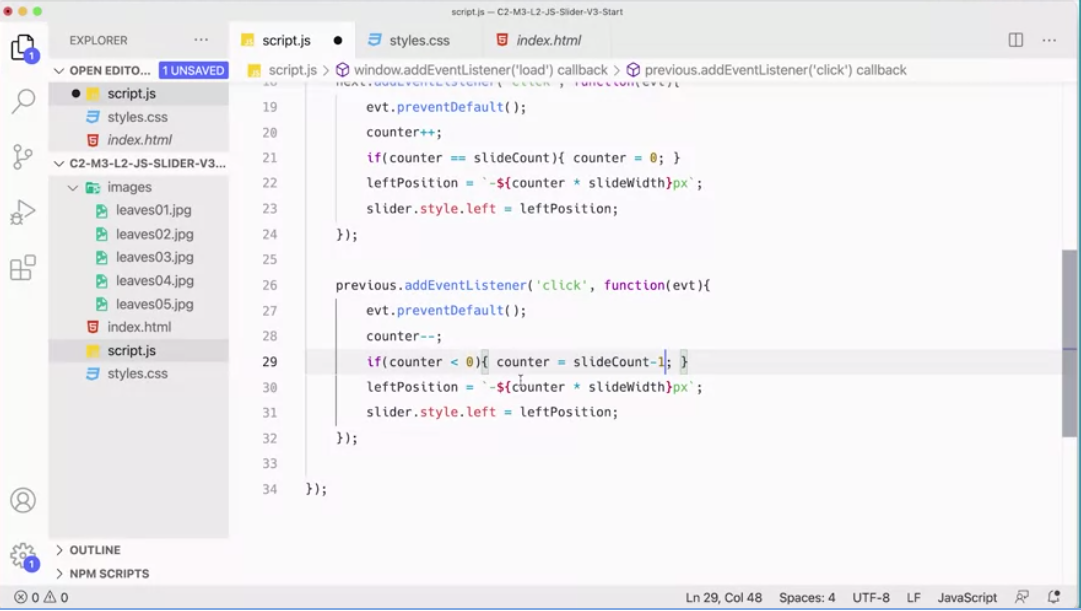
The first thing I'm going to do is copy this entire event listener and paste it. A lot of it's the same. I'm going to say next, instead of next, it's going to be previous to go with my previous variable here, which is getting my prev element from my HTML.

Over here in the HTML, you can see that I set the previous button to id prev. I'm getting previous, click evt.PreventDefault. Instead of incrementing the counter, we're going to decrement it minus minus. Now I need to think about this. If the counter is less than 0, I want to set the counter to slideCount minus one. Remember, slideCount will give me a full number of slides. In this case, there's five, so that's going to be five. But I want my counter to be a zero, a one, a two, a three, or a four, those five numbers.
Then the left position is going to be the same. It should be all I need to do to make this work. Let's see if it works. I'm going to save that and come back to my slider and refresh. The next button should still work. Previous button works. If I click Previous again, it goes to the end of the slides, and then it will backup through my slides. When I get to the first slide, if I click "Previous", it goes to the end, click Next and it goes to the beginning.

You've completed this project. Here on this slide, you can see the full script with everything in it that we needed. You can see I left the else statements in here, I don't really need this, this is actually the longer version of it. We've got a full version of that script and you could use this on your websites and compare this to what we did with the jQuery versions.
Now if you want a challenge, try to make the version of the JavaScript slider work where the slides don't go all the way back to the beginning or go all the way back to the end when you get to the end, make it so that it wraps around to the second version of the jQuery script but just with JavaScript. Hopefully, that will work.

Hello, you've made it to the 4th module in our second course on JavaScript and jQuery. Congratulations, you've learned a lot of JavaScript and a lot of useful jQuery for all of your interactive projects. I think it's a lot of fun and I hope you've enjoyed the ride so far.
In this module, we're going to get into timers and recursion. These are very useful tools that will open up a whole world of possibilities for JavaScript and jQuery, and for your interactive projects. Breakout your code editor in your web browser, and let's get started on learning about timers and recursion in JavaScript and jQuery.
JavaScript timers and recursion.
I have a few scripts that we can look at that will explain how timers and recursion can work in JavaScript and these are really fun methods to play with because you can do a lot of really interesting things with them. Occasionally, you do want something to run after a certain amount of time has happened or on some interval. This is where we can really get into how to do that with JavaScript.
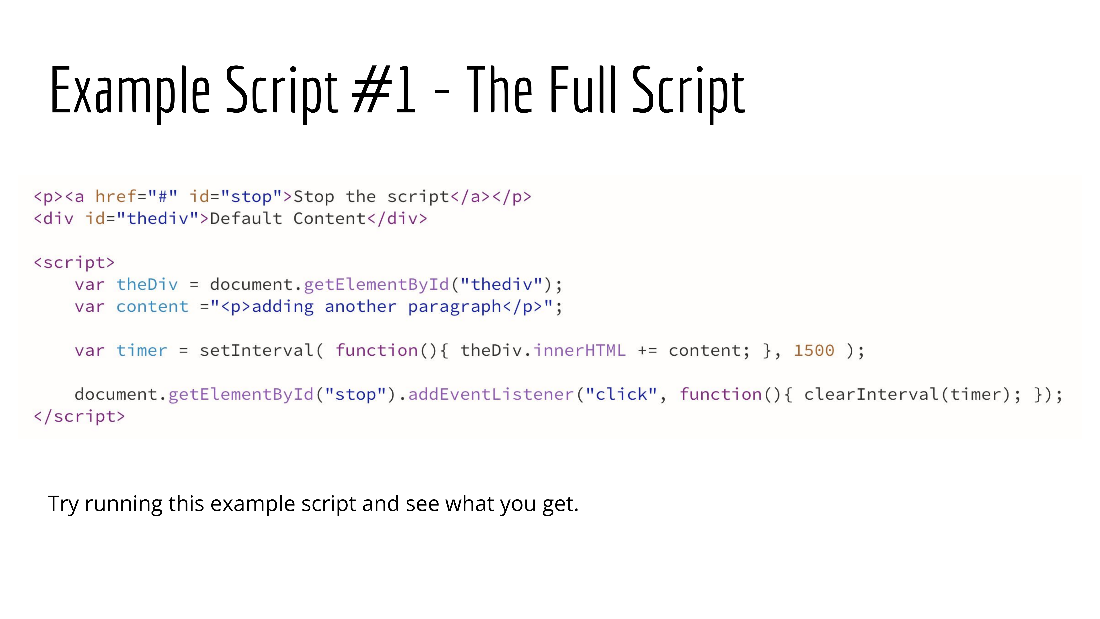
Let's take a look at this first script here. I have the example files open in my code editor here. I'm looking at the example 1 and this is the script here, it's a very short script. I'm going to close my explorer here just so you can just see this line without it rapping. But best thing to do is to actually see the script run.
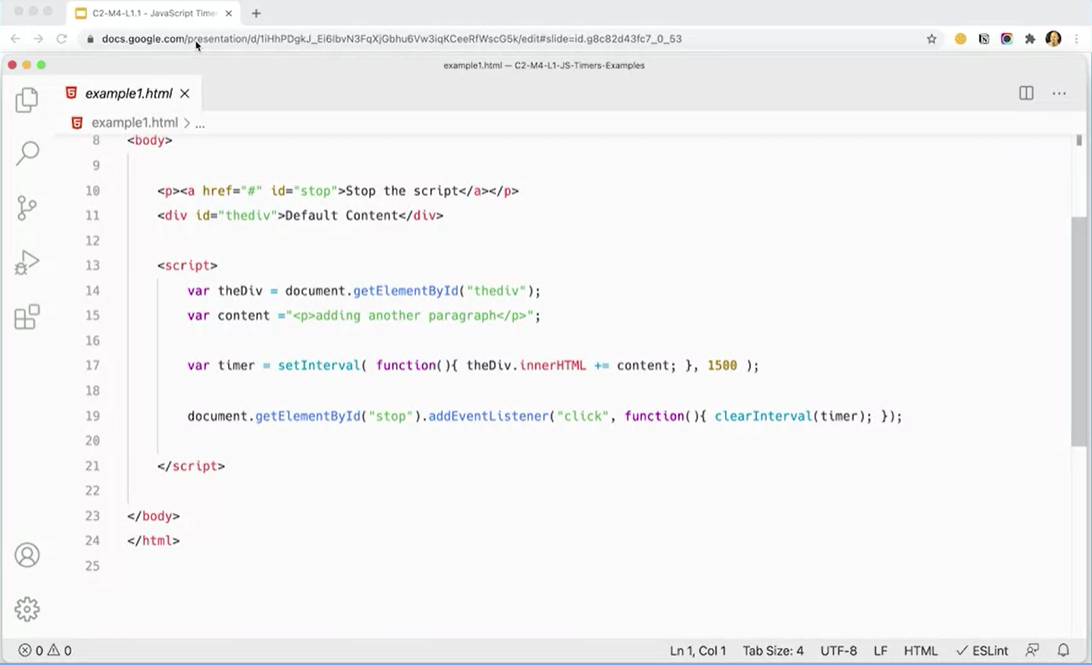
I'm going to come over here and just open the example 1 script here and you'll notice that after a certain amount of time, the script starts adding paragraphs to this web page.
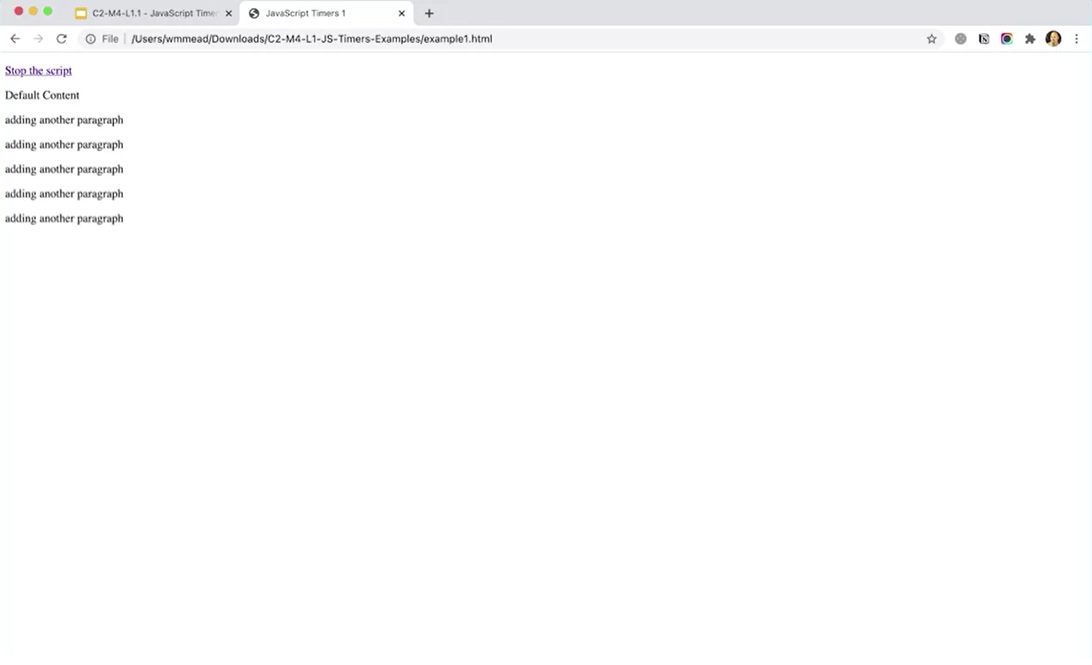

If I view the inspector and look at the body here and my div, you can see that this div, it's adding another paragraph, every 1.5 seconds it adds another paragraph. If I want to stop the script, I can click the link, "Stop the script," and it will stop adding paragraphs.
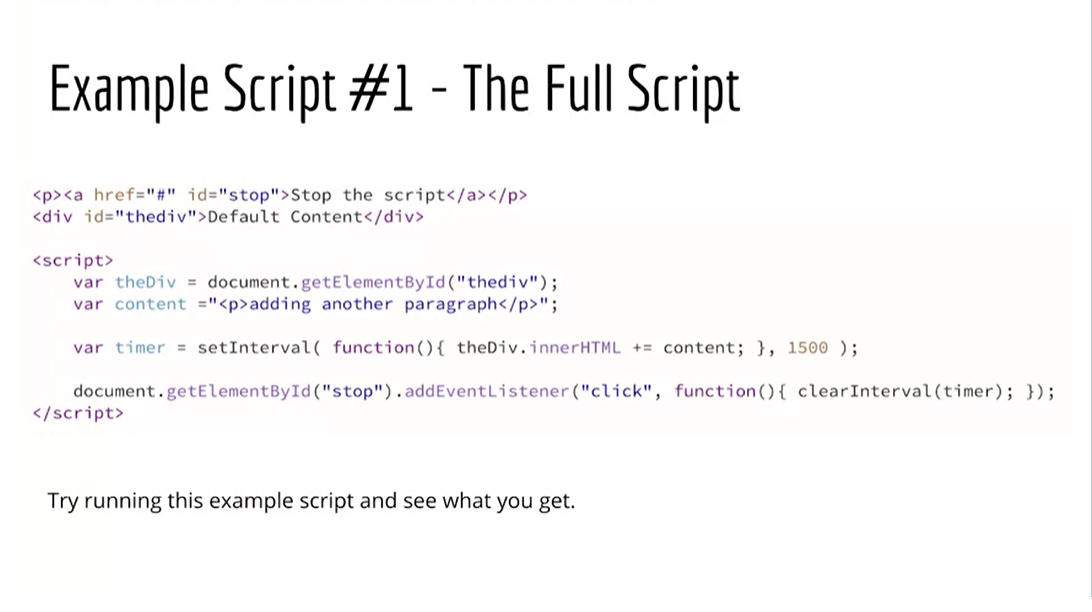
Let's deconstruct how this works just a little bit here. That's the full script.
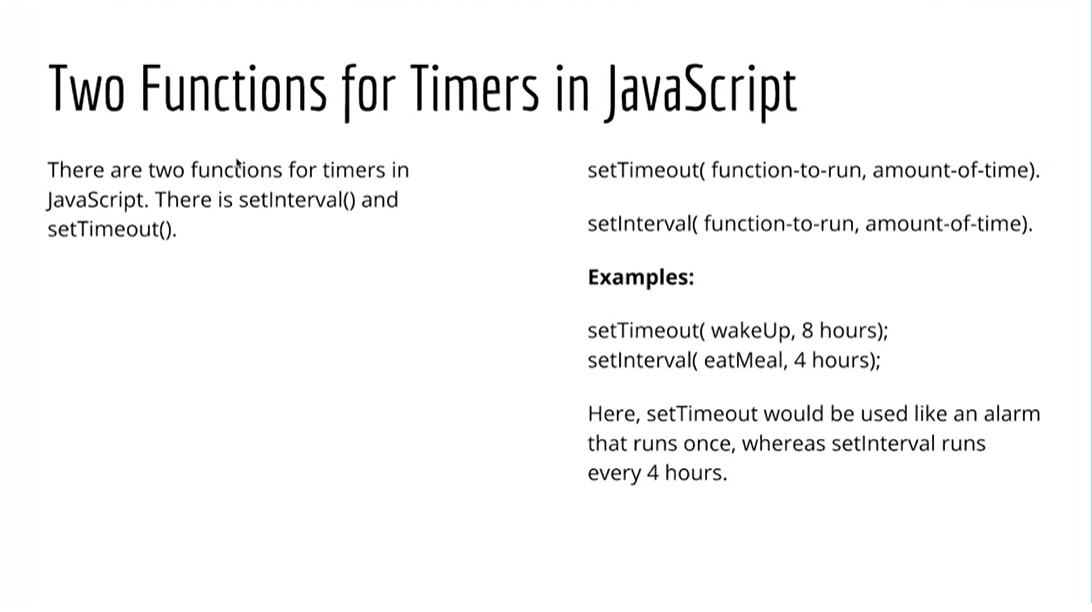
Essentially, there are two functions in JavaScript that allow us to set timers. One is setTimeout() and the other one is setInterval(). Each of these functions takes a callback function and an amount of time. For setTimeOut() or for setInterval(), you will run a function and then you'd put a comma and then the amount of time that you want to have a lapse before it runs or on the interval.
For example, down here I have setTimeout wakeUp. So it'd run this function wakeUp after eight hours or setInterval eatMeal, after every four hours I'm getting eatMeal, something like that. Now, you can't pass in eight hours and four hours, you pass in a number that represents milliseconds but it's that basic idea.
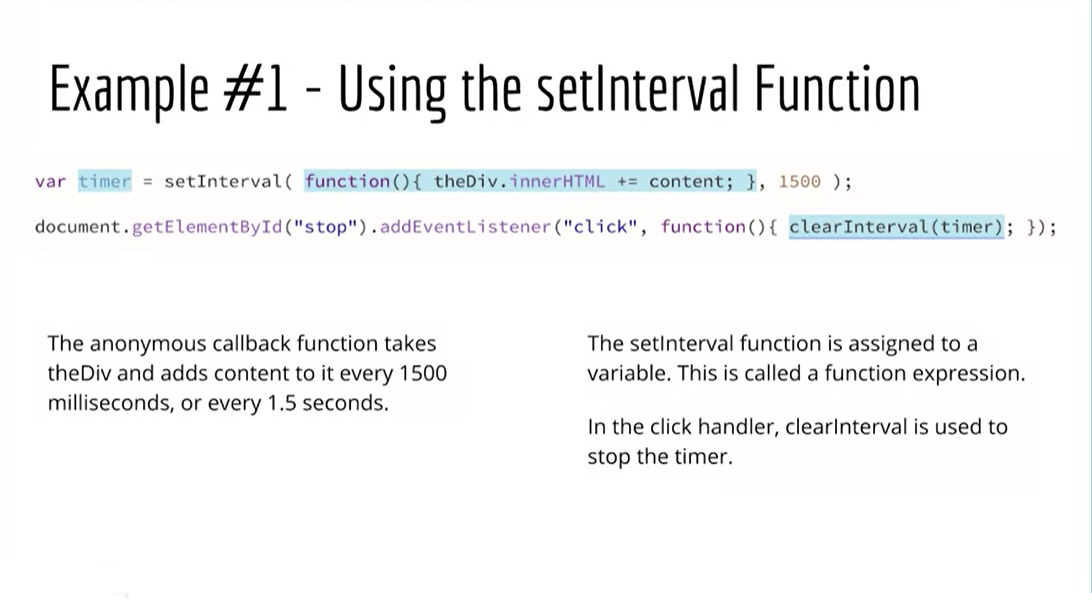
Let's take a look at our script here. We have a timer that is a variable and it's assigned the setInterval() function. If you remember, this is called a function expression because in JavaScript, JavaScript treats functions as first-class citizens within JavaScript.
You can assign a function to a variable just the same way you could assign a string to a variable or a number to a variable or anything else to a variable, any other piece of data, you can assign a function to a variable. That's one of the things that's very powerful about JavaScript, it allows us to assign functions to variables. I've assigned this set interval method to the variable timer and then the setInterval method has a function in it and the function simply says, take the div.innerHTML, and plus equal the content.
We'll take some content and add it into the div and then we'll do that every 1,500 milliseconds or every 1.5 seconds. That's how this is adding the content onto the page is that timer loads, and setInterval immediately starts running and starts doing its thing and adding this content in the page.
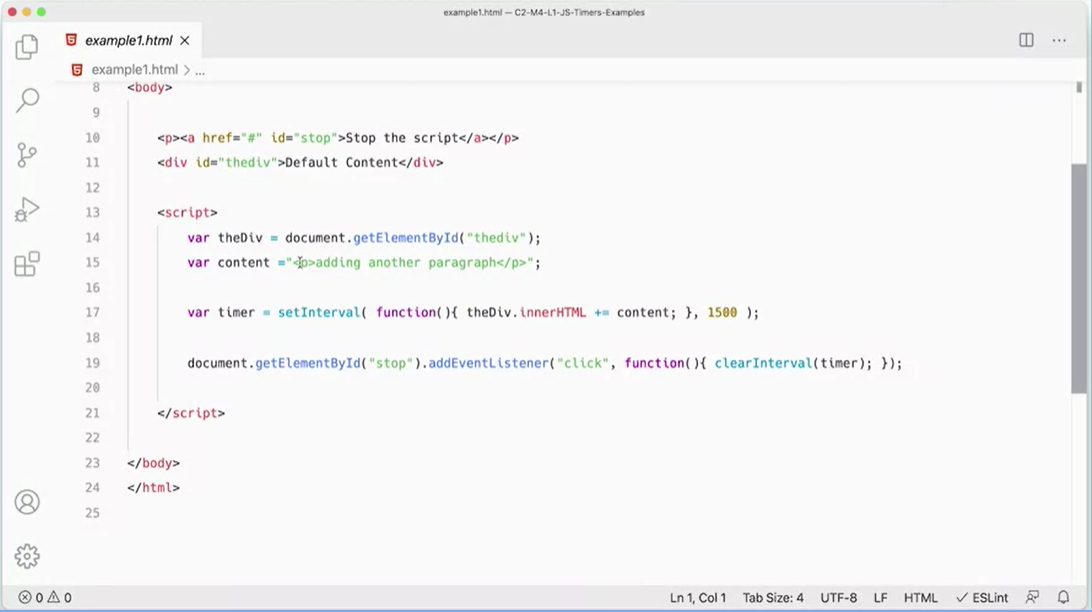
Let's go look at the script again in the actual file over here. I have the content here, which is adding another paragraph, it's just a string here and then setInterval runs and it says take theDiv, getElementByID(‘theDiv’).
It's got some default content and it's going to set its innerHTML to content. In 1.5 seconds, the content is going to get switched to a paragraph and it's going to add that. It's going to set the innerHTML to that content. Then in another 1.5 seconds, it will take the content and add it again. Now, there's two paragraphs in the content and it's going to change the innerHTML and div to having the two paragraphs so the two paragraphs are on the page, and so on and so forth until the page is completely full with the paragraphs. We'll talk about the clear interval method in the next lesson.

We're looking at the first example in our timers and recursion examples here.
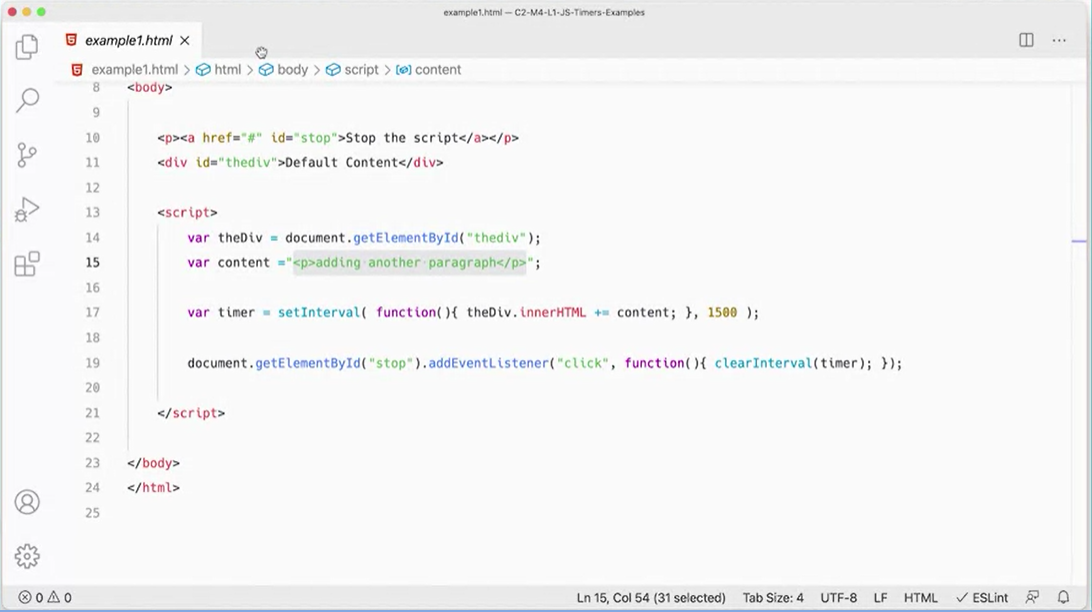
We've already talked about how this example is using setInterval to keep adding content into the div and then adding these paragraphs onto the page. We have setInterval assigned to this variable timer, and down here I have an event listener that when you click this button, clearInterval timer and stop.
It's got an EventListener and when you click on it, it runs a function, and the function runs this method, clearInterval and I'm passing in timer. Timer holds the setInterval thing here. That's what allows me to stop the script.
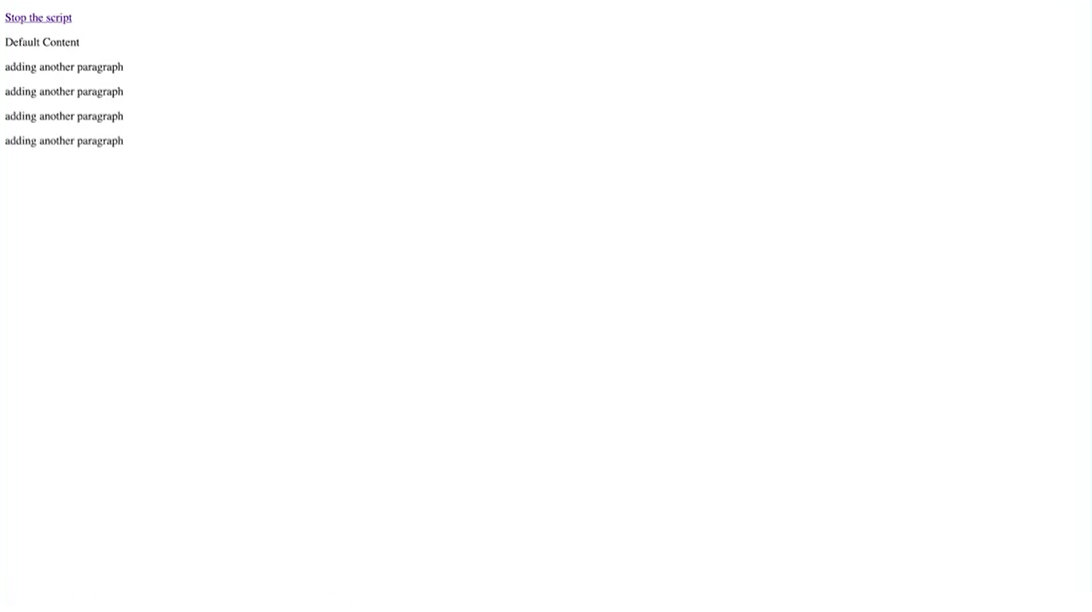
Up here, when I refresh my page, it'll automatically start adding content into that div. When I click stop the script, then that EventListener fires and it runs a function with clearInterval in it and then stops that script. It clears the interval timer. Now, we don't need to use the function expression here.
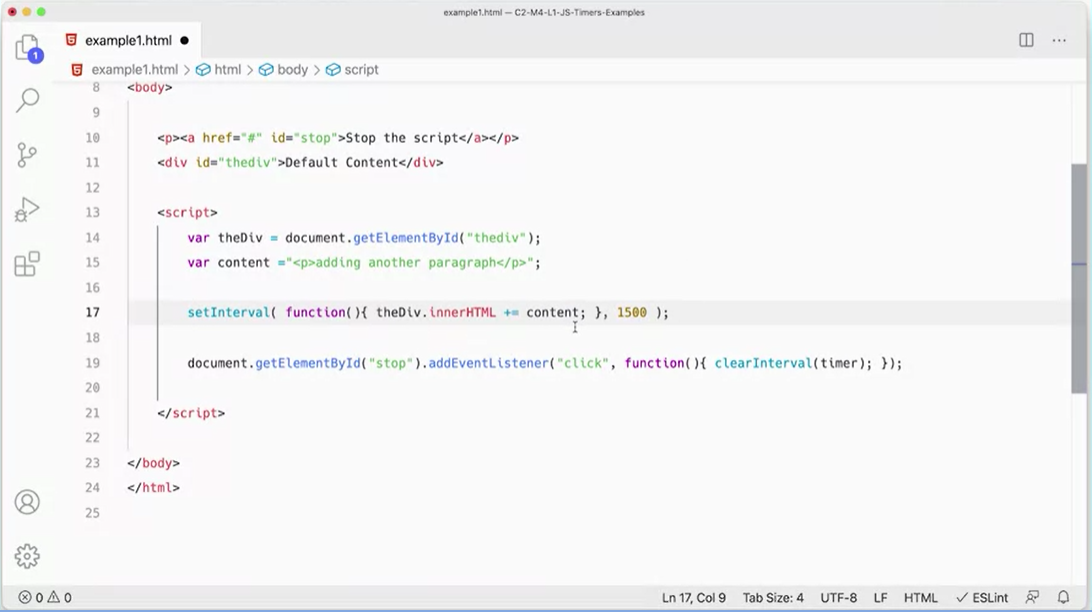
If I were to remove this, the page would still work and that it would still run set interval and start adding div to the content.
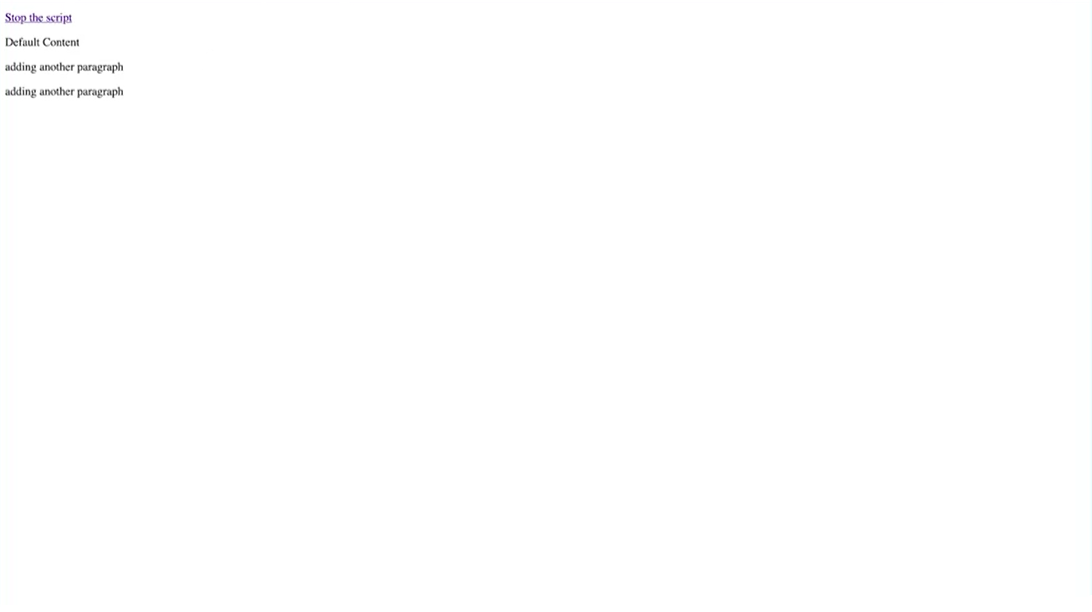
If I come back here and refresh, you'll see it will continue to work in terms of adding that in there but the stop script function won't work.

In order to stop the script, I have to have this thing set to some variable so that I can pass that variable into clearInterval over here. The other option would be to put setInterval inside there, but then you need something to get it started. In order to clear the interval, I need to assign my setInterval to timer, is really that bottom line here in order to make that work.
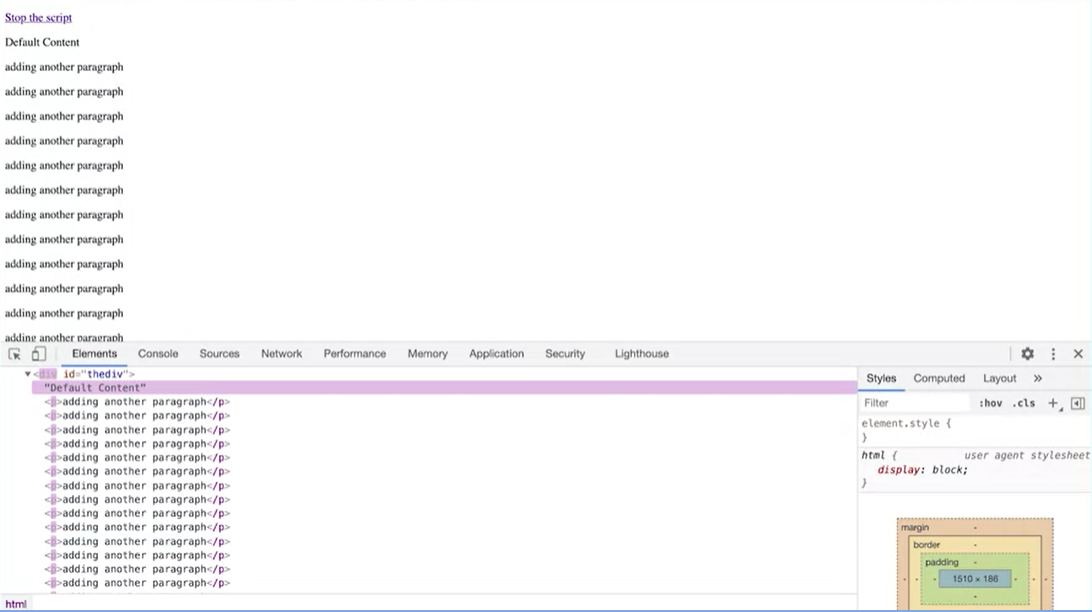
Now there's one other thing that I'd like to be clear about with this script before we finish. If I go back here and right-click and choose inspect, what I would like you to notice is that all of these paragraphs are highlighting every time the script runs in my inspector here, and that's because of the way the script is running. It's not just adding a paragraph to what was there before. It's replacing the entire contents of the div with all of the paragraphs every second and a half.
That's something to pay attention to because it might not be the best in terms of performance to replace all of the contents, and we could make it so that it's just adding to the div with an append method, we could append to the div a new paragraph every second and a half, and that might be a better way of running the script.
But I thought that it was interesting to point out that what's happening here is that every second and a half, our variable, the content is getting an extra paragraph in it. The first time it runs as one paragraph in it, the second time it runs, it's got two paragraphs in it. The third time it runs, it's got three paragraphs in it, and so on. Then each time setInterval runs, it's taking however many paragraphs are there and putting them inside the div using innerHTML. So it's an important way of understanding how this one works. In the next lesson, we'll take a look at the next example.

Let's take a look at example 2. In this example, the script is going to run exactly one time.
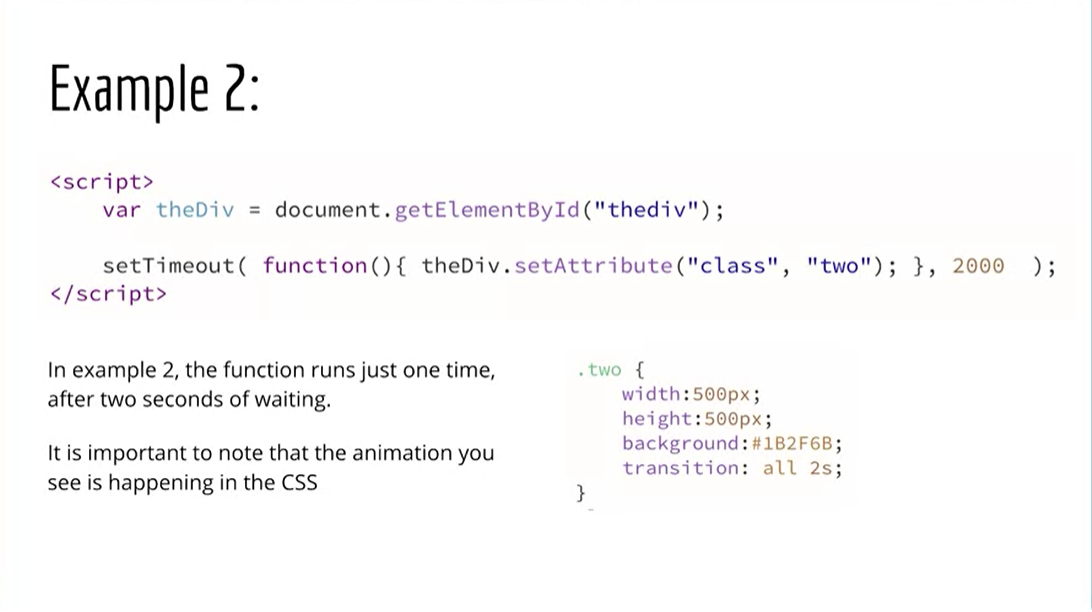
Let's just see what it does. I'm going to come over here and I change this to example2.html.

When I refresh the page, we have a square in the page. After a certain amount of time, it resizes the square and changes its background color red to blue.
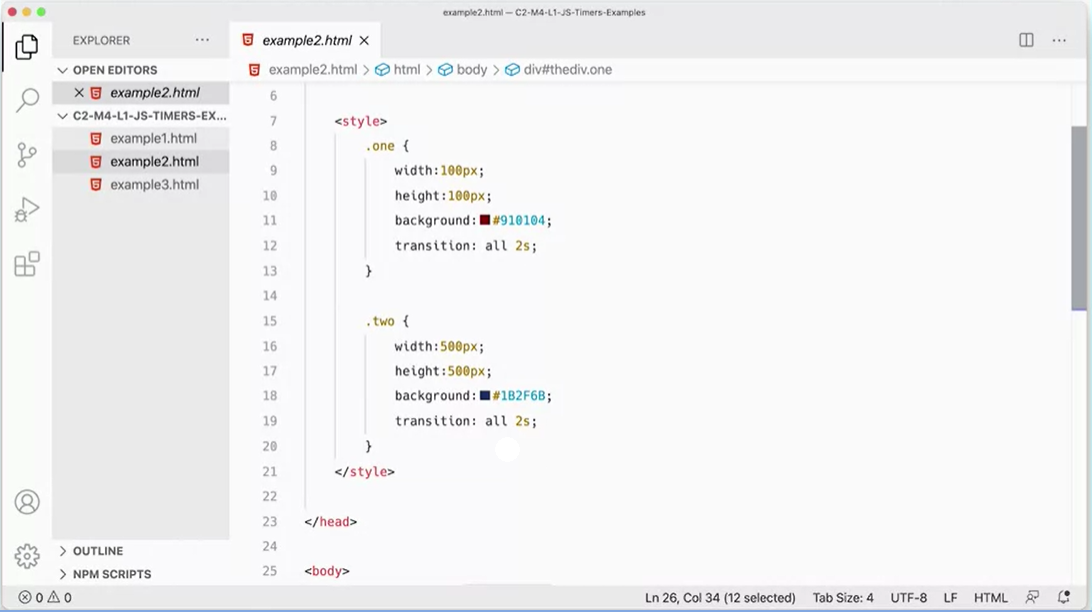
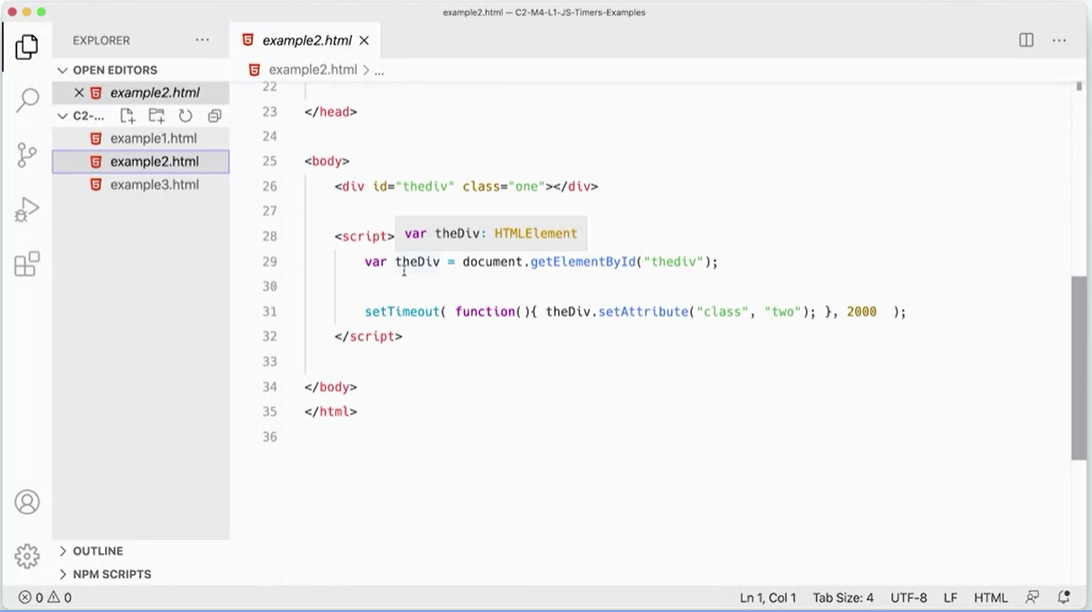
Let's take a look at what's going on with this example. I'm going to go over to my code example 2. Down here I have a div with a class of one on it. That class is setting that div to be a 100 pixels tall by 100 pixels wide with the background color of red. Notice the transition is here on the classes. Transitional two seconds. setTimeout runs. Since we're running this function here.
What this function is doing is it's setting the class attribute to two, but it's not doing it for 2,000 milliseconds for two seconds. As soon as this class gets attached to it, then this class becomes active. The animation happens in the size and all that in the background color, everything gets transitioned.
Second of all, you can use JavaScript to add a class or change a class on an element and when it gets that new class, it then applies all of the declarations or rules within that class.
That's cool because it means you could have elements on your web-page and then after a certain amount of time or when a user does something, you can apply a class to it and change that element based on the styling associated with that class. It could have an animation in there.

Next, let's take a look at example three, which uses recursion.
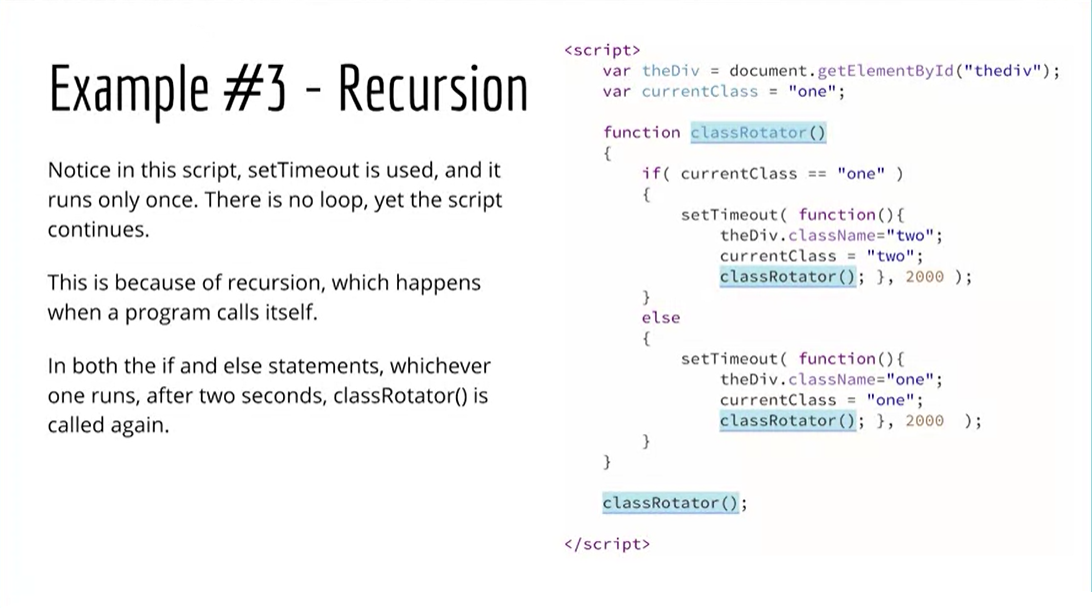
As I said before, set timeout runs only one time. But when you use it in a recursive fashion, you can get it to repeat and this can be very powerful technique in JavaScript.
Let's go take a look at the actual example file (example3.html) and see what happens when we run it. You'll notice it waits a certain amount of time and then it starts this pulsating div that's set to a circle, the different background color here, red to purple.
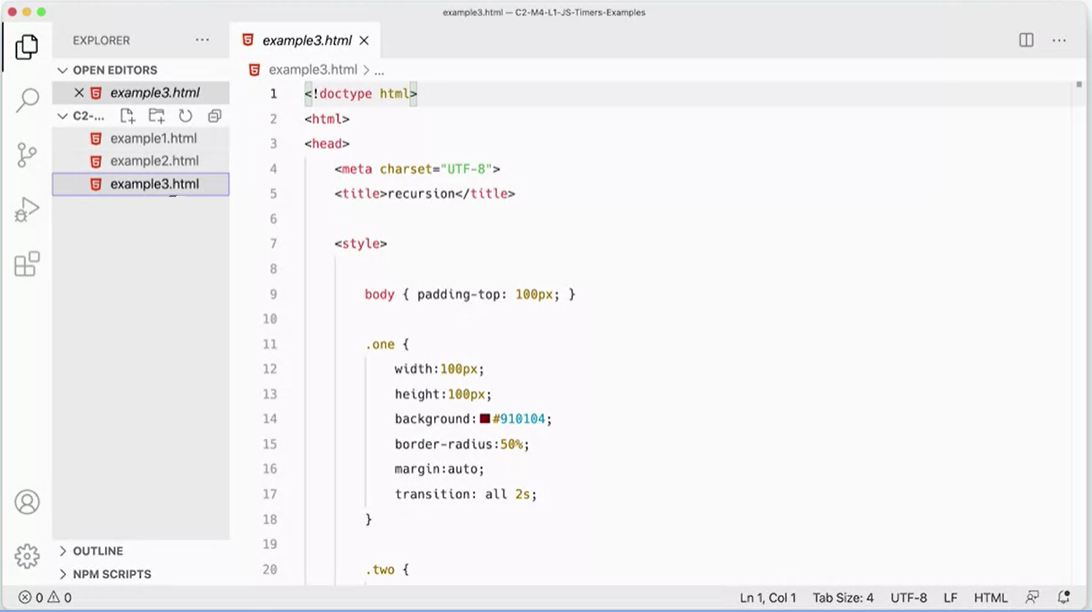
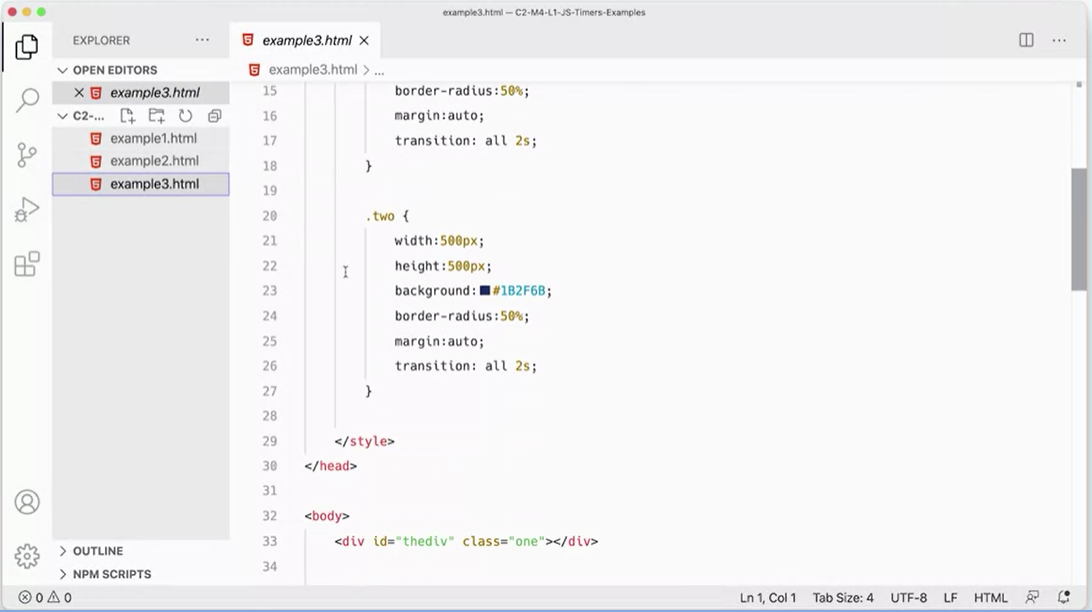
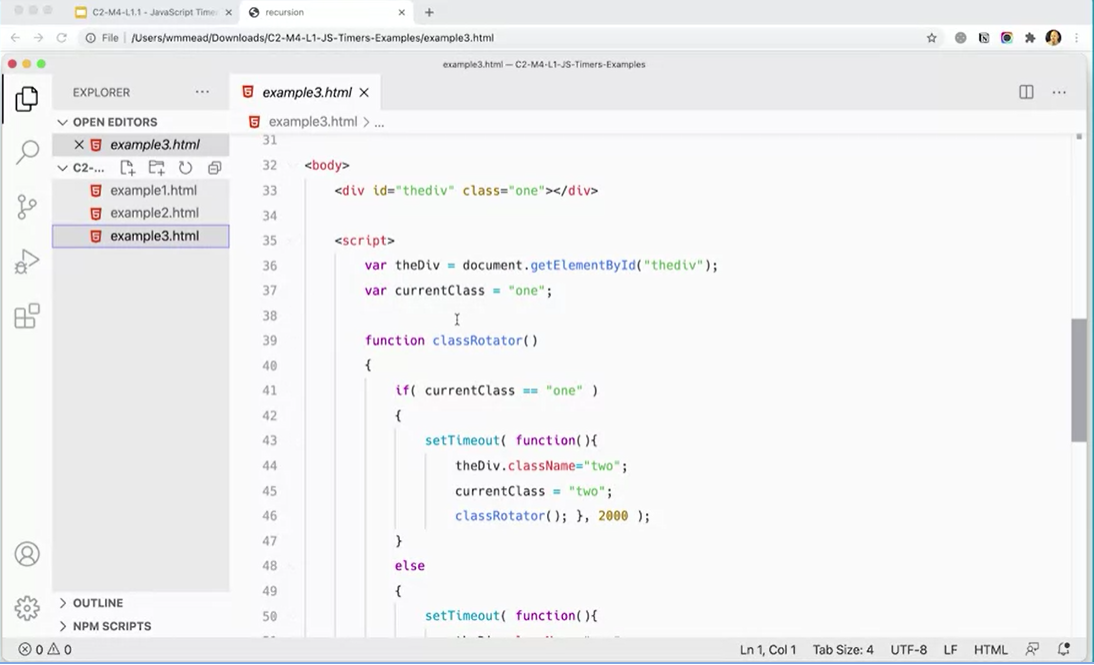
Let's take a look at the JavaScript that makes this work. If I come back here, I open example3.html. You can see again I have a div (id=“thediv”) with the class of “one” on it.
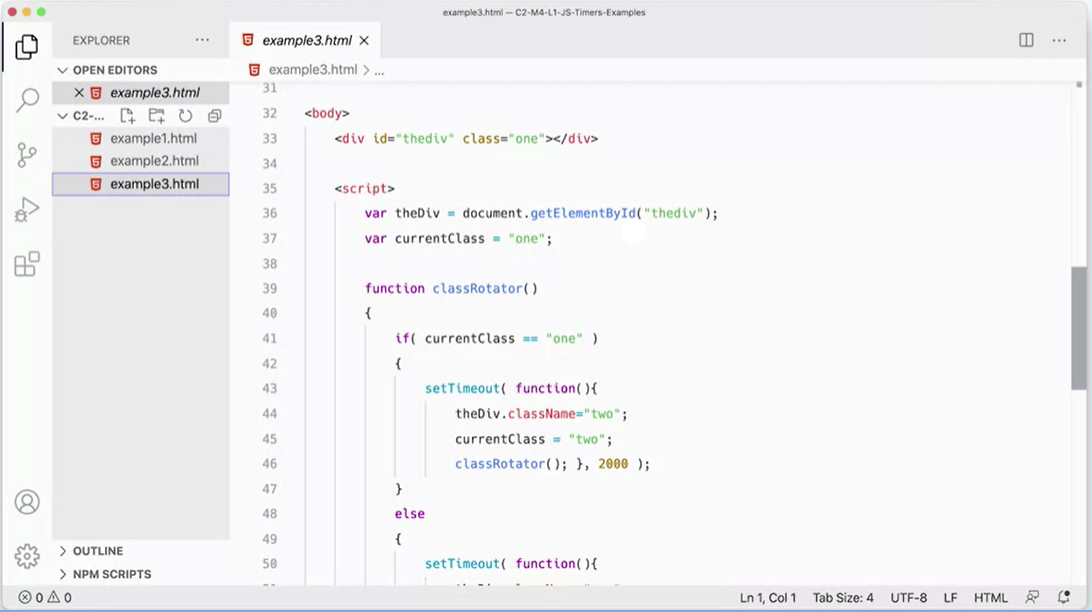
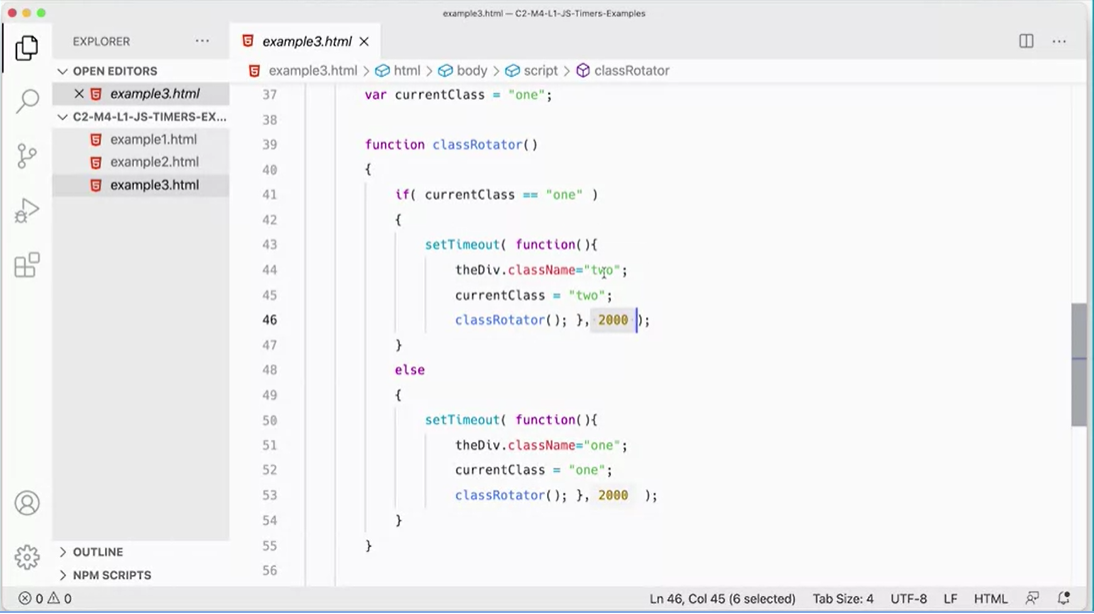
Down here, I've got, getElementById(“thediv”), I've got a variable called currentClass, which is set to “one”. Then I've got a function called “classRotator'', which checks to see if the currentClass is”one”. I'm going to setTimeout and I'm going to run a function that's going to run after a two second delay. In this function, I'm going to take the div and set the class name to “two”. Then I'm going to set currentClass to “two”. In a nutshell, if it's not “one”, then it must be “two” and set currentClass over a two second delay.
But notice that this function is running classRotator. Recursive function is a function that calls itself and this is an example of a function that calls itself.
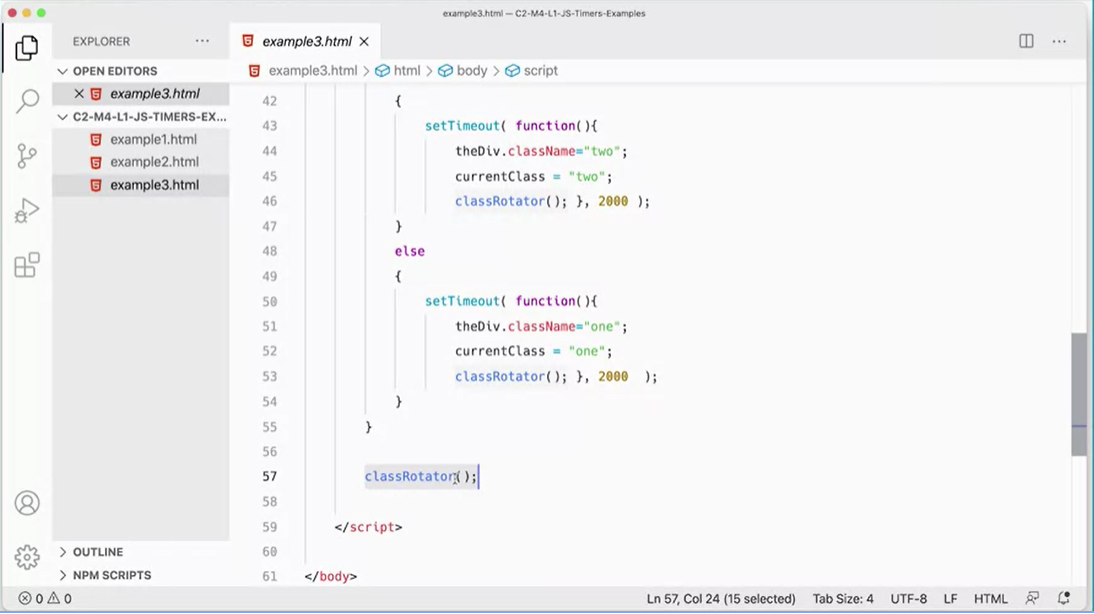
To kick off that function entirely, we have to run it once down here. When the page loads, it runs this once, but then when it runs itself, it either runs itself again in the if statement or it runs itself again in the ‘else’ statement in the setTimeout.
Now, recursion is a very powerful thing and it's easy with recursion to get confused or to do something that will cause your script to run out of memory and to run crazy and wild.
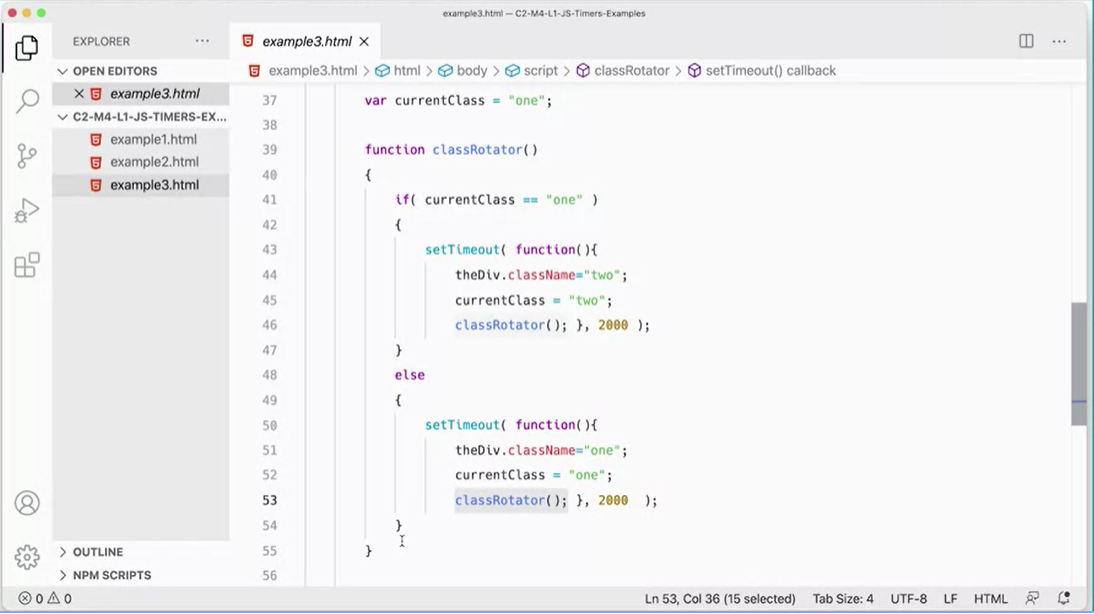
For example, if I took classRotator and stuck it outside of the setTimeout, it would run very quickly and it would keep running itself and then it would start to get stacked up and eventually you'd run out of memory. You'd get a heap overflow error showing that basically JavaScript has run out of memory.
That can happen very easily when you're working with recursive scripts but when handled properly, recursion can be a very powerful feature. Not only that, it can be the preferred way of working with data and working with setTimeout or setInterval. If, for example, you're going out to the world and getting a piece of data from somewhere and then doing something when it comes back. Usually recursion is the better way to go because you can wait until it's come back before you try to do something with it.
Whereas if you use setInterval, then you're more likely to try to do something before you get your data back. setInterval will run every x amount of seconds. setTimeout will wait at least two seconds, but maybe longer, depending on where something is in the stack of things to run with JavaScript. We will get more into the event loop in JavaScript and talk more about how that works and why it is like that in a later lesson.
I've got two classes and this function is calling itself, but it's only calling itself after two seconds is lapsed, either here, in the “if” or here, in the “else if”. That gives us this very interesting pulsating, creepy circle that feels like it's breathing on our web page and you can do more stuff with that if you wanted to.

Sliders on a timer. Putting slides on a timer.
In this lesson, we'll convert one of the slide shows that we did in the previous module, so that it runs on a timer without having to click the Next and Previous buttons. Basically, so that it runs automatically. You could pick any of the three that we did in the previous lesson, or if you figured out how to take the JavaScript only one and make it run on a never ending loop. You could use that one, you could use any of them.
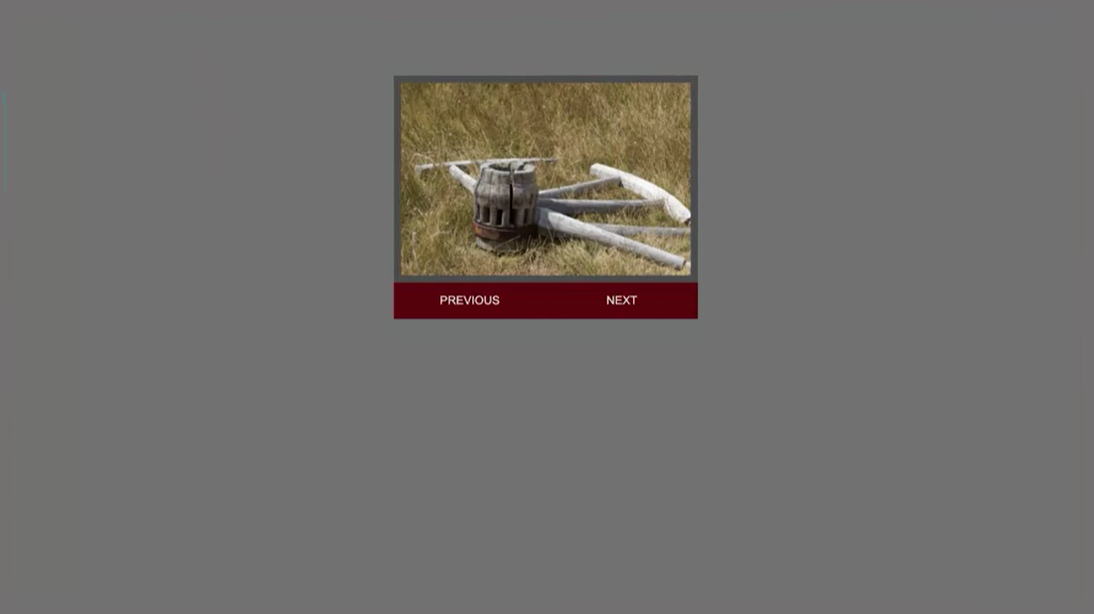
I'm going to use this slider here that loops around and goes in any direction this way. But I'm going to make this one run on a timer. Now, before you follow my lesson and follow these videos showing you how to do it, I strongly encourage you to try to do it for yourself. It's not that hard and see if you can figure it out. To do that, get rid of the buttons, delete the buttons off the screen.
You can delete the CSS that has to do with the buttons off the files, and then modify the script that's using setInterval or setTimeout using recursion, you can make it work either way. As an added challenge, make it so that when the user hovers their mouse over the slides, the slider stops. Then when they move their mouse off of it, it starts again.

Hopefully you are successful at creating your slider on a timer and were able to do that on your own. But if you weren't or if you want to see how I did it, I'll show you how I did it here.
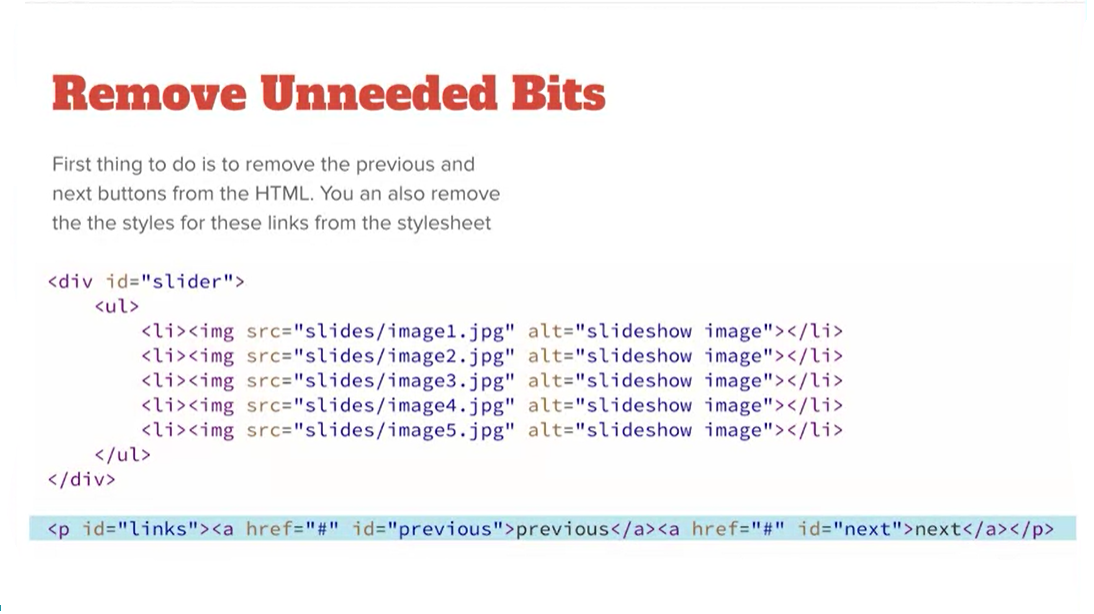
To start with, I'm going to go into my files and I'm going to remove this paragraph at the bottom as the previous and next buttons because we don't really need those anymore.
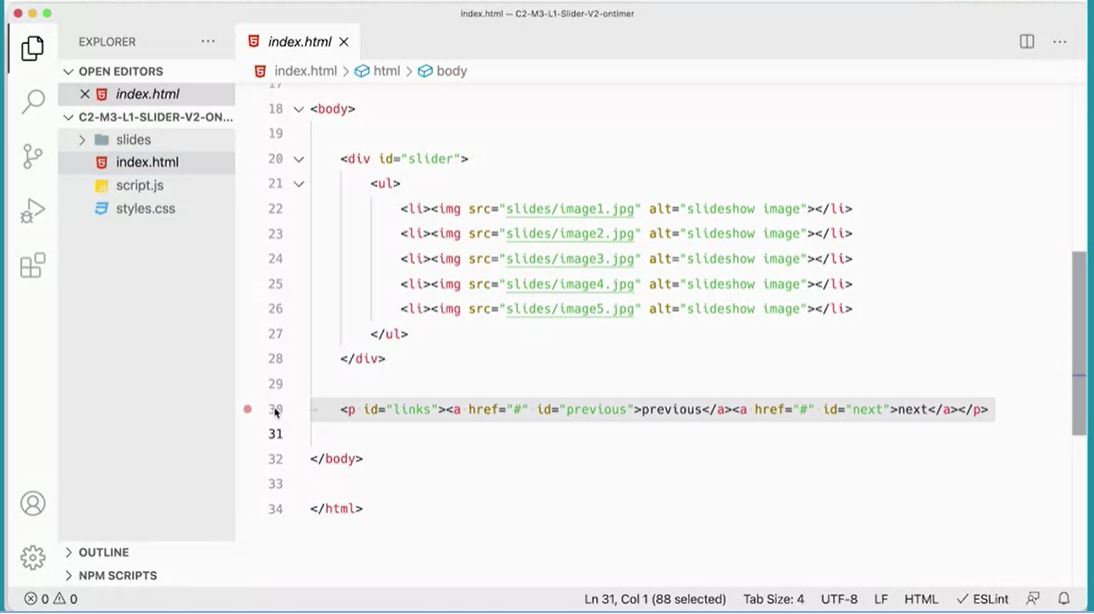
I'm just going to come in here to my files here and go down and remove that there (line 30 in the index.html).
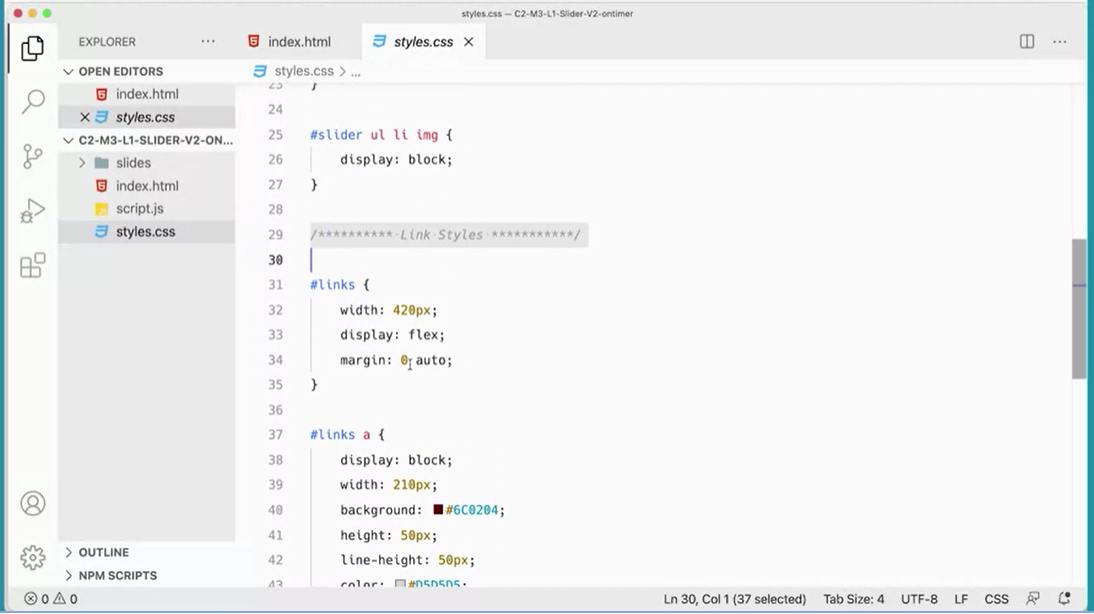
Also, I might as well go over to my styles and remove (comment out) the styles that have to do the links because I'm not going to use them anymore. I just think it's a good idea to remove unnecessary code if you're not using it.
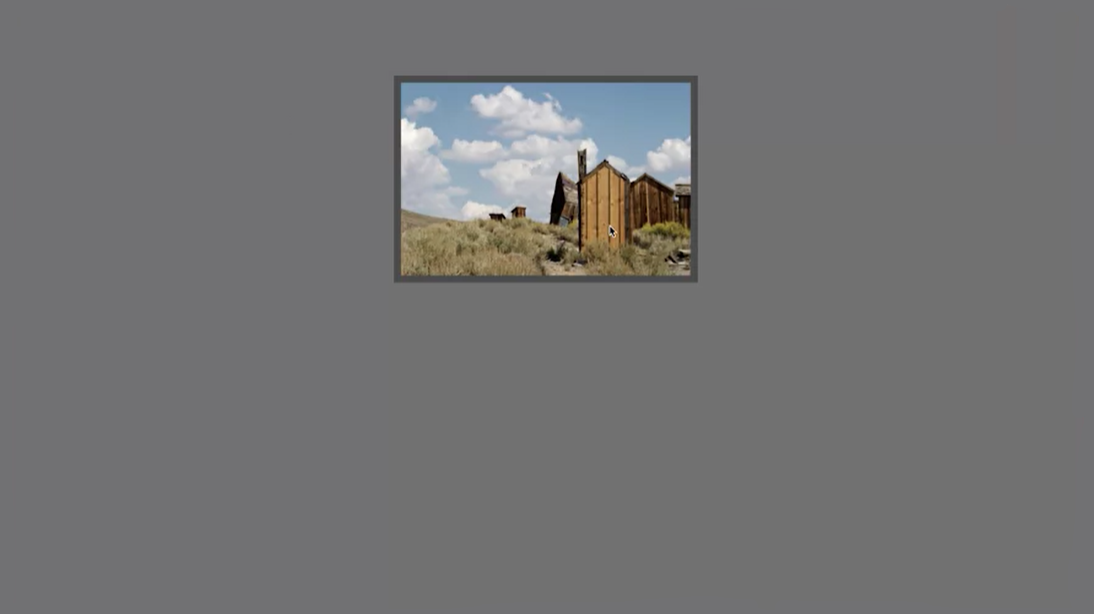
Now our slides will not have buttons attached to them, it's just going to be an empty slider.
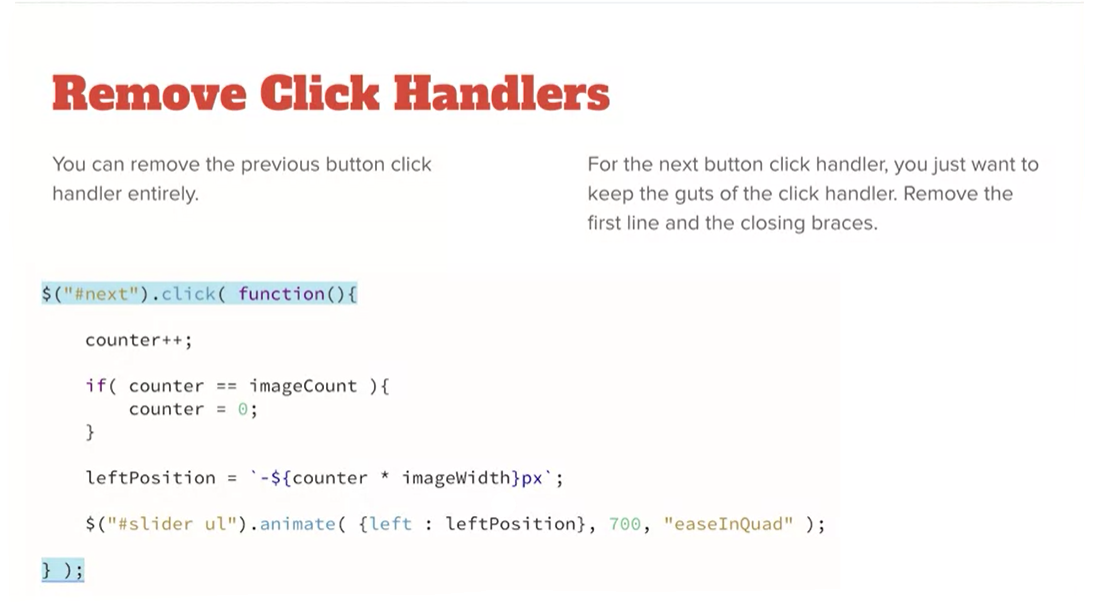
The next thing we need to do is remove the click handlers. For the next click handler, I'm going to remove the first line here and the last line of the click handler, and leave the guts. For the previous click handler, we can remove it entirely.
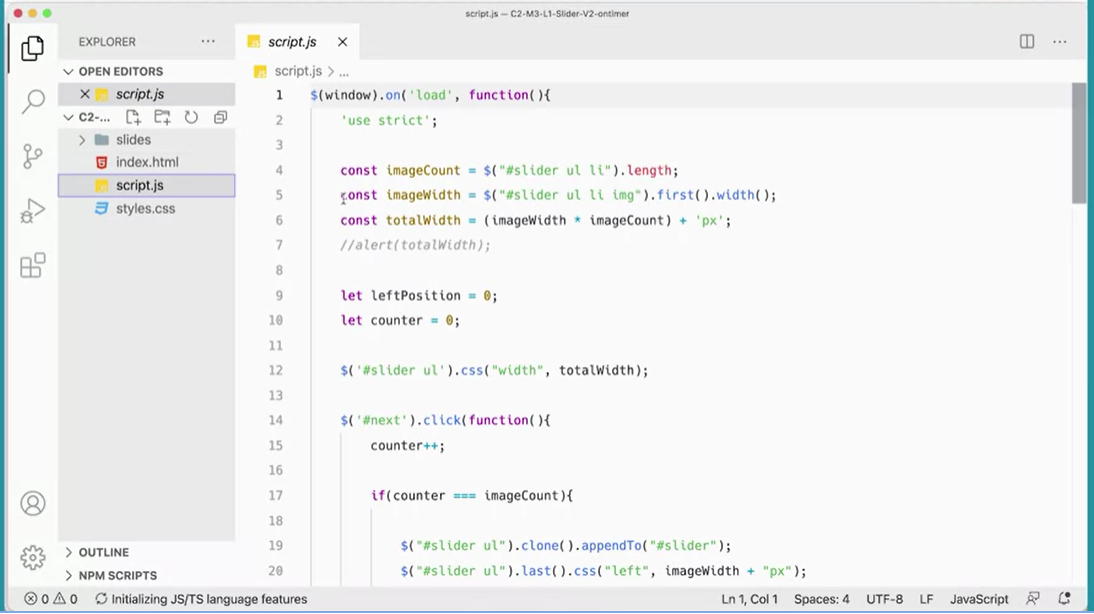
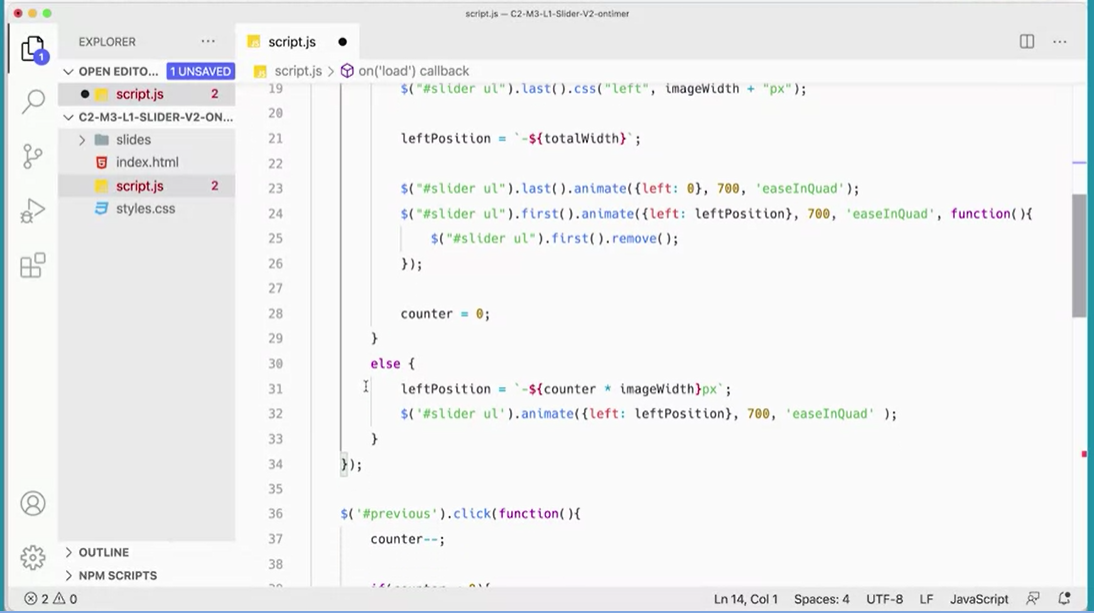
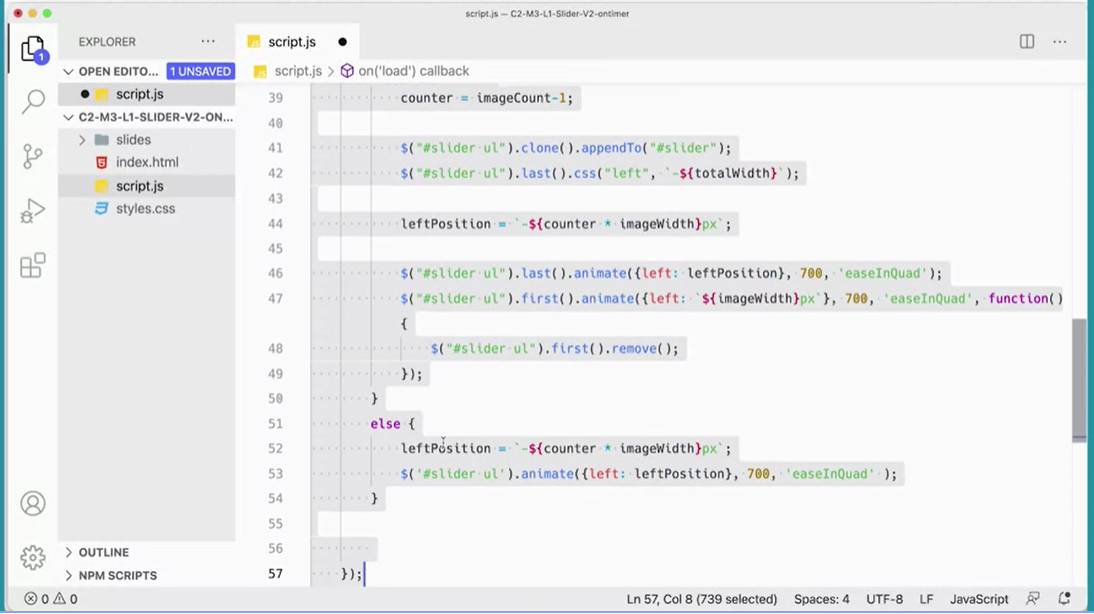
Let's go over here and do that next. Done with this file, we can go into our script and I'm going to remove this line for my next click handler and the closing one down here. Then I don't need the previous one at all so I can just get rid of all of this down to here. This is closing our window on event handler for when the page loads, so we want to keep that.
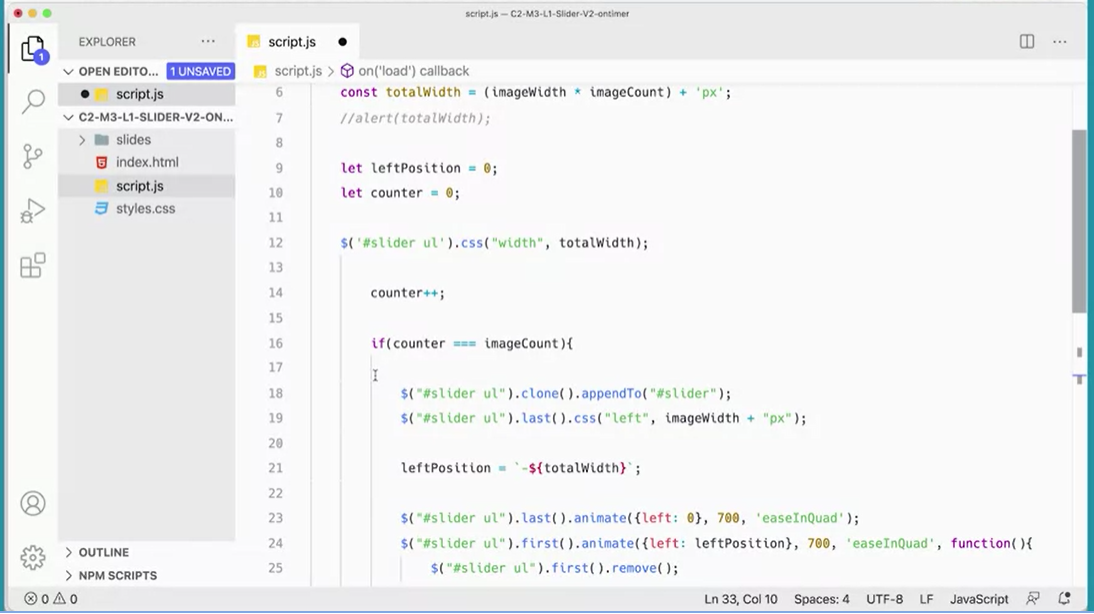
Now I'm left with just the guts of my next link tenure, I've got just the guts of that there.
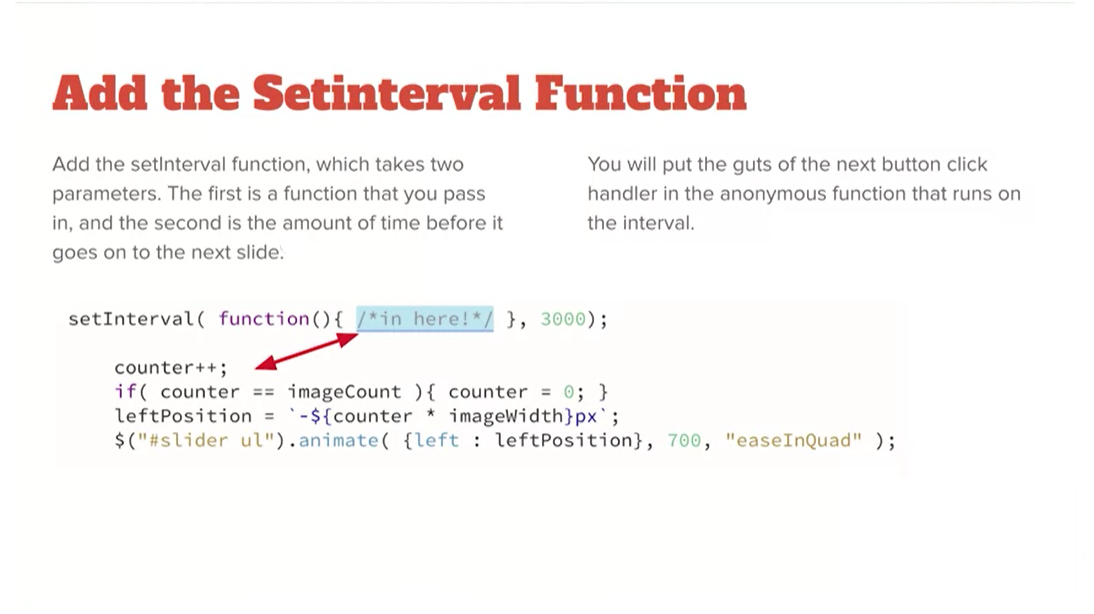
The next thing I need to do here is create my function that will create setInterval, I'm going to use setInterval for this, but you could also use setTimeout with recursion if you wanted to, but I'm going to use setInterval here.
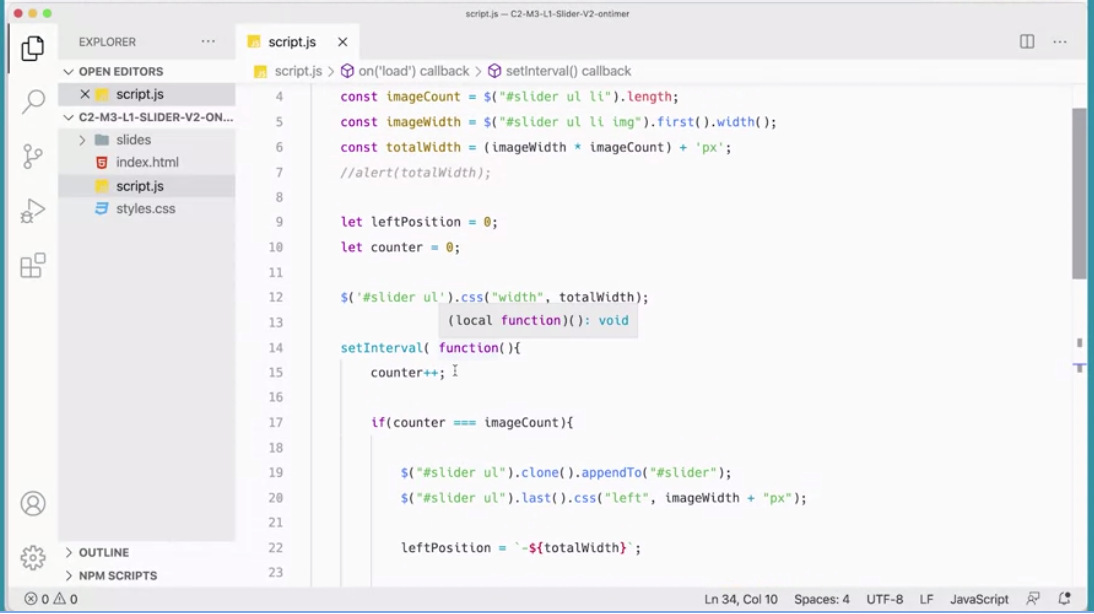
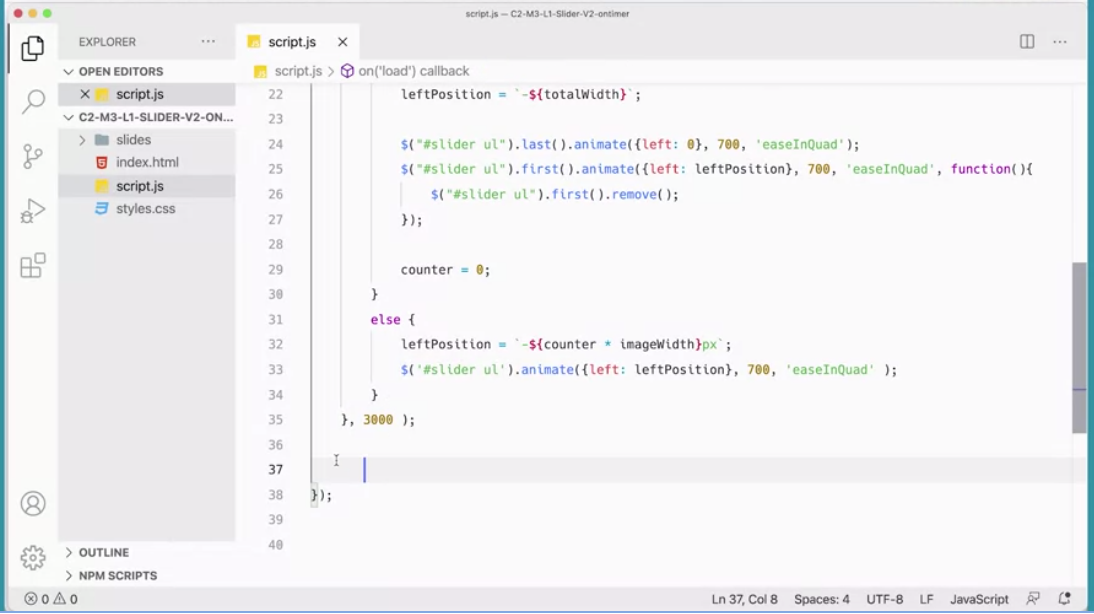
I'm going to add setInterval method and pass in the anonymous function and set it to 3,000 milliseconds, three seconds. It seems long enough for slides. I'm going to put it here, setInterval like that. I pass in a function and then I'm going to say over 3,000 milliseconds and that will run.
Now setInterval is going to run this function and it's going to do the counter, and then it's going to check my if statements, and it's going to do this every three seconds so that it will move the slides forward every three seconds.
When it gets to the end of this slide deck, it'll wrap around to the beginning.
Let's test it. Have to wait three seconds for the first one to go and there it goes. Here we are in the last slide and a shared wraparound to the first slide.
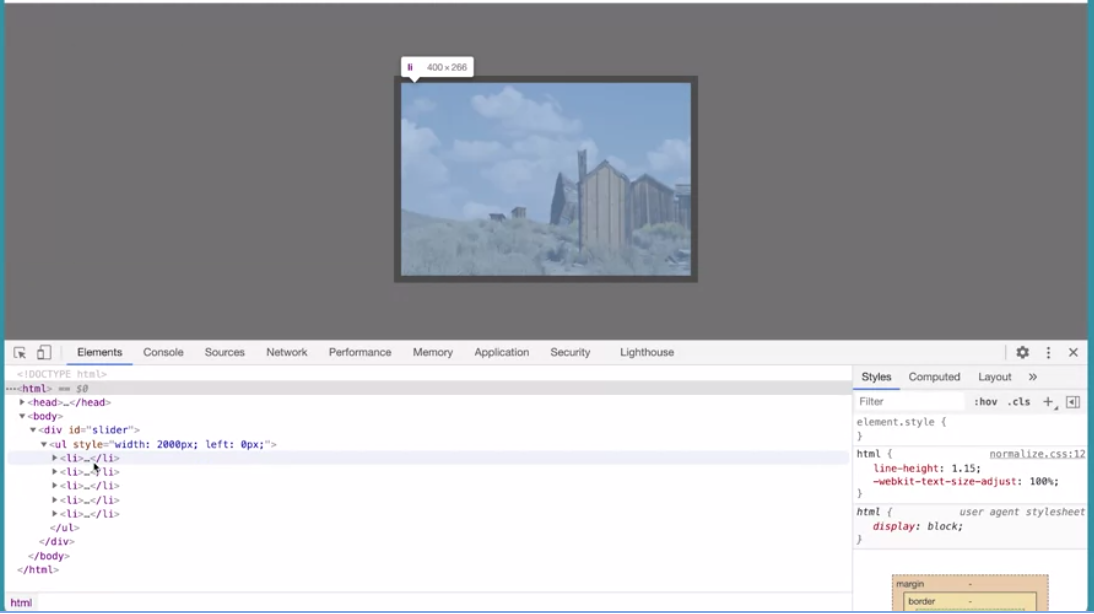
If you inspect and look at the body here, look in the slider, you'll see the unordered list is moving along and changing its position here.
When it gets to the end, you'll see the new one gets added in, moved into place, and then the old one gets taken out right there, so that's working perfectly. Now, think about what you could do to make it work so that if you hover over this, it will stop sliding the slides while you're hovering your mouse over the slider. That's your next challenge.

Did you successfully complete the challenge?
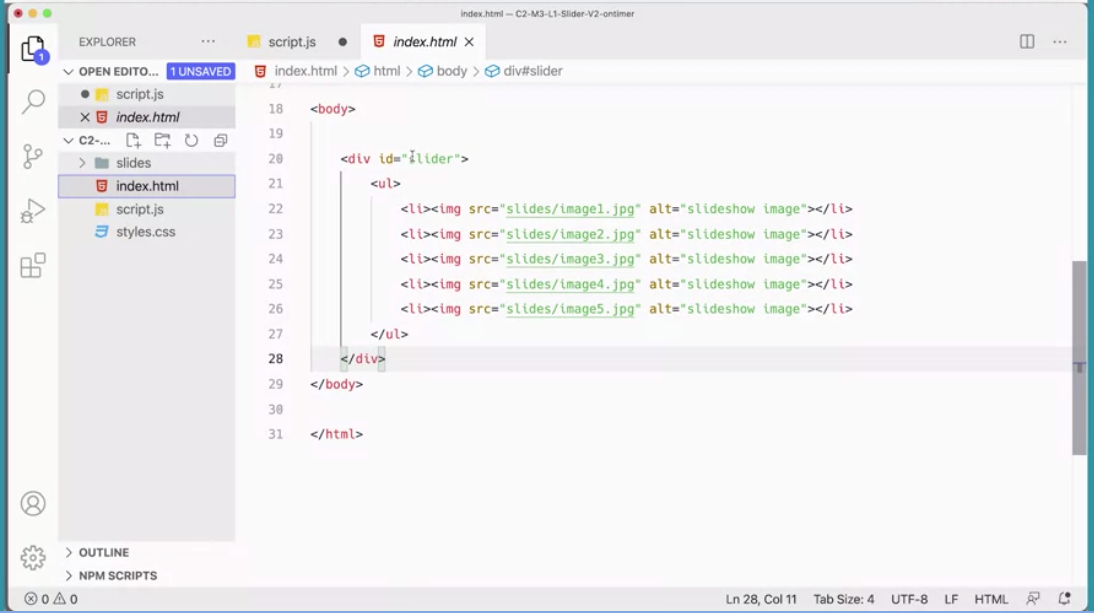
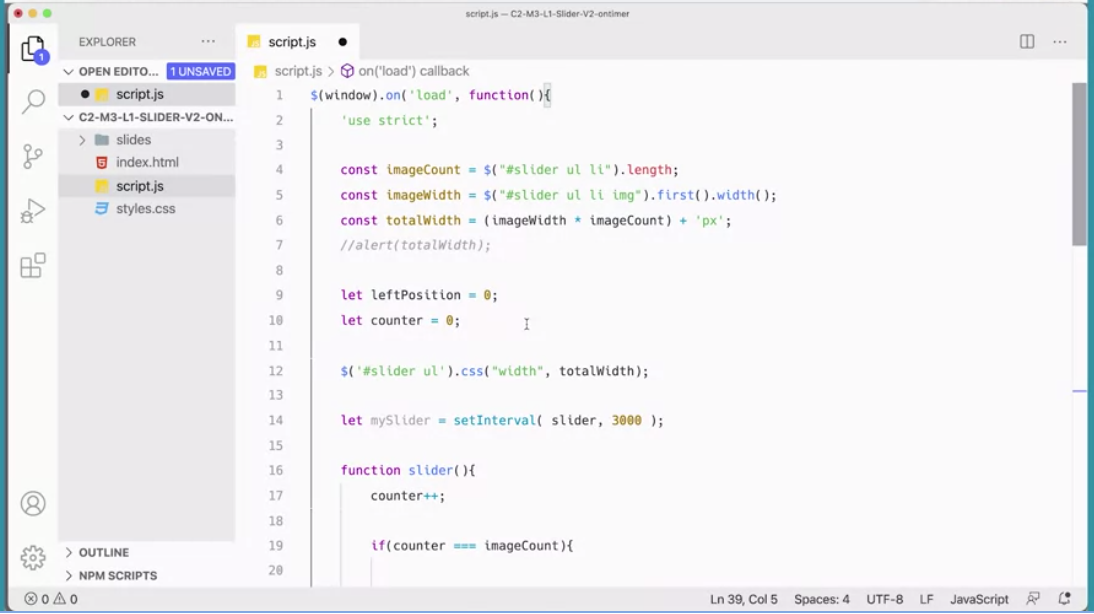
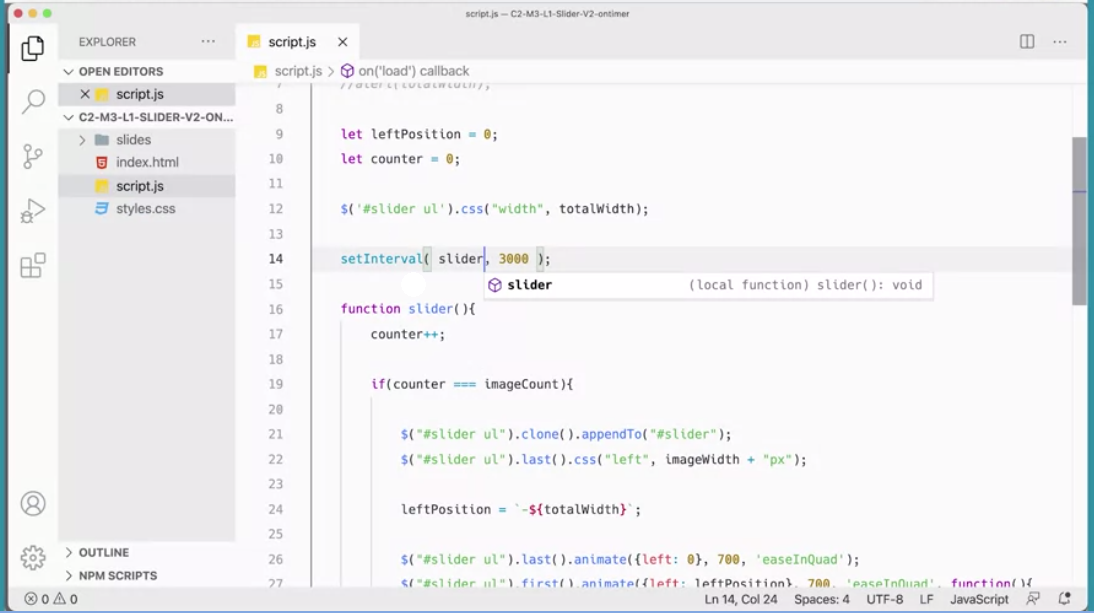
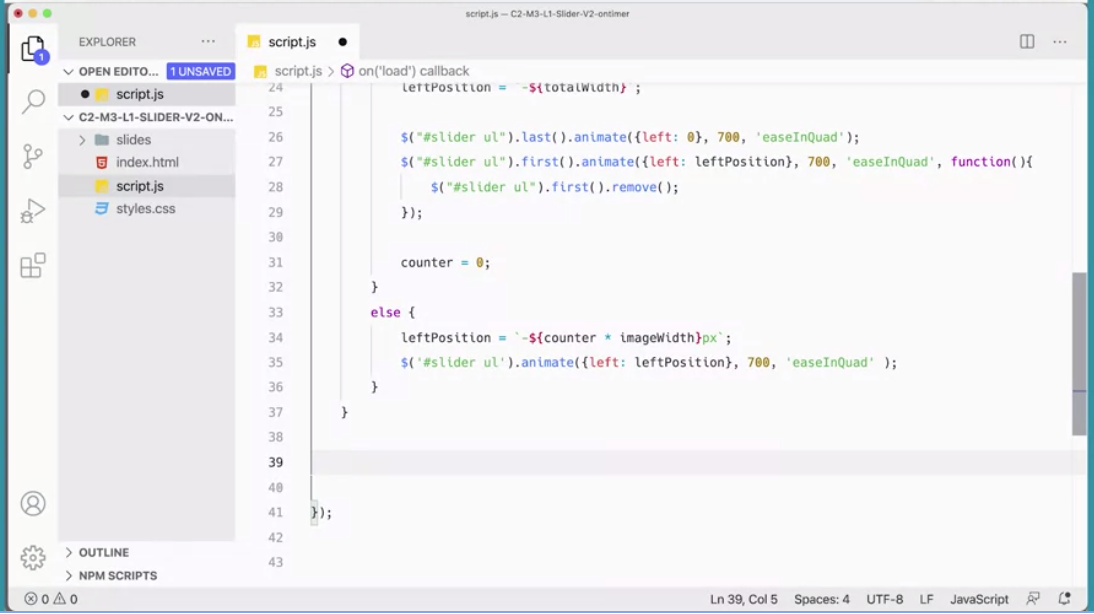
Remember again, the challenge was to make it so that when the mouse hovers over the slider, the slider stops.
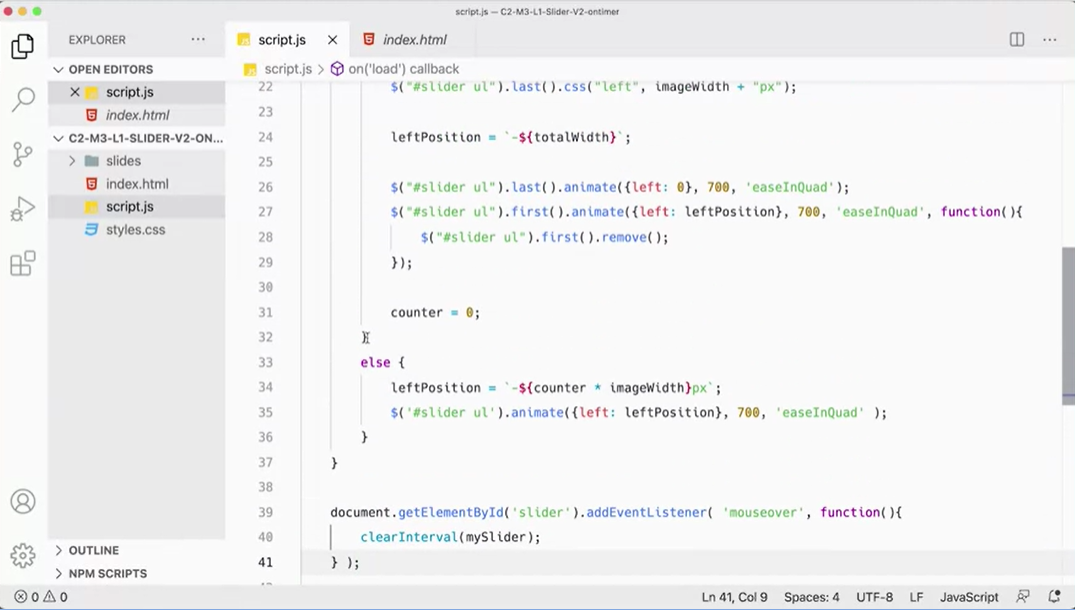
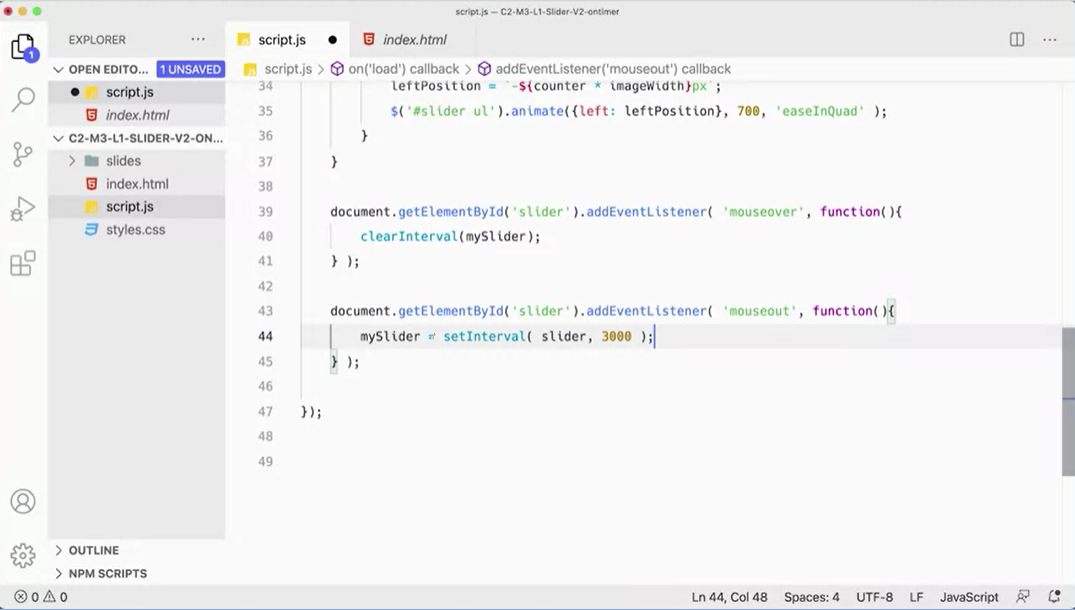
Let's see if we can actually make that work. What I'm going to do here is currently I have set interval running this anonymous function and it runs it over 3 thousand seconds. What I'm going to do instead is I'm going to make a function down here, function called, Slider.
I'm going to put the guts of this anonymous function, this one here, inside of that function instead. I'm going to take all of this stuff that I had moved into there, all the way down to here. I'm going to cut it. Now we're back to just set interval with the anonymous function in it and comma 3 thousand back to where we were before. I'm going to put all that stuff in here instead, inside of this function here. I've got my counter and all of this stuff inside here.
Then here I'm going to say run slider, and this is a reference to my function slider. We want to wait 3 seconds and then run Slider, so then it's going to go find the function Slider and run. That should work in terms of exactly the same thing that we had before.
The difference now is that I can set my setInterval here. I can assign that to a variable. I could put, "let my slider equal set Interval slider." Then I can create an eventListener that will do something when the mouse hovers over it. I'm going to make an eventListener for when you hover over this element on my page here.
Down here I'm going to dodocument.getElementByID(slider.addEventListener) and when the addEventListener runs. I'm going to be looking for mouse over, when you mouse over I'm going to run a function. When you mouse over that element, the Slider, I'm going to say, clear interval, mySlider, and that will stop it from running.
Now I've cleared my interval and it's not going to advance the slides. Now I need one that will actually advance the slides when I roll off. Coming back here, I can actually copy this. Get interval, slider addEventListener, mouse out. I'm going to run a function, and what am I going to run? I'm going to say Slider. I'm going to just do this again, so I can actually just copy that.
This is why I used Let up there instead of constants because a reassigning this variable. In order to reassign it, I need to be able to set it to Let up there. Now if I set that to set interval slider, when I mouse out, sliders now going to have set interval on it again and that should run. Now set interval has been cleared and it's no longer advancing the slides. But then if I roll off of it and wait three seconds, it should start back up again.
Look at that, it's working perfectly. Hopefully you were able to solve those two challenges. If not, I recommend going through this a few times, do it on your own a few times. Create your own Slider, or create your own script where you can play around with set interval and set timeout.
The best way to learn JavaScript is to keep practicing with it and to keep challenging yourself by making small experiments, taking a small script that you have, and then extend on it and see if you can make it do a little bit more.
What else could you do? Could you make it so that it has the buttons for advancing the slides manually, but it goes automatically when you're not using the buttons. But then when you do use the buttons, it moves it manually. That would be an interesting modification to the script. Maybe you can come up with other ideas and other things that you could do.

In this project we'll look at creating a content rotator and we'll use jQuery, and we'll use timers and recursion. This is a fun project, I hope you enjoy it.
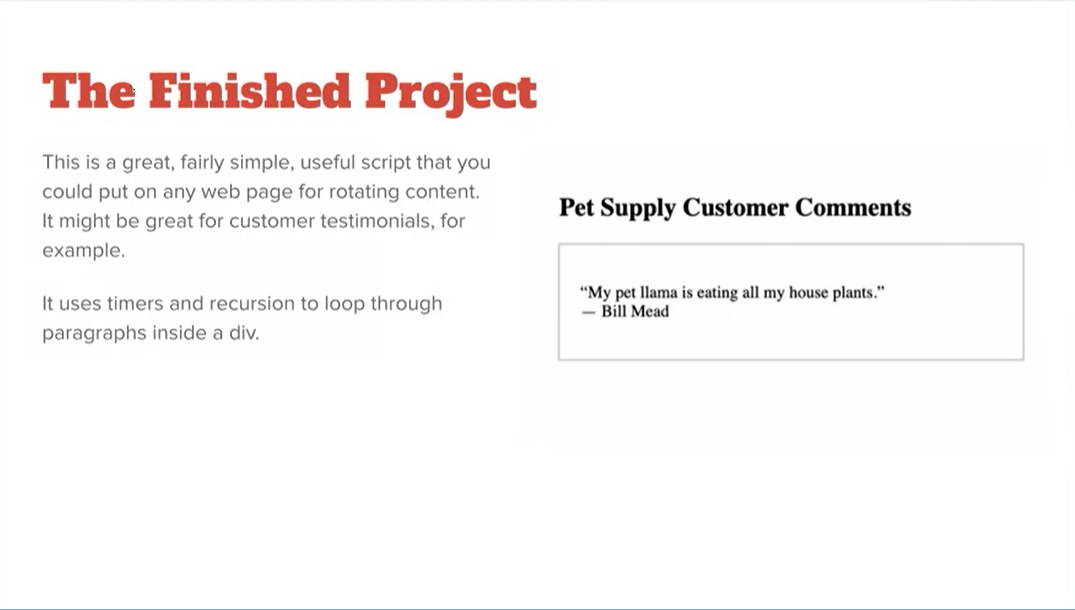
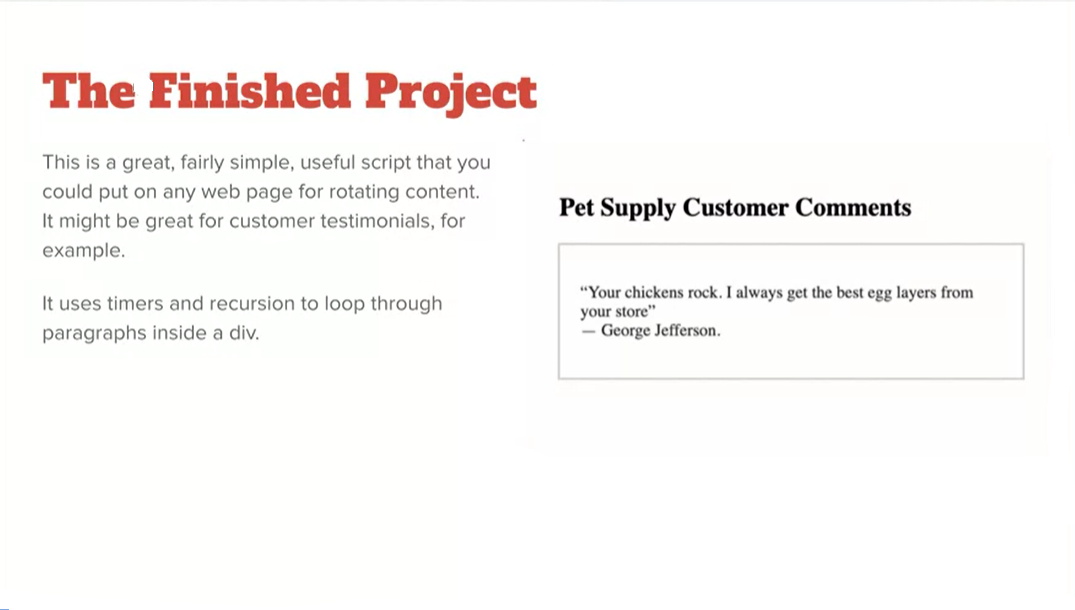
The finished version of the project will give you a quote that rotates around two different quotes after a period of time. And this is potentially very useful you could put this on a website to rotate customer testimonials.
I wrote this script myself because a client needed on his website to to make something that rotated testimonials and this is way back in the early 2010s. So a lot of these scripts hadn't been written were easily accessible at that point, so I had to write one myself.
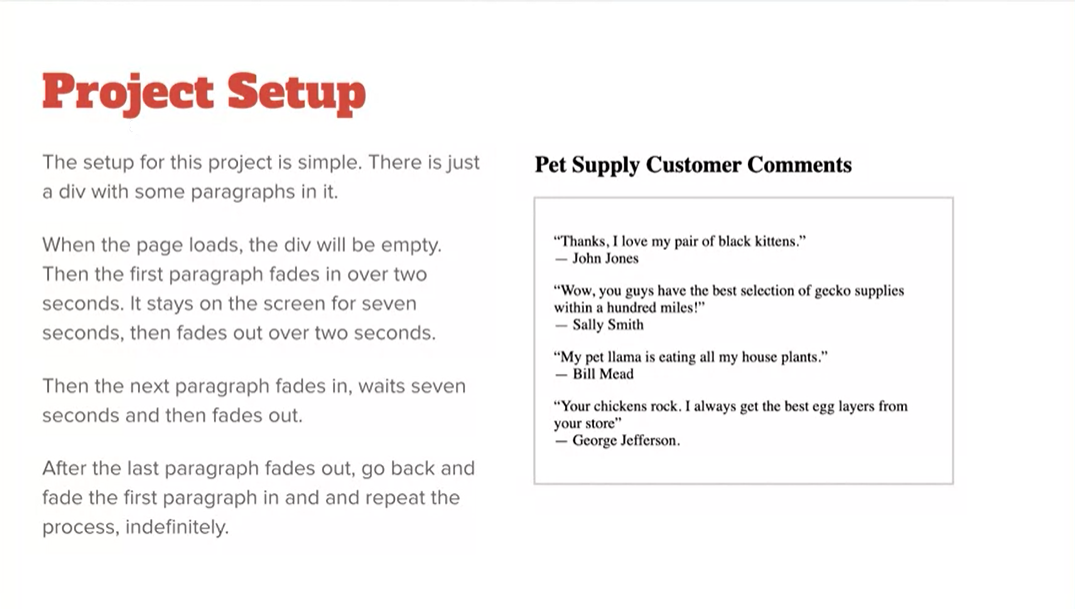
Let's take a look at how this is set up so we can actually work with it. The project setup is really simple, we have a page with a div with four quotes in it and you could add quotes or remove quotes and put in more if you wanted to. And basically the quotes will all get set so that they're hidden so that the div is empty to begin with. Then the first paragraph fades in over two seconds, it stays on the screen for seven seconds so you can read it and then it fades out over two seconds.
Then the next paragraph fades in, waits seven seconds and then fades out. After the last paragraph fades out we want to go back and fade in the first paragraph and repeat the process indefinitely, so this is a really great job for recursion. We'll also be making use of the jQuery affects library a little bit along with some of the other features we've talked about in this course. I hope you have fun with it and end up with a script that you could use for something, it's pretty fun.
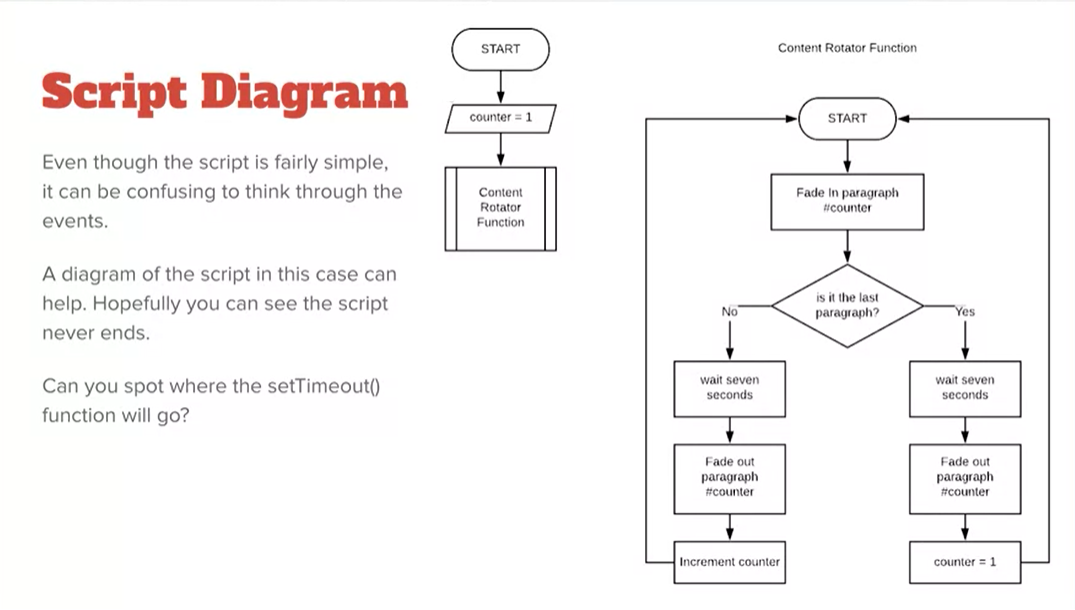
I have this diagram that can help us simplify it and think about exactly how this is going to work. When the script starts it's going to set a counter to one and then it's going to run a function called contentRotator.
And then on the right here I have that function contentRotator and it starts, it fades in the first paragraph that matches the counter number to begin with it's counter number one. And then it asks, is it the last paragraph on the page? If it is then we're going to wait seven seconds, fade the paragraph out and set the counter back to one. If it's not then we're going to wait seven seconds fade the paragraph counter out and then increment the counter. And then we run this function again, we run content rotator again and that's where the recursion comes in. This function is going to call itself and we'll be using a set time out.
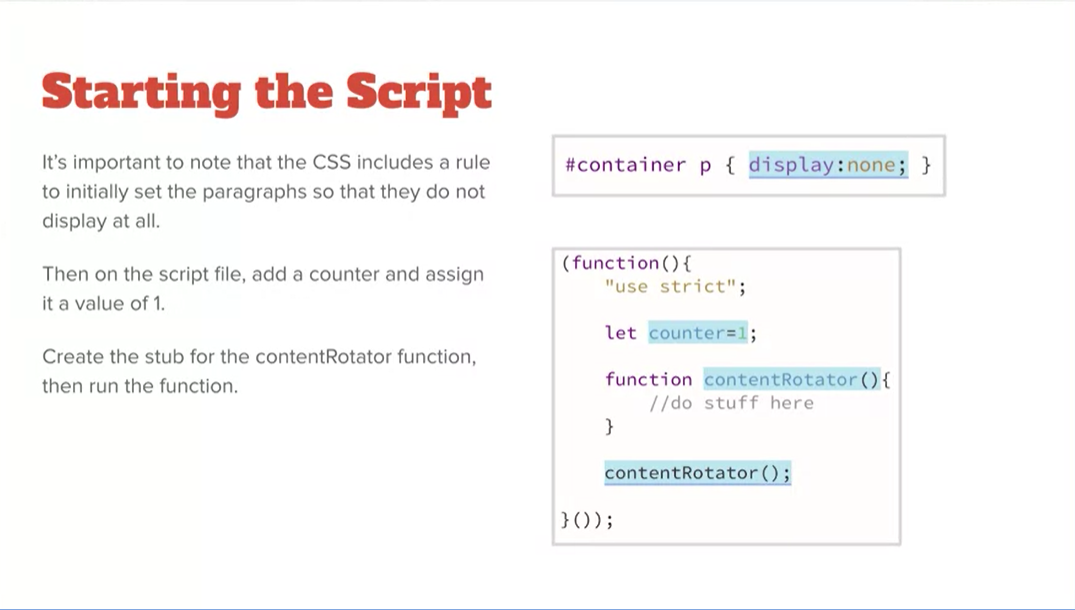
We're going to fade the paragraph in and then we're going to wait seven seconds, so there's a set time out where we wait for seven seconds and then we're going to fade the paragraph out. That's where the set time out will go, is when we're waiting seven seconds.
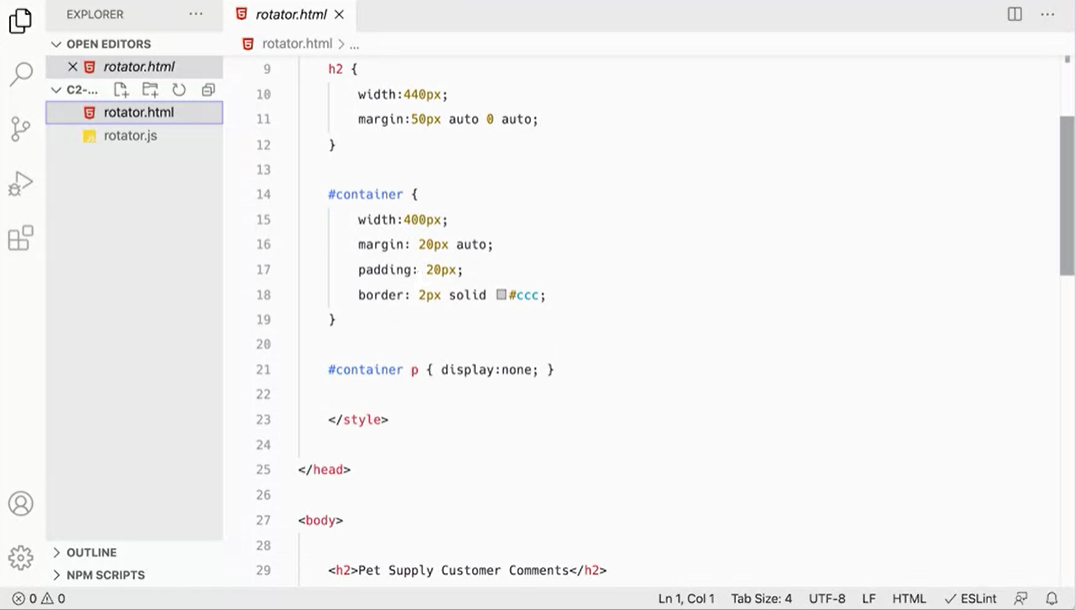
Let's get started on the script, the first thing to note on this script and I have my files open here in Visual Studio Code here. And the first thing to note is that in the CSS I have all the paragraphs inside my container, so here's my div id container, they're all set to display none. Now, when you look at this it might look a little bit weird because of these things here, but this is just an html entity that's creating a curly quote.
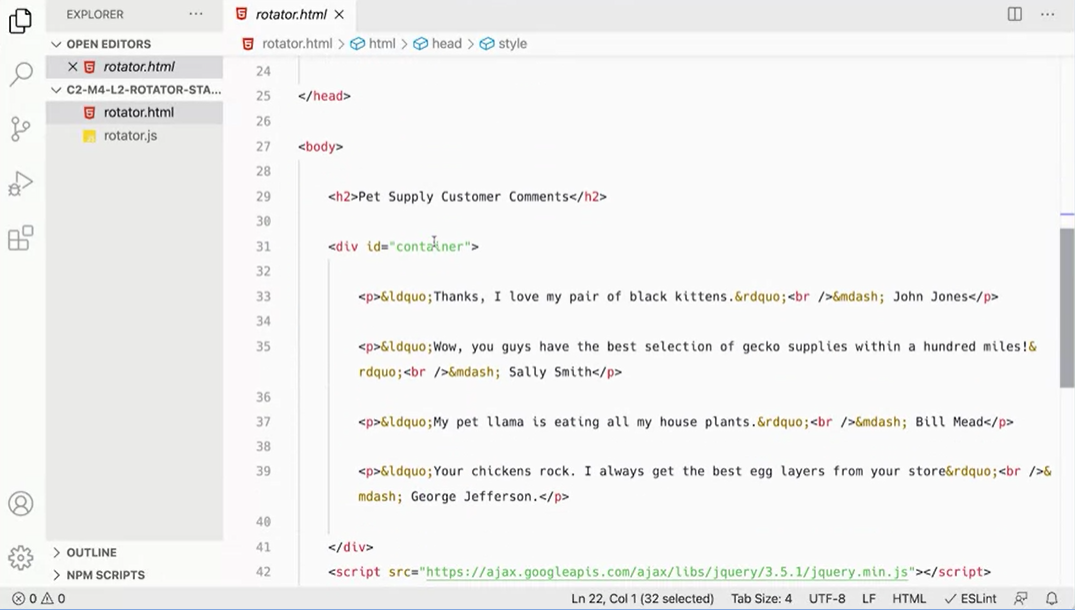
That's the left double quote and then this one over here creates the right double quote and then this one in here creates an mdash. In design typography it is very important and rather than just, I could just put the straight up and down quotes but those don't look as good. And since I want this to look a little bit nicer, I'm putting in the curly quotes and the mdash, which is the longer dash rather than the end dash or the hyphen. And if you take a typography course at some point you'll learn all about these different glyphs that we can use when we're creating content.
The quote button on the American keyboard anyway, can really represents six different possible characters. There's the straight up and down, double quote, the left curly quote, the right curly quote and then the same thing for the single quotes. There's a straight up and down single quote, left, single curly quote and right single curly quotes, that's six characters in one key. And other languages may have other characters associated with that as well but for English it's actually six characters.
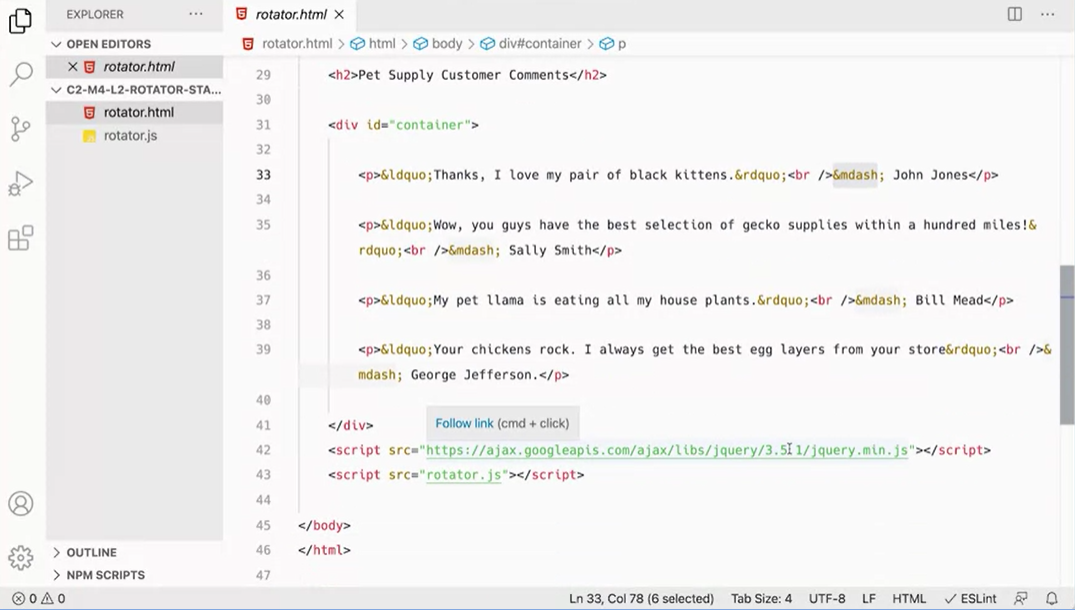
Okay, so we've got that all set up, we have our jQuery library loaded down here and we have a script a rotator.js and that's where we're going to do our work over here is on the rotator.js.
We've got our IIFE, our immediately invoked function expression set up to keep everything out of the global scope and we've got our “use strict” directive in there. Okay, we're all set and ready to start working on our script.

Here we go to write our script and get our content rotator to work.
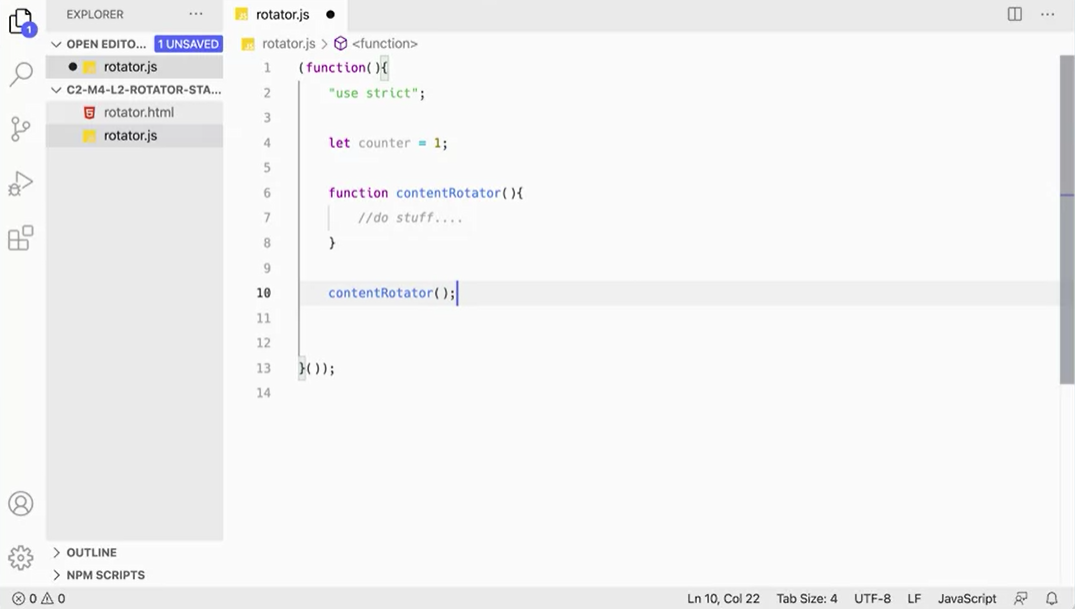
First thing I need is a variable. Let counter and I'm going to assign the value of one and then I'm going to make a function called contentRotator. And we'll do stuff in here. And then I'm going to call that function contentRotator to get it started, and make it work. This will get us started with our function and our let counter variable and we'll get our file all set up, and ready to go properly here.
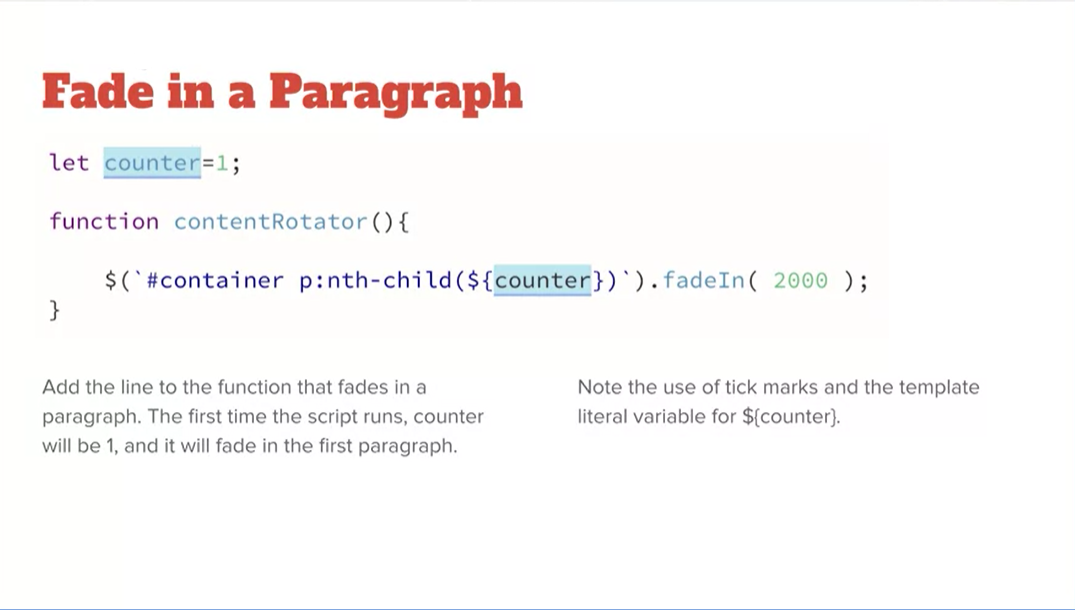
Our next job is to get our first paragraph and faded it in. We'll use our counter to do that. And the CSS and child filter to allow us to get the first paragraph because remember currently all the paragraphs are set to display none.
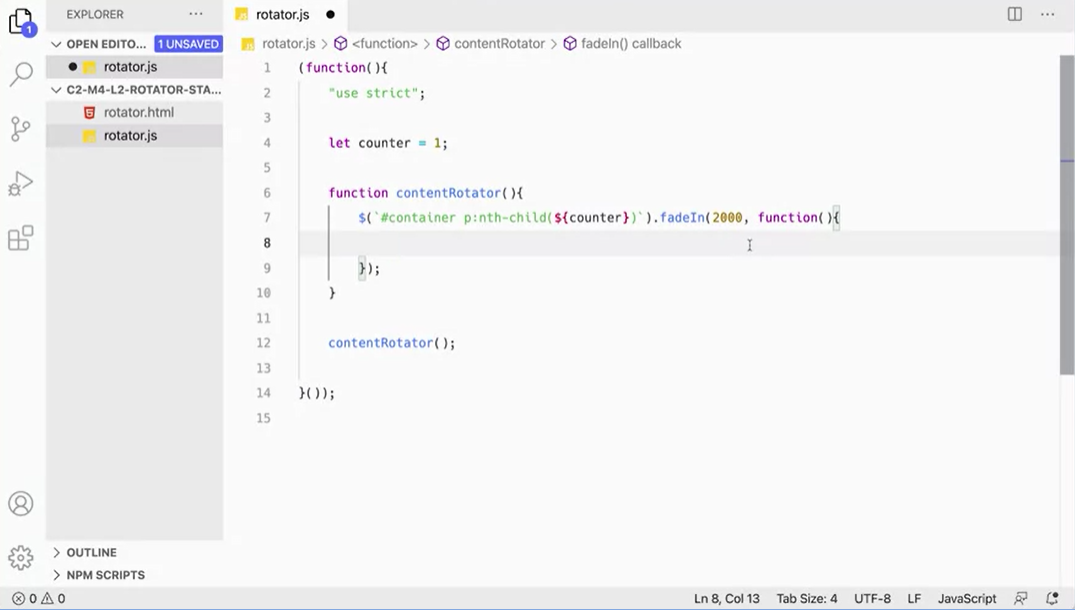
We can use our jQuery object to get that first paragraph and fade it in. Down inside contentRotator. We want to use jQuery object to get them. I’m going to use tick marks to say pound container, P and child parentheses. Now, if I were to put a one in here that would go get the first paragraph. If I were to get a two, that would get second paragraph, that would get a third paragraph. So on and so forth, you might wonder why we didn't start my counter with zero. And frequently we do when we're working with arrays because the first element in the array zero indexed.
The nth child pseudo selector is actually indexed with one. One will get the first paragraph, but I don't want to put a one in there. I want to put the variable counter so I can do my template literal like so and put the variable counter. And that will go get counter which is a one in this case the first time this runs. That gets the first paragraph and fades in 2,000 (2 secons) because this is jQuery effects library here. So we can feed in that first paragraph there.
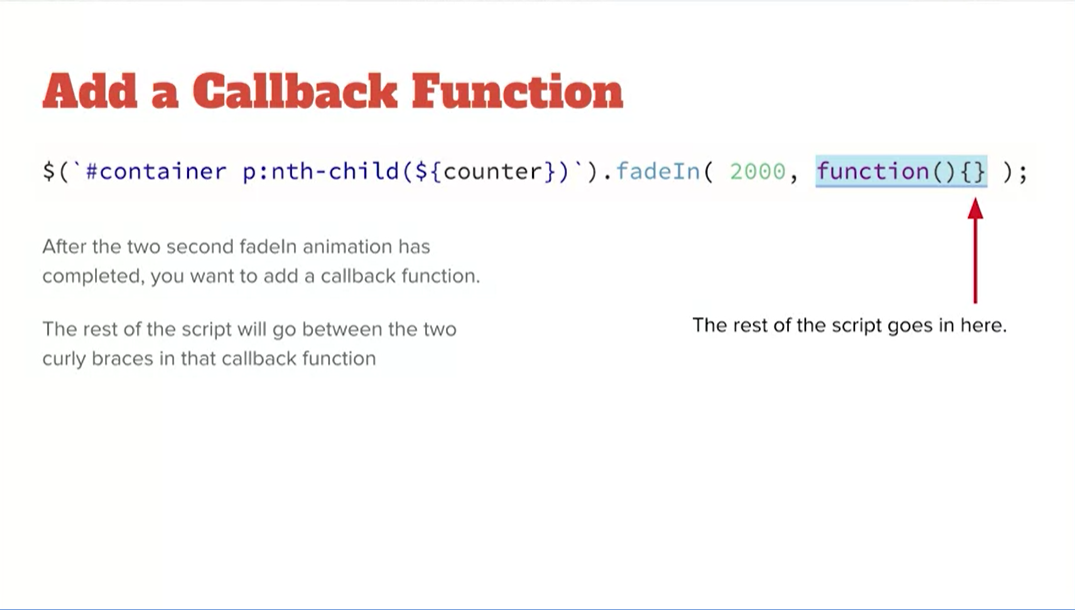
Now that I have faded the paragraph in. I need to wait seven seconds and this is going to happen after the two second fade in. Remember with jQuery we have a callback function that we can use with our fade in helper method that will allow us to do something after it has faded in.
So after that animation has run, we want to run that callback function. We want to run this function after the fade in is complete, and that's where we're going to put the rest of our script. Everything else we do is going to go inside this callback function.
Now that we've faded in the first paragraph, and after that two second fadeIn has taken place, we're going to run a callback function.
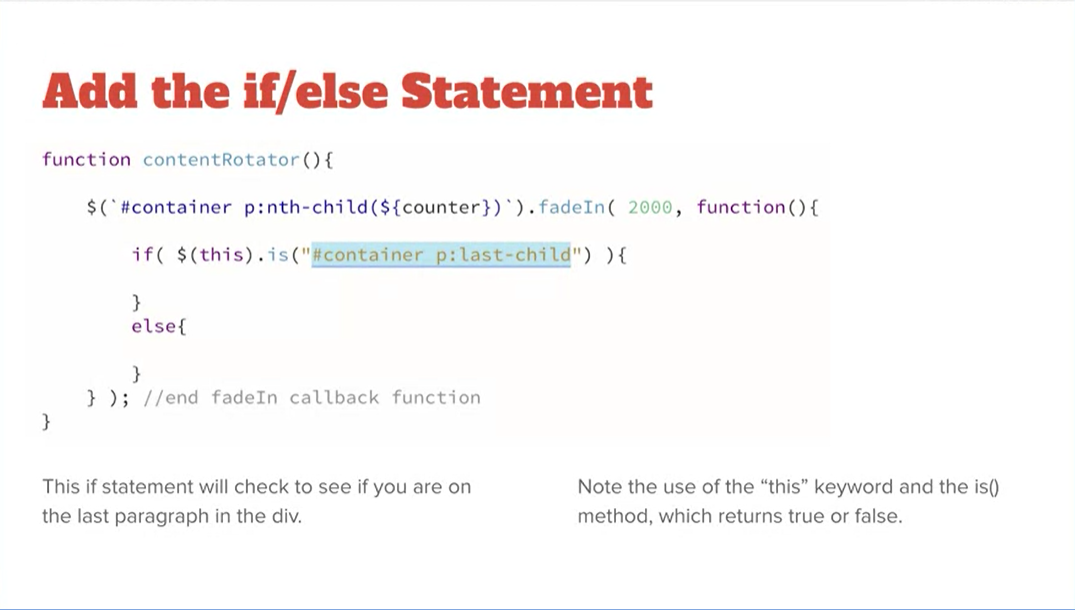
Inside that callback function, we're going to check to see if this is the last paragraph or not. Let's get that if statement in place, and then we'll go forward from there. If fadeIn that, now we're going to do an if, if parentheses, and we'll do something in there, and then we've got an else, we will do something in there.
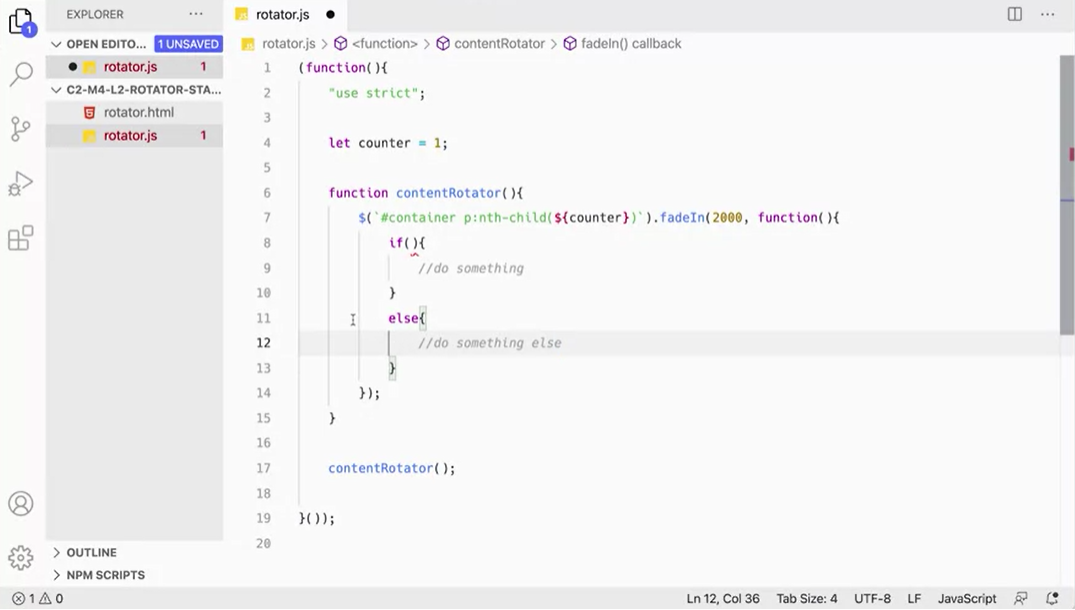
Now, what am I checking? I'm going to use my jQuery object, and the ‘this’ keyword, “this” paragraph. Is a jQuery function that will return true or false, if something in there is true.
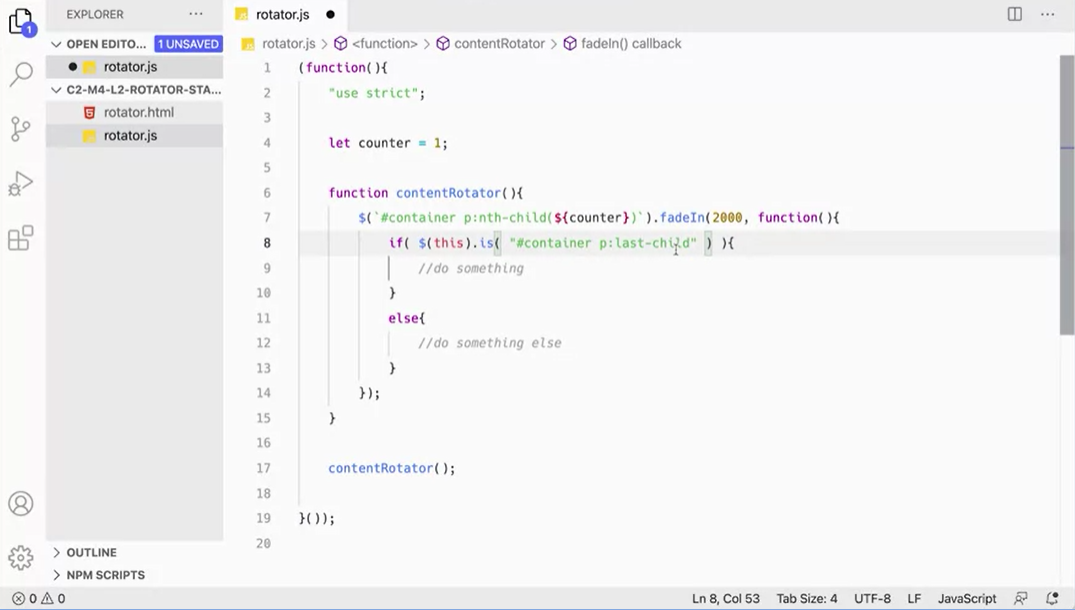
If ‘this’ is, and then I'm going to say, if this is in here, I can put "#container p: last-child();" If it's the last child, we're going to do something, and then if it's not, we're going to do something else.
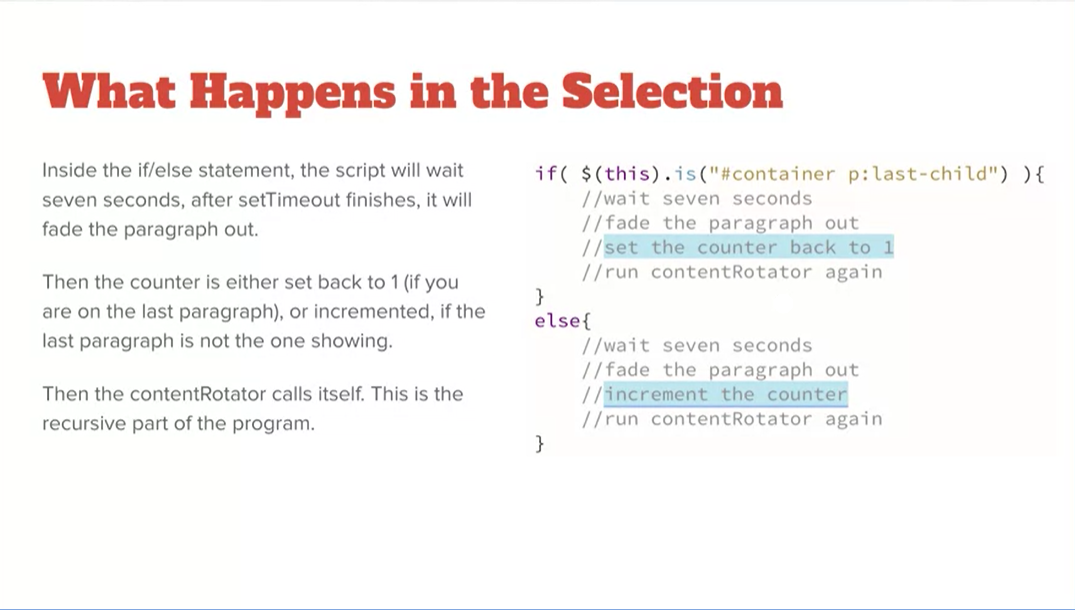
What we're going to do is wait seven seconds and then run the contentRotator again, or reset, and increment the counter, or reset the counter. We're going to wait seven seconds, fadeIn the paragraph, set the counter back to one, and run contentRotator again, if we're on the last paragraph. If we're not, we're going to wait seven seconds, fadeOut the paragraph, increment the counter and run contentRotator again. The only real difference between these two is what happens with the counter. Also, you'll see here where the recursion is taking place.
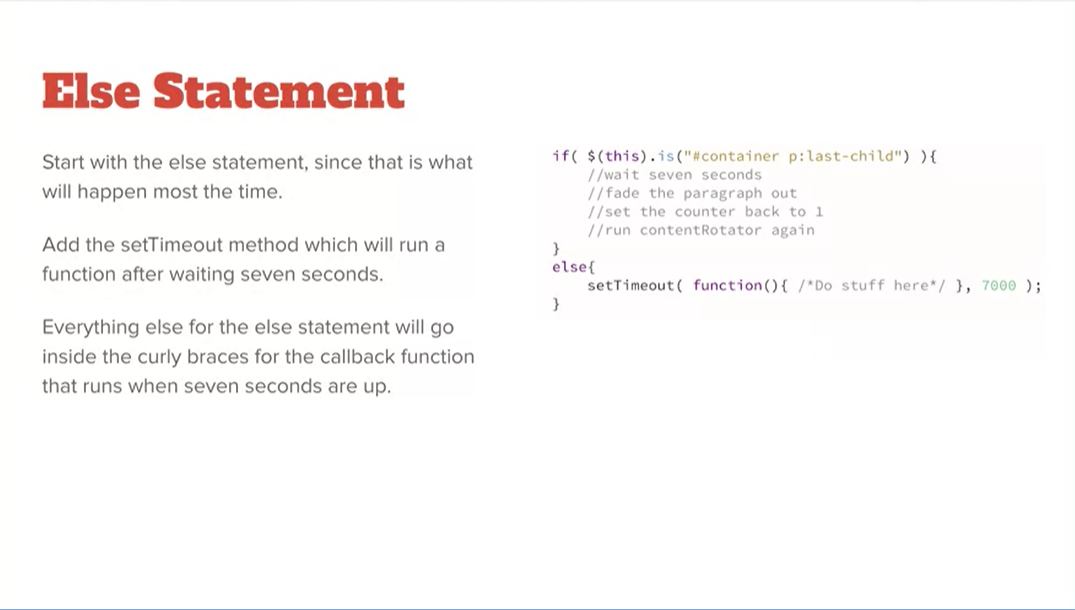
Let's work with the else statement first, because I think that one's a little bit easier. Let's have the setTimeout function in there, and then we'll go forward with that.
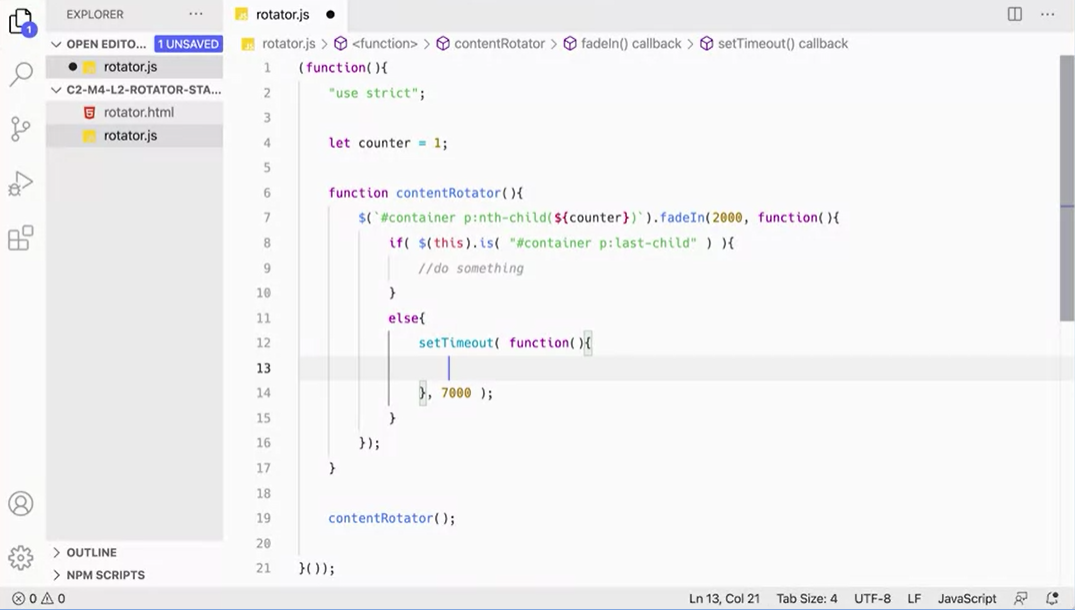
Down here, we're going to say, setTimeout, and that's going to run a function after seven seconds, we're going to take this same thing here, and just copy that.
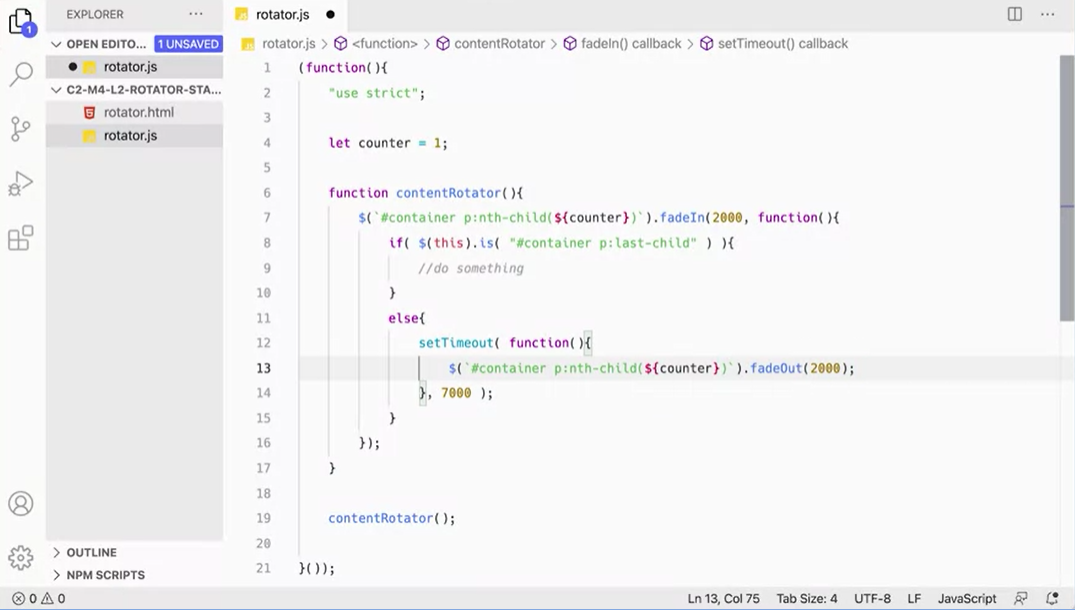
We're going to take that same thing, and we're going to run fadeOut over two seconds, and that will fade that paragraph out after seven seconds. Now, when the contentRotator starts, it checks to see if it's the last child, if it's not, it's going to wait seven seconds, then fadeOut, over two seconds. When it's done fading out, we need another callback function.
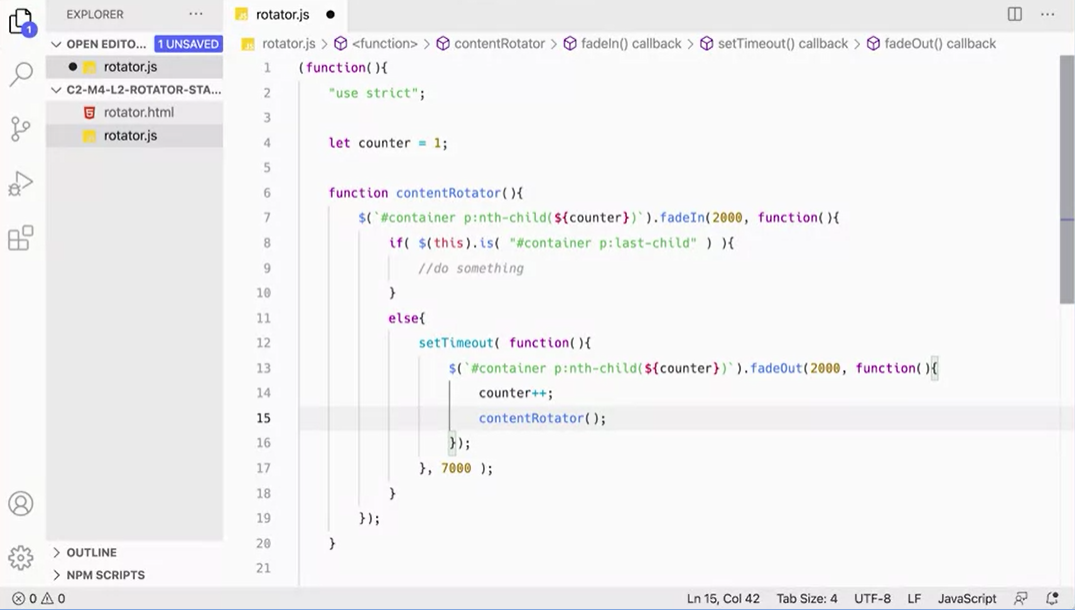
I'm going to stick another function in here like so. It gets confusing, because when we have a callback inside of a callback, now, sometimes this is referred to as callback hell. But this is the way we need to get this thing to work well. We actually have a callback inside of callback inside of a callback. We're doing all of these layers of callbacks here, because we're fading in, we're waiting seven seconds, we're fading out, we're doing three things, so we need to let those three things stack up there.
Now in here what we're going to do is increment the counter, counter++, and run contentRotator again. contentRotator runs itself when the counter is set to two, it'll check to see if it's the last child, if it's not, it'll increment the counter, and it'll do it again, and it'll keep going around. We'll finish out the “if” portion of the “if/else” in the next lesson.
In the last lesson, we set our setTimeout to wait seven seconds and then fade out the paragraph that's in there over two seconds and when that's done, increment the counter and run content rotator again.
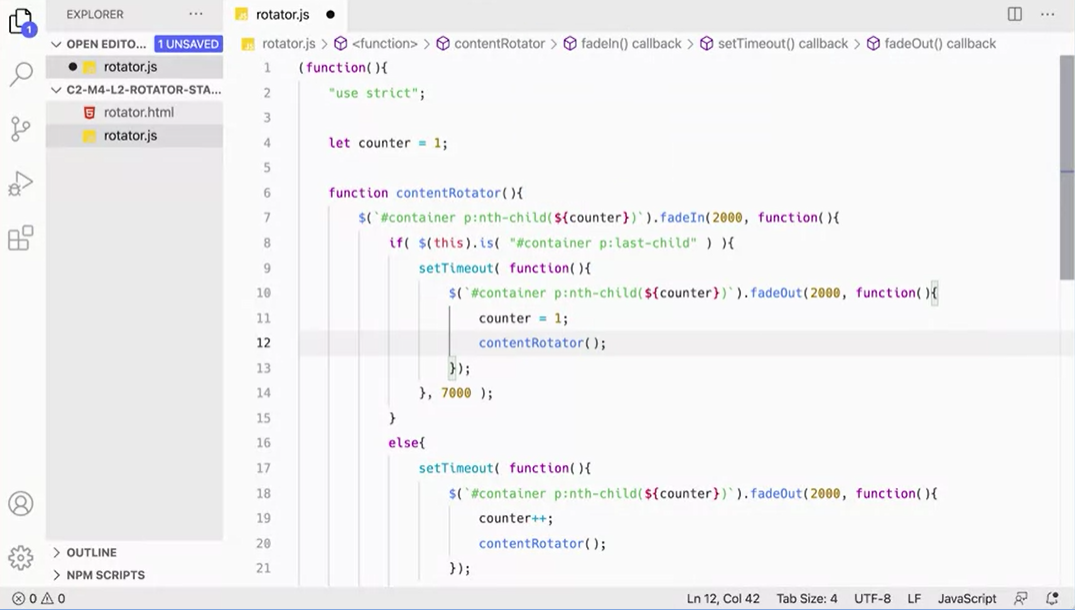
Now we have to handle the case of what happens if we're on the last paragraph. If we're on the last paragraph, we want to do pretty much the same thing and I could just copy and paste this and stick it in here and make minor changes.
Since it's so important to understand this, I'm actually going to type it again, so in here I'm going to add setTimeout again and setTimeout runs a function over a certain amount of time, in this case, seven seconds, like so. It's going to run this function over seven seconds. It's going to wait seven seconds before it does this function. In here and this part I will copy and paste just to make sure I get it right. Just this piece here. I'm going to say, okay, go into my container and get that p: nth-child counter, which in this case it's the last one. Should be four in this examle.
Get that one and then I'm going to do fadeOut over two seconds, 2,000. Then I'm going to run another callback function. Again, I have to wait until those two seconds are over before I can do this, and here the one thing that's different from what I did below is the counter gets set to one, so I'm setting it back to my first paragraph. Then I'll run contentRotator another time, but now with the paragraph counter set to one.
In summary, hopefully through this project, you saw that you can use callback functions, timers, and recursions to make something like this content rotator work without a tremendous amount of code, especially in combination with jQuery and the built-in effects library, like the fade in and fade out. Although it would be interesting to make the same script work without jQuery, that would be a good challenge for you.
See if you can do that or what else could you make work with this script? The script is fading content in and out and we're right now we're fading in and out paragraphs on our HTML here, but it really could be anything, and I could add paragraphs.
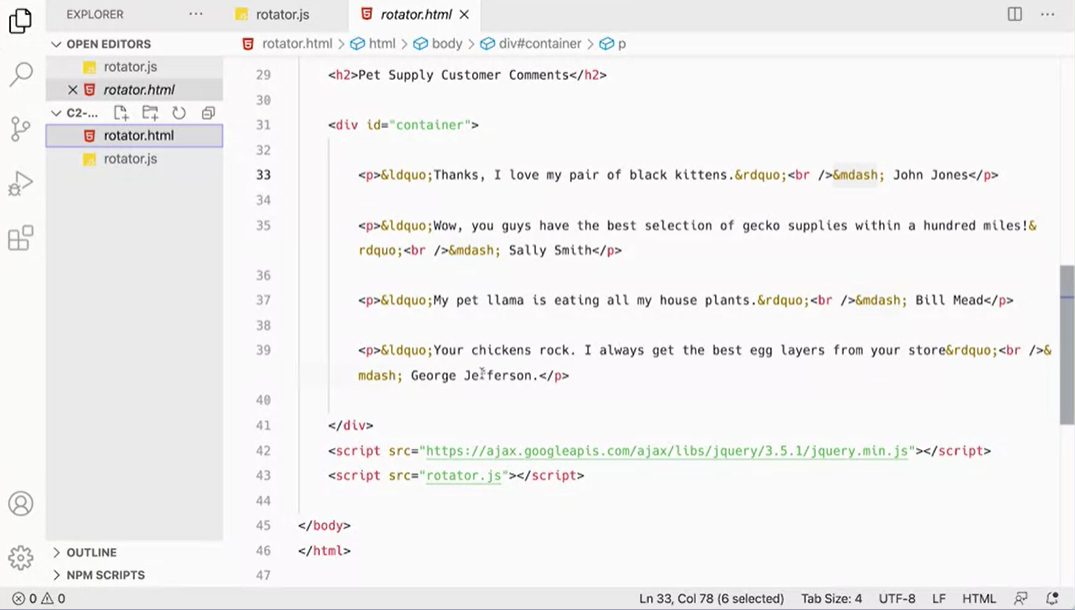
That's another thing is that this will handle an unlimited number of paragraphs. I could just keep adding paragraphs in here in the script tool, just work, that's kind of nice, but what if it wasn't paragraphs, whatever it was, pictures or block quotes or other types of content that got rotated in and out. You could rotate anything and you'll see how you would need to modify the script to make that work.
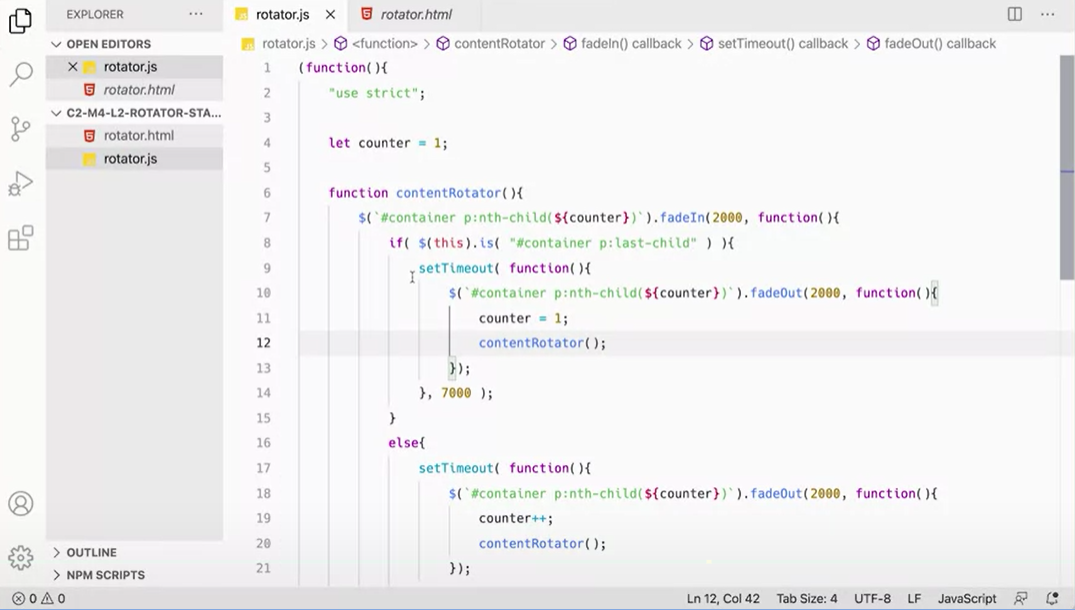
Other things that are exciting about recursion in general. The way recursion works is that you could make a recursive function that takes parameters and you could run that recursive function passing in different parameters each time it runs. That makes recursion very interesting and very different than just a simple loop, because you could run the same program, but the program could do something different each time that it runs and that's very interesting to think about.
Think about what you can do with that. There's a lot of really fun projects you could make where using recursion, where after a certain amount of time, the function runs itself again, but with a different set of parameters. You could even use the random function to pass in random parameters so that you don't know what you're going to get each time the function runs itself and that can be very interesting.
Congratulations for making it to the end of our second course on JavaScript in our four-course specialization. You've learned a lot of JavaScript so far, as well as tackling jQuery and jQuery animation and animation using CSS and JavaScript, we've created some fun interactive elements you can put on real websites. I think you've learned a lot and you should be proud of yourself. Congratulations for making it this far, and I look forward to seeing you in our third course on JavaScript, "Interactivity with JavaScript and jQuery".
We will get even deeper into the jQuery library, jQuery plugins, we'll create some more sophisticated scripts and some more complex scripts so that you can develop your skills and get better at JavaScript. I look forward to seeing you there.
...the end
Prior Updated 4/9/2024 6+ pm
Previous Updated 4/25/2024 12+ pm
Prior Updated 5/2/2024 12+ pm
Last Updated 5/8/2024 1+ am
Last Updated 6/3/2024 1+ am
Last Updated 6/11/2024 11+ am
Last Updated 6/18/2024 11+ pm
Last Updated 10/14/2024 9+ pm
Last Updated 9/18/2025 10+ pm